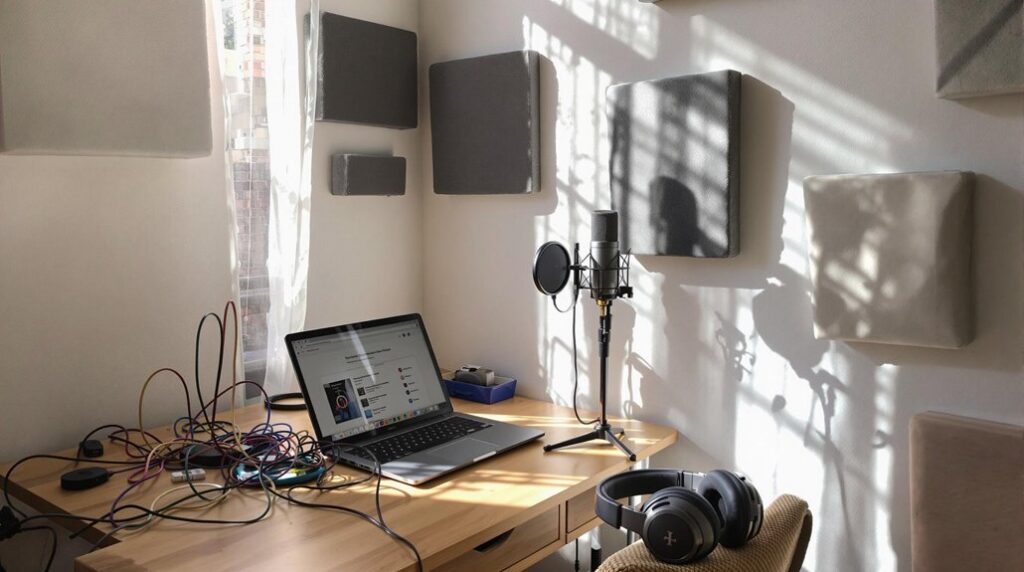
To achieve professional sound design in GarageBand, start by accessing the reverb and delay plugins via the controls window (press ‘B’). Customize reverb with parameters like decay time, pre-delay, and wet/dry mix to create depth and spatial quality. Explore built-in reverb types, such as Space Designer and Plate reverb, to match the desired acoustic environment. For delay effects, adjust feedback, delay time, and wet/dry mix to add rhythmic echo dimensions. Use automation to dynamically change effect levels, ensuring a balanced and evolving soundscape. Enhance layering techniques and recording practices for high-quality results. Continue exploring for advanced techniques and industry tips.
Key Takeaways
- Access and customize reverb and delay plugins by selecting the track and using the controls window (‘B’).
- Adjust key parameters like decay time, pre-delay, feedback, and wet/dry mix to shape the desired effect.
- Utilize Space Designer presets for quick adaptation to different acoustic environments and sound design needs.
- Experiment with different reverb and delay types, such as Big Reverb and Ping Pong Delay, to match the track’s genre and emotional context.
- Employ automation techniques to dynamically adjust reverb and delay effects, enhancing the track’s evolving soundscape.
Understanding Reverb Basics
Reverb, an indispensable audio effect, simulates the natural reflections of sound in a space, thereby enhancing the depth and spatial quality of recordings. The reverb effect has a rich history, evolving from mechanical devices to sophisticated digital algorithms. In GarageBand, users can choose from built-in reverb types like Space Designer, Big Reverb, and Small Reverb, each crafted to emulate different acoustic environments effectively.
Understanding the applications of reverb is vital for producing professional-grade audio. Key parameters in GarageBand, such as decay time, pre-delay, and wet/dry mix, provide precise control over the reverb effect.
Decay time determines how long the reverb tail lasts, while pre-delay introduces a delay before the reverb begins, allowing for clearer separation between direct sound and its reflections. The wet/dry mix adjusts the balance between the processed (wet) and unprocessed (dry) signals, offering flexibility in blending the reverb with the original track.
Applying reverb judiciously can enhance the clarity and presence of vocal tracks, making them sound polished. Additionally, layering tracks with different reverb settings can create a rich, immersive soundscape, thereby greatly elevating the overall musical experience.
Accessing Reverb Controls
To access reverb controls in GarageBand, initiate by selecting the desired track and press the ‘B’ key to open the controls window swiftly.
Within the plugin window, click on the shaded area to add reverb and select from various types, such as Space Designer, which includes a range of presets.
Customize key parameters like decay time, pre-delay, and wet/dry mix to achieve the desired reverb effects, enhancing the depth and spatial quality of your audio mix.
Opening Controls Window
Accessing the reverb controls in GarageBand begins with opening the controls window, an important step for fine-tuning track settings.
Start by selecting the desired track, which is a significant aspect of track selection. You can streamline this process by pressing the keyboard shortcut ‘B’, allowing for quick access to the track’s settings and controls window.
Once the controls window is open, you will see two main tabs: Track controls, which facilitate individual track adjustments, and Master controls, which govern overall session settings.
Effective controls navigation is essential to guarantee you are adjusting the correct parameters.
To add reverb, locate the plugin window within the Track controls tab. Click on the shaded area of the plugin window to reveal the reverb options available in GarageBand.
Here, you can choose from various reverb types and presets, such as Space Designer, to quickly modify and tailor the sound.
For further customization, focus on key parameters like decay time, pre-delay, and wet/dry mix.
Adjusting these settings allows you to achieve the desired reverb effect, enhancing the professional quality of your sound design.
This meticulous approach guarantees precise control over the auditory characteristics of your tracks.
Selecting Reverb Types
Achieving the ideal reverb effect in GarageBand requires the careful selection of reverb types within the plugin controls. To access these controls, open the controls window by selecting the desired track or using the keyboard shortcut ‘B.’
In the plugin window, click the shaded area to add reverb, where you can choose from various types including Space Designer, and select from presets for easy adjustments. Understanding the specific applications of different reverb types is essential for achieving professional sound design.
Here are four key reverb tips for selecting the right reverb type:
- Space Designer Presets: Utilize presets in Space Designer for a quick start. These presets offer a variety of reverb applications, tailored to different acoustic environments.
- Big Reverb vs. Small Reverb: Use Big Reverb to create a spacious, expansive sound. Conversely, Small Reverb is ideal for a more intimate, close-up feel.
- Software Instrument Reverb Settings: Be mindful that some software instruments come with built-in reverb settings. Adjust or disable these to apply custom plugins like Space Designer for more control.
- Key Parameters: Focus on key parameters such as decay time, pre-delay, and wet/dry mix to tailor the reverb effect precisely to your needs.
These reverb tips will enhance your ability to create a polished and professional audio production.
Customizing Key Parameters
Steering through the intricacies of reverb customization in GarageBand is vital for achieving a polished sound.
Begin by selecting the desired track and pressing the ‘B’ key to open the controls window, providing quick access to both track and master settings. In the plugin window, click the shaded area to reveal a variety of reverb types, including the powerful Space Designer plugin. Utilizing reverb presets can expedite the process, offering adjustments tailored to specific sounds, guaranteeing efficient sound layering.
Focus on key parameters such as decay time, which dictates the duration of the reverb effect. Adjusting the pre-delay parameter allows you to set the time before the reverb effect initiates, enabling you to create a sense of space and depth. The wet/dry mix parameter is essential for balancing the reverb effect with the original signal, maintaining clarity without overwhelming the track.
Experiment with different reverb types to match the desired sound quality of your project. For instance, Big Reverb can add spaciousness, while Small Reverb offers a more intimate feel.
Regularly review and fine-tune your settings throughout the mixing process to guarantee the reverb enhances the audio without overpowering it.
Customizing Reverb Settings
Wondering how to raise your tracks with customized reverb settings in GarageBand? By fine-tuning parameters and leveraging reverb automation and reverb layering, you can achieve a professional sound design.
Access the plugin window by clicking the shaded area and selecting your desired reverb type, such as Space Designer. Here are key steps to enhance your track:
- Adjust Decay Time: Control how long the reverb lasts by modifying the decay time. This parameter influences the reverb’s tail, helping you craft either a long, spacious reverb or a short, tight one.
- Set Pre-Delay: Fine-tune the pre-delay to set the time before the reverb effect starts. This creates a sense of depth and space, essential for distinguishing between different elements in your mix.
- Balance Wet/Dry Mix: Maintain clarity by carefully adjusting the wet/dry mix. This balance guarantees the reverb complements the dry signal without overwhelming it, preserving vocal clarity and instrument definition.
- Experiment with Reverb Types: Use different presets like Big Reverb for expansive sounds or Small Reverb for intimacy. Regularly review and tweak these settings to refine the reverb’s impact throughout the mixing process.
Exploring Reverb Types
Diving into the array of reverb types available in GarageBand reveals a wealth of options to enhance your mixes. These include Big Reverb for spacious sounds, Small Reverb for intimate settings, and Long Decay for extended echo effects. Each type serves distinct reverb applications and opens avenues for creative experimentation. Utilizing the Space Designer reverb plugin, users can explore various presets tailored for different instruments and vocals, thereby enhancing the overall mix.
Understanding key parameters such as decay time, pre-delay, and wet/dry mix is vital for customization. Decay time influences how long the reverb tail lasts, pre-delay sets the initial delay before the reverb effect kicks in, and wet/dry mix balances the reverb effect with the original signal. Room simulation effects further allow users to recreate specific acoustic environments, matching reverb to the desired soundscape.
Built-in reverb settings within software instruments, like the Wurlitzer classic, enable quick adjustments while maintaining flexibility for further processing with dedicated reverb plugins. This capability guarantees that your sound design remains both efficient and adaptable.
| Reverb Type | Application | Key Parameter |
|---|---|---|
| Big Reverb | Spacious sounds | Decay Time |
| Small Reverb | Intimate settings | Pre-Delay |
| Long Decay | Extended echo effects | Wet/Dry Mix |
Effective Recording Techniques
To achieve ideal results when applying reverb and delay in GarageBand, begin by capturing a clean, dry signal, which provides more control during post-processing.
Pay meticulous attention to microphone placement and room acoustics, as these elements critically impact the initial recording quality and the subsequent effectiveness of added effects.
Ascertain that the balance between dry and wet signals is carefully managed to prevent an overly cluttered mix and maintain audio clarity.
Microphone Placement Strategies
Achieving pristine audio quality necessitates meticulous attention to microphone placement, a fundamental aspect of effective recording techniques. Proper microphone placement is vital for capturing clean audio.
For vocal recordings, positioning the microphone 6 to 12 inches away reduces room noise and enhances clarity. Experimenting with microphone angle and distance effects can greatly alter the captured sound. For instance, positioning the microphone closer to the source enhances bass response, while increasing distance captures more ambient sound.
Using directional microphones effectively isolates the desired sound source, minimizing background noise and reflections. This is particularly important in untreated rooms.
For instruments like guitars or flutes, positioning the microphone near the sound hole or bell captures the instrument’s unique character. Slight adjustments in the angle or distance can yield different tonal qualities, providing a variety of sonic textures.
To guarantee ideal placement and sound quality, always monitor recordings with headphones. Real-time adjustments during the recording process can make a considerable difference.
Here are four key strategies:
- Vocal Recording: Position 6-12 inches away.
- Instrument Recording: Near sound hole or bell.
- Directional Microphones: Isolate sound source.
- Real-Time Monitoring: Use headphones for adjustments.
Dry Signal Importance
Understanding microphone placement is only one aspect of capturing high-quality audio; another key element is recognizing the significance of recording a dry signal.
Dry recording benefits include enhanced flexibility during post-processing, as it allows for precise adjustments to reverb and delay settings in GarageBand. Ensuring signal clarity is essential, and this begins with capturing a clean dry signal devoid of any pre-applied effects.
Proper microphone placement and attention to room acoustics play a vital role in achieving this. Positioning the microphone effectively and considering the acoustic properties of the recording environment help in obtaining a pristine dry signal, which serves as a robust foundation for subsequent sound design.
Monitoring with closed-back headphones during recording sessions can further isolate the dry signal, minimizing the risk of unintended feedback or bleed from other instruments.
This isolation is critical for maintaining signal clarity, preventing phase issues, especially when layering multiple tracks with varying effects.
Best Practices for Reverb
Starting with a clean, dry recording is vital when applying reverb in GarageBand, as it guarantees the effect can be added without introducing unwanted coloration.
To achieve professional sound design, it is essential to navigate reverb myths and avoid common mistakes. Here are best practices to guide you:
- Parameter Experimentation: Adjust key parameters such as decay time, pre-delay, and wet/dry mix. This customization guarantees the reverb complements each specific instrument or vocal track, enhancing the sonic texture without overwhelming it.
- Reverb Types: Utilize different reverb types to match the desired acoustic environment. For instance, Big Reverb can introduce spaciousness, whereas Small Reverb can create a sense of intimacy. Selecting the appropriate type is vital for achieving the intended ambiance.
- Monitor with Headphones: Use headphones to monitor your mix. This approach helps prevent feedback and maintains clarity between dry and wet signals, guaranteeing the reverb enhances rather than muddies the sound.
- Regular Adjustments: Continually review and adjust reverb settings during the mixing process. GarageBand’s intuitive interface allows for easy refinement, guaranteeing balance and cohesion across tracks.
Using Delay Plugins
Delay plugins in GarageBand serve as essential tools for sound engineers, offering the ability to create intricate depth and spatial dimension in audio tracks. Access delay effects by opening the track controls window, selecting the plugin area, and choosing from built-in options like Tape Delay or Echo. Each option provides distinct sonic characteristics, important for various creative delay applications.
Key parameters for customizing delay include feedback, which determines the number of repeats, delay time, which sets the timing of the echoes, and the wet/dry mix, controlling the balance between the delayed and original sound. Adjusting these parameters allows for precise control over the resulting effect.
To further enhance the dynamic nature of your track, employ automation to adjust delay levels throughout the composition. This technique enables the creation of evolving rhythmic textures that enhance the musical narrative.
Experimentation is essential for deriving unique textures and rhythmic patterns. By manipulating different delay types and settings, you can achieve a wide range of professional sound designs.
This makes delay plugins a crucial component in any GarageBand project, ensuring the final product is both polished and sonically rich.
Enhancing Sound Design
Incorporating reverb and delay plugins into your GarageBand projects is essential for enhancing sound design, as these tools simulate various acoustic environments to create a sense of space and depth.
By leveraging reverb and delay, you can considerably raise spatial perception and emotional resonance in your tracks. Here are key strategies to achieve professional sound design:
- Reverb Types and Genre Adaptation: Utilize different reverb types, such as Small Reverb for a more intimate feel or Big Reverb for spaciousness, to tailor your audio to specific genres or emotional contexts. This approach guarantees that the reverb complements the intended mood of the track.
- Wet/Dry Mix for Clarity: Adjust the wet/dry mix parameter to balance the processed effect with the original dry signal. This balance is vital for maintaining clarity while adding depth and space, preventing the mix from becoming muddy.
- Creative Experimentation with Parameters: Experiment with decay time and pre-delay settings in reverb to introduce dynamic alterations. These adjustments can transform the texture of sounds, making them more immersive and engaging for the listener.
- Automation for Evolving Soundscapes: Incorporate automation for reverb and delay levels throughout your track. Automation can create evolving soundscapes, enhancing listener engagement and maintaining interest through dynamic sound layering.
Frequently Asked Questions
How to Put Reverb on Garageband?
To apply reverb in GarageBand, open the track controls using ‘B’, access reverb types in the plugin window, and adjust decay time, pre-delay, and wet/dry mix. Employ precise mixing techniques to integrate the effect seamlessly.
How Do I Use Audio Plug-Ins in Garageband?
To utilize audio plug-ins in GarageBand, access the controls window and select your desired track. Choose from various plugin types and customize settings. Enhance your mix by employing sound layering techniques with multiple plug-ins for intricate soundscapes.
Can You Automate Reverb in Garageband?
Yes, you can automate reverb in GarageBand. Utilize the automation feature to adjust reverb parameters like wet/dry mix and decay time, creating dynamic sound shaping by setting automation points and curves for precise control over the reverb effect.
What Does Pre-Delay on Track Reverb Mean on Garageband?
Pre-delay on track reverb in GarageBand refers to the interval between the original sound and the reverb onset. Adjusting pre-delay enhances vocal clarity and interacts with reverb types and delay effects to create spatial depth and professional sound design.
Conclusion
Mastering reverb and delay plugins in GarageBand involves understanding basic principles, accessing and customizing controls, and exploring various types. Effective recording techniques and best practices guarantee peak results. Utilizing delay plugins further enhances sound design, contributing to a professional audio production. By meticulously applying these methods, one can achieve a polished and sophisticated sonic environment, elevating the overall quality of the music or audio project.


