Creating an effective home music production studio involves selecting a noise-isolated room and implementing soundproofing strategies such as acoustic panels. Choose compatible computer systems with sufficient processing power and integrate DAWs and audio interfaces for streamlined functionality. Utilize both condenser and dynamic microphones based on input needs. Incorporate personal touches for creativity. Budgeting effectively while planning for upgrades is vital. For extensive studio design insights, continue exploring these essential considerations.
Key Takeaways
- Choose a quiet, irregularly shaped room with adequate ceiling height for optimal sound isolation and acoustic clarity.
- Implement soundproofing techniques using acoustic panels, bass traps, and sealing gaps to prevent external noise interference.
- Select a computer with a 64-bit OS, multi-core processor, and compatible DAW for seamless audio processing and integration.
- Use condenser and dynamic microphones with accessories like pop filters and shock mounts for high-quality recordings.
- Establish a realistic budget, prioritize quality gear, and plan for gradual upgrades and future expansion.
Choosing the Ideal Room for Your Studio
When starting the journey to create a home music production space, how does one choose the perfect room for a studio? The foundation lies in selecting a quiet room with minimal external noise, ensuring sound isolation essential for pristine recordings.
Larger spaces with irregular shapes are preferable, as they facilitate best sound by reducing frequency cancellations and muddy recordings. Avoiding small or square rooms is important; these can detract from acoustic clarity.
A suitable ceiling height is also critical, as low ceilings impede sound quality. Evaluating the room's dimensions and existing features, such as windows and doors, is imperative to address sound leakage.
Implementing acoustic treatment transforms the chosen space, enhancing the listening environment and achieving the highest fidelity.
Understanding the Basics of Soundproofing
In the quest to craft an ideal home music production environment, understanding the basics of soundproofing is paramount.
By accurately identifying noise sources, particularly in urban settings, and implementing robust sound barriers, one can greatly enhance recording fidelity.
Strategic acoustic treatment, utilizing both sound absorption and partial soundproofing solutions, guarantees a balanced and controlled auditory environment without necessitating extensive renovations.
Identifying Noise Sources
How does one begin to tackle the challenge of soundproofing a home music production space? Identifying noise sources is critical. External sounds, such as traffic, neighbors, or appliances, disrupt recordings and compromise audio quality.
Common areas of concern include windows, doors, walls, and flooring, all potential gateways for sound leakage. A meticulous assessment of the studio's location and surrounding environment—considering proximity to busy streets or construction sites—is essential.
Employing soundproofing strategies, like acoustic panels, window plugs, door sweeps, and acoustic seals, can notably curb noise infiltration. Understanding the acoustic properties of construction materials enables the selection of appropriate insulation and treatment solutions.
These steps are pivotal for optimizing recording conditions and fostering an environment conducive to creative excellence.
Implementing Sound Barriers
Though often underestimated, implementing sound barriers is a fundamental step in creating an effective home music production space.
Soundproofing is essential to preventing external noise from interfering with recordings and minimizing sound leakage. This guarantees superior recording quality by incorporating elements such as acoustic panels and bass traps. These tools are important for capturing clean audio, particularly in managing problematic low frequencies common in home studios.
Using dense absorption materials, like Roxul Rockboard 80, for window plugs and heavy curtains can effectively address weak points. While extensive soundproofing can be costly, strategic solutions like sealing gaps around doors and windows offer significant noise reduction.
Ultimately, a well-soundproofed studio not only enhances audio quality but also mitigates noise complaints from neighbors.
Acoustic Treatment Strategies
When designing a home music production space, understanding acoustic treatment is crucial to achieving superior sound quality. Acoustic treatment involves controlling reflections, absorption, and diffusion. Key components include sound-absorbing panels and bass traps. Sound-absorbing panels, typically crafted from foam or fiberglass, target mid and high-frequency reflections, reducing echoes and enhancing clarity. Bass traps, essential for low-frequency management, prevent muddiness by absorbing bass frequencies, especially in corners where waves accumulate. Proper placement, particularly at first reflection points on walls and ceilings, guarantees accurate monitoring and mixing. Diffusers are also utilized to scatter sound waves, maintaining a balanced acoustic environment.
| Component | Purpose |
|---|---|
| Sound-Absorbing Panels | Reduce mid/high-frequency echoes |
| Bass Traps | Absorb low-frequency sounds |
| First Reflection Points | Enhance monitoring accuracy |
| Diffusers | Prevent sound from being deadened |
| Acoustic Treatment | Control reflections and diffusion |
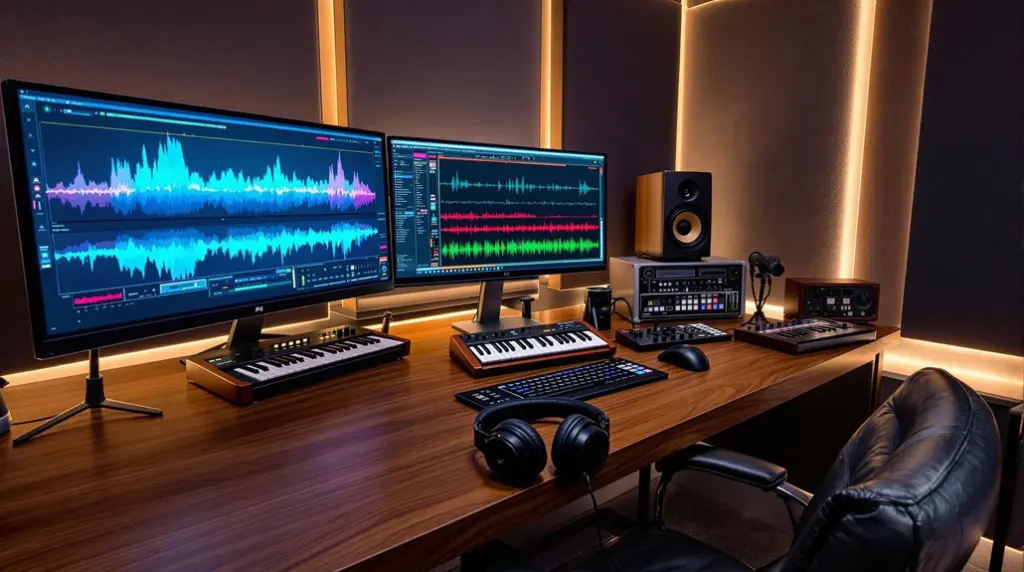
Designing an Efficient Layout for Workflow
Why does the layout of a home music production space matter so much? An efficient studio design greatly impacts workflow, sound quality, and creative fluidity.
Arranging equipment in a triangular setup, with monitors and the listening position forming an equilateral triangle, optimizes audio performance. The placement of essential gear, such as the audio interface and MIDI controller, should prioritize accessibility to maintain an uninterrupted creative process.
Incorporating cable management solutions guarantees a tidy workspace, reducing clutter and preventing accidental disconnections. Thoughtful positioning of acoustic treatment panels is vital, as they enhance sound quality without obstructing workflow.
Proper seating alignment further supports ergonomic efficiency, allowing seamless access to all equipment, thereby nurturing an environment conducive to musical innovation. For enhanced sound quality, it's beneficial to use balanced XLR or TRS cables from the audio interface to monitors to minimize noise interference.
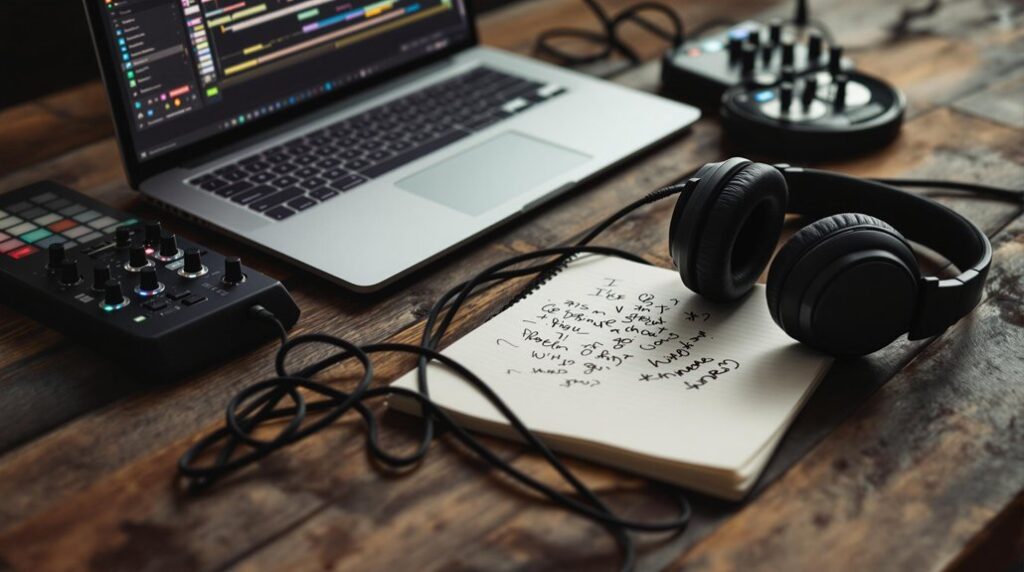
Selecting the Right Computer and DAW
In creating a home music production space, selecting a computer with robust performance capabilities is paramount; a 64-bit operating system, at least 16GB of RAM, and a multi-core processor form the backbone of efficient audio processing.
Equally critical is the choice of Digital Audio Workstation (DAW), which must align with the computer's operating system to guarantee seamless integration and workflow efficiency.
The decision between Mac and PC often hinges on personal preference and software compatibility, with the market offering versatile options like Logic for Mac and Pro Tools for both platforms.
Computer Performance Essentials
Selecting the right computer and digital audio workstation (DAW) is foundational to optimizing a home music production space. A high-performance computer with a 64-bit operating system is essential, as it directly influences computer performance through enhanced processing speed and increased RAM capacity.
To efficiently handle multiple tracks and plugins, a multi-core processor and at least 16GB of RAM are recommended. Macs, particularly iMacs and MacBook Pros, are favored for their Core Audio capabilities, providing seamless audio integration.
The choice of DAW, such as Ableton, Logic, or FL Studio, should align with the producer's workflow and genre preferences, with costs ranging from £150 to £539. Regular assessment and upgrades guarantee the system evolves with expanding production demands.
DAW Compatibility Considerations
While starting on the journey of setting up a home music production space, considering DAW compatibility is essential to guarantee a seamless creative workflow.
Selecting the right computer and Digital Audio Workstation involves understanding the technical requirements and aligning them with creative goals. Prioritize a powerful, multi-core processor and at least 16GB of RAM to handle demanding DAWs efficiently.
Macs offer stability and optimized performance with Core Audio, favored for compatibility with Logic and GarageBand, whereas PCs offer versatility and budget options.
Confirm your computer supports:
- The sample rate and bit depth for higher audio quality (e.g., 24-bit/96kHz).
- Familiarity with specific DAW features and workflows, such as Ableton or Pro Tools.
- Sufficient USB ports and connectivity for seamless integration with external devices and audio interfaces.
Integrating an Audio Interface
An audio interface acts as the pivotal bridge between the analog world of microphones and instruments and the digital realm of computer-based music production.
It is crucial for converting analog signals into digital audio for processing by a Digital Audio Workstation (DAW). When integrating an audio interface, one should evaluate the number of inputs and outputs required.
Basic setups for recording vocals may need two inputs, while extensive projects might demand 16 or more. Interfaces supporting USB3 or Thunderbolt connections provide superior data transfer rates, enhancing performance and minimizing latency.
Popular options range from the entry-level Focusrite Scarlett 2i2 to the more advanced Universal Audio Apollo Twin MK II. Compatibility with the selected DAW guarantees seamless integration and peak functionality in the music production process.
Choosing Microphones and Accessories
Selecting the right microphones and accessories is vital for any home music production setup, balancing technical requirements with creative ambitions.
Condenser microphones, known for their sensitivity and frequency response, suit vocals and acoustic instruments, while dynamic microphones offer durability for louder sources.
Complementing these choices with essential accessories like pop filters, shock mounts, and sturdy stands enhances recording quality and stability, ensuring a seamless integration with professional-grade audio equipment.
Essential Microphone Types
Choosing the right microphone is a critical step in designing a home music production space, as each type serves a unique purpose and caters to different recording needs.
Dynamic microphones excel in capturing loud sound sources, such as drums and guitar amplifiers, due to their ability to handle high sound pressure levels without distortion. In contrast, condenser microphones are preferred for vocal recordings and acoustic instruments, offering wide frequency response and detailed sound reproduction.
Microphone accessories like pop filters and shock mounts further enhance recording quality by reducing noise and vibrations.
Key microphone types include:
- Dynamic Microphones: Ideal for live performances and loud instruments.
- Condenser Microphones: Perfect for vocals and acoustic instruments.
- Ribbon Microphones: Provide a warm, natural sound for vocals and guitars.
Must-Have Recording Accessories
Microphones play a pivotal role in shaping the character of a recording, yet their potential is fully realized only when paired with the right accessories. A condenser mic is ideal for capturing vocals and acoustic instruments, known for its sensitivity and wide frequency response. Complementary must-have recording accessories include quality cables, such as XLR and quarter-inch jacks, essential for maintaining signal integrity and minimizing interference. Additionally, microphone stands provide stability and precise positioning, ensuring consistent recording quality. Pop filters are equally important, mitigating plosive sounds and enhancing vocal clarity. For beginners, the Shure SM58 is recommended for its durability and noise rejection prowess.
| Accessory Type | Key Benefit | Recommended Item |
|---|---|---|
| Condenser Mic | Wide frequency response | Shure SM58 |
| Quality Cables | Signal integrity | XLR, Quarter-inch |
| Microphone Stands | Stability and positioning | Sturdy Models |
| Pop Filters | Plosive sound reduction | Standard Filters |
Setting Up Studio Monitors for Accurate Sound
Achieving accurate sound in a home music production space hinges on the precise setup of studio monitors. Key factors include positioning, spacing, and height.
Studio monitors should form an equilateral triangle with the listener's ears at the apex, enhancing stereo imaging and soundstage. To prevent bass buildup and guarantee clear low-frequency response, maintain a distance of 1-2 feet from the back wall.
Raise monitors to ear level using monitor stands or isolation pads, aligning tweeters with the listener's ears. This setup combats unwanted vibrations and sound muddiness. Additionally, consider room acoustics for best results.
- Position monitors in equilateral triangle: Enhances soundstage.
- Maintain distance from back wall: Prevents bass buildup.
- Use stands or isolation pads: Aligns sound correctly.
Implementing Acoustic Treatment
While the precise setup of studio monitors lays the groundwork for accurate sound reproduction, the refinement of audio quality is further enhanced through strategic acoustic treatment. Acoustic treatment materials like absorption panels and bass traps are essential for managing sound reflections and optimizing room acoustics. Thick absorbers specifically target low-frequency sound absorption, while thin foam products address high frequencies. Identifying reflection points and applying treatment at these locations enhances monitoring accuracy, preventing uneven sound distribution. Bass problems, prevalent in home studios, can be mitigated by placing large bass traps in corners, addressing common low-frequency challenges in smaller spaces. Properly designed acoustic treatment improves mix translation, ensuring consistency across playback systems.
| Treatment Type | Purpose |
|---|---|
| Absorption Panels | Manage sound reflections |
| Bass Traps | Control low frequencies |
| Foam Products | Address high frequencies |
Managing Connectivity and Cables
In the intricate ecosystem of a home music production space, connectivity and cables serve as the fundamental arteries linking various components. Proper connectivity is achieved using specific cables like XLR for microphones, Quarter Inch Jack for instruments, and USB for digital devices. These connections guarantee compatibility and peak audio quality.
High-quality cables are essential to prevent signal degradation, thereby enhancing the clarity of recordings. Effective cable management is critical for maintaining an organized workspace, reducing clutter, and boosting productivity. Positioning speakers at ear level helps in achieving direct sound projection and optimal audio quality.
Key strategies include:
- Keeping spare cables available to avoid workflow disruptions.
- Labeling and color-coding cables for easy identification and troubleshooting.
- Utilizing cable ties or sleeves to organize and secure cables.
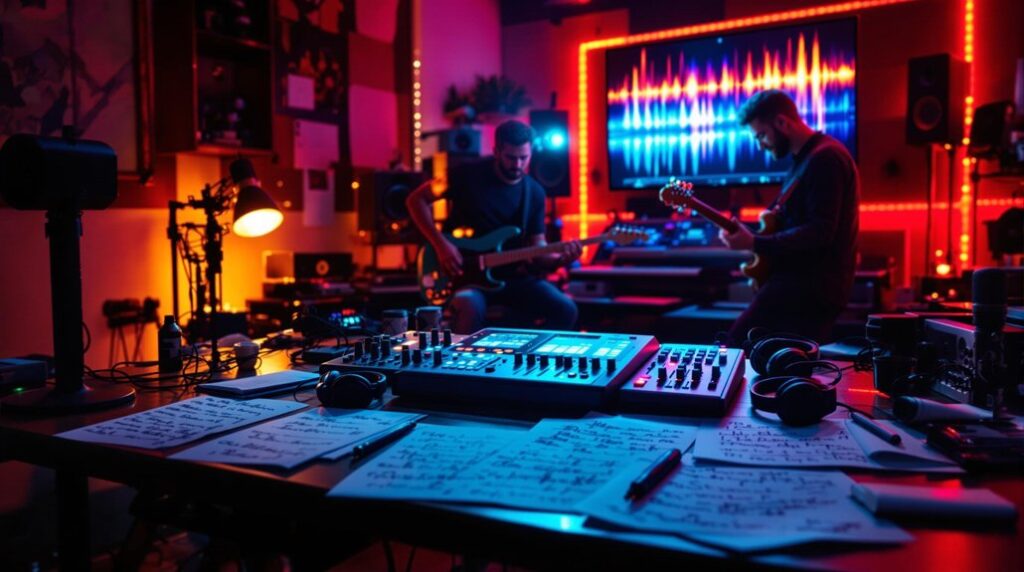
Enhancing the Studio With Personal Touches
Designing a home music production space that resonates with personal style while optimizing functionality requires a blend of technical precision and creative expression. Integrating ambient lighting enhances the studio's atmosphere, promoting creativity and focus. Personal memorabilia, such as instruments or mementos from a musical journey, serve as sources of inspiration. Ergonomic seating is essential for maintaining comfort and productivity during extended sessions, offering necessary support for prolonged use.
Consider the following elements for an enhanced studio environment:
| Element | Purpose | Benefit |
|---|---|---|
| Ambient Lighting | Sets mood and reduces eye strain | Enhances creativity |
| Personal Memorabilia | Inspires through personal history and achievements | Motivates and personalizes space |
| Ergonomic Seating | Provides comfort and support | Increases productivity |
Such thoughtful enhancements optimize both the technical and aesthetic aspects of a music production space.
Evaluating the Need for Additional Equipment
Enhancing a studio with personal touches lays a solid foundation for a creative environment; however, maximizing production potential often necessitates reevaluating the need for additional equipment.
In a home recording studio, identifying gaps in the current production workflow is essential. This might include upgrading the audio interface for superior sound quality or incorporating a MIDI controller for intuitive music input.
Consideration of the studio's acoustics can lead to investing in acoustic treatments to optimize sound clarity. Additionally, the recording objectives should dictate equipment choices; for instance, simultaneous multi-instrument recordings may require more microphones and a multi-input audio interface.
- Assess gaps in production workflow and equipment needs.
- Evaluate and improve studio acoustics with treatments.
- Align equipment purchases with intended recording goals.
For optimal sound clarity, high-resolution audio playback and low-latency processing are crucial, as they ensure seamless integration and performance in live settings.
Setting a Realistic Budget for Your Studio
Establishing a realistic budget is paramount for creating an efficient home music production space. Essential components of a home studio setup include computers, audio interfaces, cables, stands, and acoustic treatment materials. When crafting a budget, it is important to prioritize quality gear that guarantees durability and high performance, as cheaper alternatives may lead to frequent replacements. Recognizing that effective setups can range from a few hundred to several thousand dollars, depending on quality and use, is critical. A flexible budget allows for gradual upgrades, accommodating evolving production needs without financial strain. Additionally, allocating funds for backup solutions is necessary to safeguard recordings, preventing costly and time-consuming data loss. A basic DJ setup, including essential DJ equipment, can serve as a cost-effective starting point for beginners looking to explore music production techniques.
Planning for Future Upgrades and Expansion
When envisioning the future of a home music production space, it is essential to incorporate strategies for upgrades and expansion from the outset.
Planning with a focus on adaptability guarantees the studio can evolve with technological advancements and personal skill growth. Modular furniture and equipment allow for easy rearrangement and scalability.
Prioritizing essential gear first, while allocating a budget for future upgrades, prevents financial strain.
Key considerations include:
- Compatibility: Confirm new gear seamlessly integrates with existing equipment.
- Space: Design layouts with room for additional instruments and technology.
- Workflow: Regularly assess studio needs and optimize workflow for efficiency.
Frequently Asked Questions
How Do I Maintain a Comfortable Temperature in My Studio?
To maintain a comfortable studio temperature, one must optimize temperature control through insulation techniques, efficient HVAC systems, and humidity regulation. Each element plays an essential role in ensuring a stable environment for creative and technical endeavors.
What Lighting Options Work Best for a Music Studio?
Ideal music studio lighting incorporates ambient lighting for overall illumination, task lighting for specific areas, and adjustable color temperature to suit mood and productivity. Consider soundproofing effects to guarantee lighting fixtures do not compromise acoustic isolation.
How Can I Minimize Electrical Interference in My Studio Setup?
To minimize electrical interference, one should employ cable management to reduce clutter and use power conditioning devices. Shielding techniques protect against external noise, while effective grounding methods guarantee stable connections, enhancing both technical precision and creative output.
What Are the Best Practices for Organizing Digital Files and Backups?
Organizing digital files effectively involves a clear folder structure and consistent file naming conventions. Regular backup frequency is essential, utilizing both local and cloud storage solutions to safeguard data, ensuring reliable access and protection against data loss.
How Do I Ensure Ergonomic Seating in My Studio?
Ensuring ergonomic seating involves selecting adjustable chairs for tailored posture support. Proper seating arrangements should consider desk height to minimize strain, promoting comfort and efficiency. Industry experts recommend integrating these elements for an ideal creative workspace.
Conclusion
In designing a home music production space, one must harmonize technical expertise with creative vision. By selecting the ideal room, understanding soundproofing, and crafting an efficient workflow, the foundation is set for a productive studio. The choice of computer, DAW, and audio interface further enhances this environment, while personal touches infuse inspiration. Evaluating additional equipment needs and setting a realistic budget are essential. Finally, planning for future upgrades guarantees the studio evolves alongside the artist's ambitions.