Drum machines are essential in modern music production, marrying creativity with technical precision. Begin by selecting the right machine for your needs—hardware offers tactile control, while software provides flexibility. Learn basic drum programming; the kick drum anchors the rhythm, while backbeats and hi-hats add dynamics. Humanize your patterns with timing variations and velocity changes for a more organic feel. Balance individual drum sounds with proper volume and panning techniques, and apply compression to refine dynamics. Experiment with samples and layering to enrich your sonic palette. By mastering these fundamentals, you will be equipped to craft engaging and professional drum sequences.
Key Takeaways
- Choose between hardware for tactile control or software for flexibility and DAW integration.
- Use kick drums to establish tempo and serve as the rhythmic anchor.
- Apply humanization techniques like timing variations and velocity changes for a live feel.
- Create basic patterns with kick, snare, and hi-hats, adding syncopation for complexity.
- Balance individual drum volumes and use panning for a cohesive and wide soundstage.
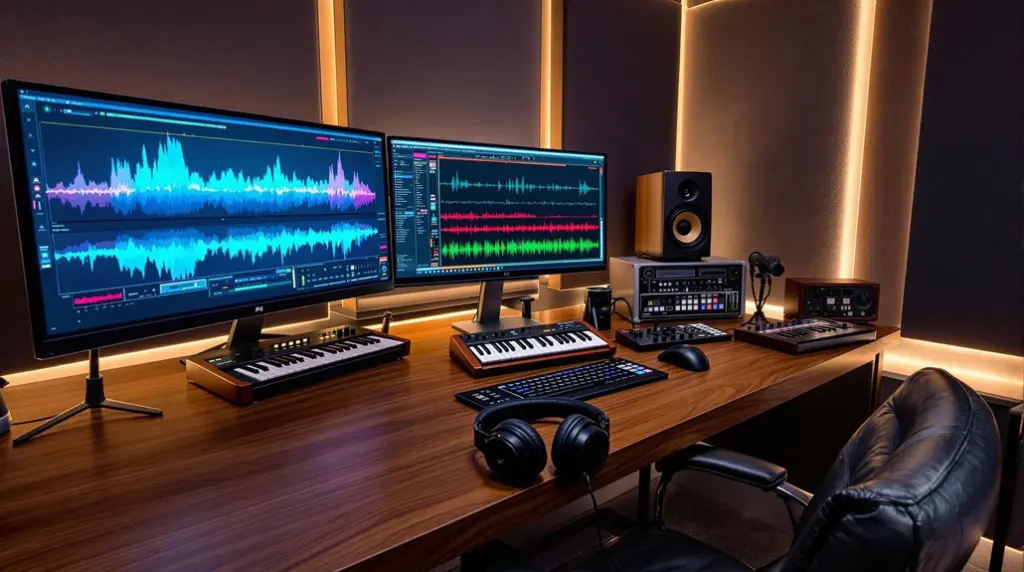
Choosing Your Drum Machine
Selecting the ideal drum machine for your music production setup is akin to choosing the right brush for an artist’s palette; it requires a blend of technical understanding and creative foresight. One of the first decisions you’ll face is the choice between hardware vs software.
Hardware drum machines, such as the Elektron Analog RYTM, offer tactile control and hands-on manipulation, making them indispensable for live performances and studio sessions alike. In contrast, software drum machines are prized for their flexibility and seamless integration with Digital Audio Workstations (DAWs), providing a more expansive array of sounds and easier editing capabilities.
Additionally, some MIDI controllers like the Akai Professional APC40 MKII offer robust features that can complement your drum machine setup, enhancing workflow efficiency.
Another critical consideration is the sound engine. For those seeking the warmth and organic feel of analog synthesis, hardware options like the Roland TR-8S deliver rich, textured tones that are particularly favored in genres such as techno and house.
Conversely, digital sampling drum machines excel in producing realistic drum sounds, offering extensive libraries of samples that can be manipulated to create unique timbres.
Lastly, examine the built-in sequencers and connectivity options, particularly MIDI capabilities, to guarantee thorough integration with your existing setup. An ideal choice will blend these elements to enhance both technical and creative dimensions of your music production.
Understanding Drum Programming
Understanding drum programming is essential for crafting rhythmic structures that anchor and energize music production. At the core, the kick drum establishes tempo while the snare or clap provides syncopation, with human-like timing variations and velocity adjustments vital for realism.
Balancing simple rhythms with auxiliary percussion components such as cymbals guarantees both accessibility and dynamic complexity, enhancing overall groove and listener engagement. Additionally, employing a dynamic EQ can help manage frequency clashes between drums and other elements, leading to a cleaner mix.
Regular assessment on different playback systems is also important for achieving a well-rounded sound.
Definition and Purpose
Drum programming, a fundamental aspect of modern music production, entails the meticulous arrangement and sequencing of pre-existing drum samples to craft compelling rhythmic patterns. By mastering drum machine fundamentals, producers can harness rhythmic creativity to raise their tracks. The kick drum typically serves as the tempo anchor, providing a steady pulse, while the snare or clap adds energy and syncopation, shaping the backbeat. These elements create a skeletal structure that guides the listener’s auditory experience.
Successful drum programming often involves integrating human-like characteristics into the rhythm. This humanization—whether through subtle timing variations or dynamic velocity changes—enhances listener engagement, making the patterns feel more organic and less mechanical.
Simple drum patterns, when executed effectively, often resonate more with audiences than overly complex arrangements. This simplicity aids in maintaining the track’s realism and accessibility.
To explore deeper into drum programming:
- Kick Drum Foundation: Establish a solid tempo with consistent kick placements.
- Backbeat Syncopation: Use snares/claps to create dynamic energy.
- Humanization: Introduce slight timing and velocity variations to mimic live drumming.
- Simplicity: Prioritize straightforward patterns to enhance listener connection.
Understanding and mastering these aspects of drum programming can greatly impact the overall quality and appeal of music production.
Importance of Groove
A pivotal element in music production is the groove, serving as the rhythmic heartbeat that captivates listeners and compels them to move. The groove dynamics are paramount, as they form the backbone of most tracks, influencing the rhythm and inviting physical engagement. Understanding groove creation is essential across various genres, connecting listeners on a subconscious level and enhancing their emotional response.
| Key Element | Emotional Impact |
|---|---|
| Kick Drum | Foundation and Depth |
| Backbeat | Energy and Syncopation |
| Human-like Variations | Authenticity and Relatability |
The kick drum typically acts as the anchor for the groove, providing a solid foundation that guides the track. The backbeat, often created using a snare or clap, injects syncopation and energy into the rhythmic patterns, driving the music forward.
Incorporating human-like characteristics—such as slight timing variations and velocity adjustments—into programmed drum patterns can make the groove feel more authentic and relatable. These subtle nuances mimic the imperfections of live performance, adding depth and character to the rhythm. Simplicity often prevails; straightforward, well-crafted rhythms resonate more effectively with listeners than overly complex patterns, ensuring the groove remains compelling and accessible.
Basic Components
Mastering the basic components of drum programming is essential for crafting compelling and cohesive rhythmic foundations in music production. At the core, the kick drum serves as the rhythmic anchor, delivering the vital pulse and tempo that underpin the track.
Effective use of backbeat dynamics, typically executed with a snare or clap, injects syncopation and energy into the groove, making it more engaging for listeners.
Cymbal shifts play a pivotal role in defining the dynamics between different sections of a track, providing both brightness and a sense of progression. Auxiliary percussion, such as tambourines and shakers, adds layers of texture and swing, contributing to a more intricate and interesting rhythmic foundation.
Here are four key aspects to reflect on for effective drum programming:
- Kick Drum: Confirm it locks tightly with the bassline to create a solid rhythmic foundation.
- Backbeat Dynamics: Use snare or clap to add energy and syncopation to the groove.
- Cymbal Shifts: Implement these to guide listeners through different sections, enhancing the track’s flow.
- Sample Selection: Choose high-quality percussion samples to guarantee that each element blends seamlessly, impacting the final mix positively.
Incorporating these elements thoughtfully will boost your drum programming, making your tracks more dynamic and professionally polished.
Creating Basic Drum Patterns
Crafting compelling drum patterns is fundamental to music production, providing the rhythmic backbone that drives and energizes a track. To start, select a kick drum sample as the foundation of your pattern, which will establish the tempo and serve as the rhythmic anchor.
Begin by programming a basic four-on-the-floor beat, placing kick drum hits on every quarter note to generate a steady pulse, a staple in dance music genres.
Next, enhance your groove by adding a snare or clap on the second and fourth beats of the measure. This backbeat injects energy and accentuates the rhythmic flow.
To add further dynamism, incorporate hi-hats or cymbals on the eighth notes. Vary their velocity to create a more natural, lively feel, simulating the subtle nuances of a live drummer. Additionally, consider using syncopation to place accents on unexpected beats, adding complexity and groove to your patterns.
For added interest, engage in rhythmic experimentation by introducing simple fills or drum pattern variations at the end of every four or eight bars. These fills can maintain listener engagement and provide seamless shifts between different sections of your composition.
Individual Volume & Panning
After establishing your foundational drum patterns, the next step involves refining each element’s individual volume and panning to achieve a polished and professional sound. This process is crucial whether you are working with hardware or in-the-box drum machines.
Proper volume adjustments and strategic panning can greatly enhance sound layering and stereo enhancement, guaranteeing each element occupies its own space in the mix and preventing muddiness. Regularly reference mixes to verify clarity and balance throughout the process.
Key Steps to Refine Individual Volume & Panning:
- Volume Management: Carefully balance the volume levels of each drum sound to create a cohesive mix. Louder elements such as kicks and snares should be prominent, while hi-hats and percussions sit comfortably beneath.
- Panning Techniques: Utilize panning to enhance stereo imaging. Place elements like hi-hats and toms slightly left or right to create a wider soundstage, increasing listener engagement.
- Sound Layering: Combine multiple samples for a single drum sound, adjusting their individual volumes and panning to achieve a richer, more complex texture. This technique allows for greater depth and interest in your patterns.
- Track Routing and Plugins: Use in-the-box drum machines to route samples to individual tracks. Apply plugins to fine-tune volume and panning, offering precise control over each element for peak stereo enhancement.
Applying Compression
Applying compression is essential for managing the dynamics of drum machine outputs, starting with light compression to guarantee cohesion among various samples.
Moderate compression settings, with ratios typically between 2:1 and 4:1, facilitate the seamless integration of drum samples with live elements. This approach enhances the clarity and punch of the drums, enabling them to maintain their dynamic range while achieving a balanced mix.
Additionally, employing parallel compression can add impact and presence, ensuring the drums sound full and lively without sacrificing their natural dynamics.
Light Initial Compression
When incorporating drum machines into music production, implementing light initial compression is a critical step that guarantees the integrity of your drum samples while maintaining their dynamic range.
By setting your compressor with initial settings such as a 2:1 to 4:1 ratio, you achieve dynamic control that assures cohesion among the drum elements without over-compressing them. This approach preserves the natural dynamics and punch of your drum hits.
To achieve the ideal compression:
- Compression Ratio: Start with a 2:1 to 4:1 ratio. This range offers enough compression to manage volume spikes while retaining the drums’ natural feel.
- Attack Time: Set the attack time between 10-30 ms. This allows the initial transient to pass through, giving the drums their characteristic punch while managing sustain.
- Threshold: Adjust the threshold so that the compressor engages only on louder hits. This assures softer notes remain unaffected, maintaining the overall groove and feel of your pattern.
- Perceived Loudness: Light compression enhances perceived loudness, allowing drum tracks to sit well in the mix without overpowering other elements.
Integrating With Live Elements
Integrating drum machines with live elements in music production demands a nuanced application of compression to secure a seamless blend of synthetic and organic sounds. Compression is pivotal in managing dynamics, guaranteeing that sudden volume spikes do not disrupt the intricate balance between electronic and live performance components.
Initially, a light stage of compression is essential for maintaining cohesion among the samples. This approach guarantees that synthetic drum sounds blend harmoniously with live instruments, fostering a unified sound.
Employing moderate compression settings allows drum samples to sit comfortably within the mix, enhancing their presence without overshadowing other vital elements of the track.
For a more polished and professional sound blending, a second stage of compression can be applied. This additional compression consolidates the percussive elements, solidifying them as a cohesive group.
The effective use of compression not only clarifies the mix but also guarantees that the energy of both electronic and live performances is retained, creating an engaging auditory experience.
Moderate Settings for Balance
Achieving balance through moderate settings in compression is essential for the nuanced control of drum machine dynamics within a mix. Implementing precise compression techniques guarantees that drum elements remain cohesive and well-integrated, avoiding erratic volume spikes that could disrupt the overall sonic landscape.
For drum machines, initiating with a light compression ratio between 2:1 and 4:1 is advisable to maintain the integrity of individual samples. This initial stage creates a unified sound while preserving the dynamic range. A more moderate compression setting, such as a 4:1 ratio with fast attack and release times, can be employed to further refine the balance.
Here are four key steps for achieving ideal balance with compression:
- Initial Light Compression: Start with a gentle 2:1 to 4:1 ratio to bind the drum samples together without squashing their natural dynamics.
- Fast Attack and Release: Use quick attack and release times to catch transient peaks and smooth out the overall drum sound.
- Two-Stage Compression: Apply a secondary compression stage to blend the drum machine seamlessly with live elements, guaranteeing cohesion across the mix.
- Dynamic Range Preservation: Aim to maintain the drum machine’s dynamic range while preventing volume spikes, guaranteeing clarity and balance in the final track.
These methods solidify the percussive elements, enhancing the clarity and balance of your production.
Using Samples & Sweeteners
A diverse selection of percussion samples can greatly improve the sonic palette of a music production, offering unique textures and rhythms that distinguish tracks from the ordinary. Effective sample selection is vital for creating engaging rhythmic textures that captivate listeners.
Skilled mixers often draw from extensive sample libraries, incorporating elements ranging from traditional drum sounds to unconventional noises. This approach to sound design allows for the crafting of intricate and interesting rhythmic layers. When selecting samples, using techniques like high-pass filtering can help maintain mix control and tightness. Additionally, focusing on mid-range enhancement adds fullness to the percussive elements.
Creative layering of these samples not only adds depth but also injects a sense of dynamism into the mix. By exploring new samples—whether through dedicated sample packs or curated eBooks—producers can discover fresh sounds that improve their production style and maintain listener interest.
Incorporating “sweeteners,” such as subtle background percussion or ambient effects, further enriches the sonic landscape, making rhythmic elements feel more alive and immersive.
Investing time in quality sample selection and innovative sound design is essential. It directly impacts the listener’s experience, enhancing the emotional connection to the music.
Exploring Advanced Techniques
Building upon the foundational principles of sample selection and layering discussed previously, advanced techniques in drum machine programming offer an expansive toolkit for seasoned producers. Mastery of syncopation techniques, such as backbeat syncopation, can considerably enhance rhythmic variations within a composition, adding unexpected twists and maintaining listener engagement.
Additionally, precise timing adjustments and dynamic velocity changes are essential for crafting a more realistic and expressive groove, emulating the nuanced performance of a live drummer. Utilizing techniques such as high-pass filters to remove unnecessary low-end rumble can also help in achieving a cleaner mix.
To further enrich your drum patterns, consider the following advanced techniques:
- Layering Sounds: Experiment with combining multiple drum samples to create intricate textures and unique percussive effects. This can add depth and complexity to your tracks.
- Timing Adjustments: Implement subtle timing shifts and variations to break the monotony of quantized beats, introducing a human feel to your rhythms.
- Dynamic Velocity: Vary the velocity of your hits to produce a more dynamic and lively pattern, enhancing the overall groove and making it more engaging.
- Spatial Effects: Utilize reverb and delay to introduce spatial effects, adding an immersive dimension to your drum tracks and creating a sense of space within the mix.
Essential Plugins for Beginners
Steering through the domain of music production as a beginner can be intimidating, but the right plugins can greatly simplify the process while enhancing the quality of your drum tracks. Selecting essential plugins like JST Heat, JST X-Tension, Gain Reduction™ Deluxe, and JST Maximizer can provide an excellent foundation for any burgeoning producer.
Essential Plugins for Beginners
| Plugin | Key Features | Beginner Tips |
|---|---|---|
| JST Heat | Multi-band saturation, analog warmth | Start with presets to learn sonic impacts |
| JST X-Tension | Versatile mixing/mastering tools | Use for both mixing and mastering phases |
| Gain Reduction™ Deluxe | Dynamic control, compression | Adjust threshold and ratio for best results |
| JST Maximizer | All-in-one mastering solution | Experiment with final mix adjustments |
| Multiple Plugins | Regular discounts | Purchase during sales for budget-friendly options |
JST Heat is invaluable for adding multi-band saturation to your drum tracks, imbuing them with analog warmth. JST X-Tension offers a wealth of mixing and mastering tools, ensuring a polished sound without overwhelming complexity. Gain Reduction™ Deluxe focuses on dynamic control and compression, presenting an intuitive interface ideal for managing drum dynamics. Finally, JST Maximizer serves as an all-in-one mastering solution, simplifying the finalization process to achieve professional-sounding mixes.
Regular discounts on these plugins make them accessible for beginners, encouraging experimentation and skill development. Strategic plugin selection paired with these beginner tips can greatly enhance your drum machine productions.
Integrating With Your DAW
Understanding the role of vital plugins is a foundational step, yet integrating your drum machine with your DAW forms the backbone of modern music production. To achieve seamless MIDI integration, connect your drum machine via USB or a MIDI cable, ensuring your DAW detects it as an input source for MIDI data.
Here’s a structured approach to mastering this integration:
1. MIDI Tracks: Utilize MIDI tracks within your DAW to record and sequence drum patterns from your drum machine. This facilitates easy editing and arrangement of your drum parts, offering a non-destructive workflow that can be adjusted at any stage of production.
Additionally, using vital mixing plugins such as FabFilter Pro-Q3 can help sculpt the frequencies of your drum sounds for a more polished mix.
2. MIDI Clock Synchronization: Most drum machines can transmit MIDI clock signals, which synchronize with your DAW, ensuring consistent tempo alignment. This is essential for maintaining rhythmic precision across your project.
Syncing your drum machine with your DAW can be particularly beneficial when using advanced DJ software like Traktor Pro, which excels in hardware integration.
3. Audio Routing: Leverage your DAW’s audio routing capabilities to record individual outputs from your drum machine onto separate tracks. This allows for detailed mixing and processing, giving you granular control over each drum element’s sonic characteristics.
4. VST Plugins: Enhance the sonic palette of your drum machine by applying VST plugins within your DAW. Effects and processing plugins can greatly expand your creative possibilities, allowing for intricate sound design and meticulous tonal adjustments.
Frequently Asked Questions
What Is a Good Drum Machine for Beginners?
A good drum machine for beginners includes affordable options like the Akai MPC One, Arturia MicroLab, and Korg volca beats, all featuring user-friendly interfaces, while the Teenage Engineering PO-32 Tonic and Roland TR-6S offer portability and versatile sound design.
What Is a Good Drum Machine for Beginners?
For beginners, popular models such as the MT Power Drumkit 2, Akai MPC One, and Korg Volca Beats offer basic features including user-friendly interfaces and realistic sounds, making them ideal for those new to drum programming and sequencing.
Do Producers Use Drum Machines?
Producers extensively use drum machines due to their rich history and versatility across various genres. These devices enable precise rhythm programming and creative sound design, essential for shaping the intricate beats characteristic of electronic, hip-hop, and pop music.
How to Make Drum Machines Sound Good?
To make drum machines sound good, employ advanced drum machine techniques such as meticulous sound design, including high-quality sample selection, precise volume and panning adjustments, strategic compression, and creative use of saturation, reverb, and delay to enrich the sonic landscape.
Conclusion
Mastery of drum machines in music production necessitates an extensive understanding of various components including machine selection, drum programming, pattern creation, volume and panning adjustments, and compression application. Incorporating samples and sweeteners, exploring advanced techniques, and utilizing essential plugins further enrich the production process. Seamless integration with a DAW is imperative for optimizing workflow and achieving professional results. Through diligent practice and exploration, proficiency in drum machine utilization can greatly enhance the quality of musical compositions.