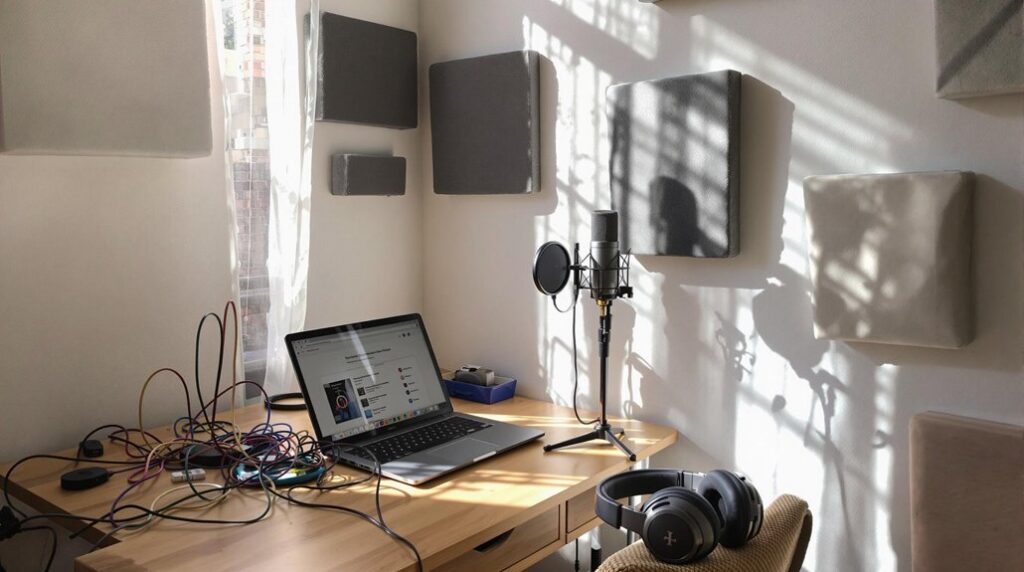
So does Garageband have Autotune? Yes and it’s amazing! To use Autotune in GarageBand, open your project and navigate to the editing window. Select your vocal track, then access the editor window. Locate the pitch correction tool and enable it. Adjust the Auto-Tune slider, experimenting with different positions; start around 50 for balanced results. Set the song’s key and scale for precise autotune corrections. Fine-tune the settings by adjusting the pitch correction intensity and using the ‘limit to key’ option. Make sure the autotune complements the music’s style and vibe. Want to perfect those settings even further?
Key Takeaways
- Open your GarageBand project and select the vocal track.
- Navigate to the editor window and locate the pitch correction tool.
- Enable pitch correction and set the key and scale of your song.
- Adjust the Auto-Tune slider to achieve the desired pitch correction intensity.
- Fine-tune the settings by experimenting with the ‘limit to key’ option and listening to the mix.
Open GarageBand Project
To start, launch GarageBand on your computer or mobile device and open the existing project where you’ll apply Autotune. Make sure that the project contains the vocal track you intend to process. If you’re starting from scratch or need to add additional audio components, import audio files by dragging them directly into the project’s timeline. GarageBand supports various file formats, so this should be a seamless process.
Once your audio files are in place, navigate to the editing window by pressing ‘e’ on your keyboard. This action will reveal the track controls and the various editing tools at your disposal. Here, you can add and manipulate effects plugins, such as reverb, compression, and most importantly, pitch correction. The pitch correction tool is essential for Autotune, allowing you to enhance your vocal track’s pitch accuracy.
To apply Autotune, locate the pitch correction slider within the track’s edit menu. You can adjust the slider to your desired level of correction. Remember, subtle adjustments often yield the most natural results, while higher settings can produce the iconic T-Pain effect.
Select Vocal Track
To begin, make sure you’ve selected the vocal track you want to autotune by clicking on it to highlight it.
Check the vocal input settings to confirm they’re ideal for autotune adjustments.
Verify the track type selection to guarantee accurate application of autotune effects.
Track Type Selection
When starting in GarageBand, you’ll want to select a vocal track to make sure autotune settings are applied accurately to your recordings. Access the ‘Track’ menu, choose ‘New Track’ and then select the ‘Audio’ option. This is where you’ll find the vocal track, specifically designed for vocal recordings. The importance of this step lies in the track’s built-in features, which include tailored vocal effects and enhanced track customization options.
Vocal tracks in GarageBand are optimized for capturing and refining the nuances of vocal performances. They come equipped with advanced vocal effects like compression, reverb, and EQ settings, which are essential for achieving a polished sound. Additionally, these tracks offer robust track customization capabilities, allowing you to tweak parameters to suit your specific vocal characteristics and recording environment.
Vocal Input Settings
Before applying autotune, click on the track header to select the specific vocal track you want to enhance in GarageBand. This guarantees you’re working on the right track and prevents any unintended changes to other tracks. Properly recorded and isolated vocals are essential for achieving professional results with autotune. Make sure your recording techniques are solid, capturing a clean and clear vocal performance.
Next, optimize your vocal input settings. Adjust the volume to avoid clipping and maintain consistent levels. Fine-tune the EQ to balance the frequencies, enhancing the clarity and presence of the vocals. Consider adding basic vocal effects like compression to smooth out dynamic ranges and reverb for spatial depth, but keep these effects subtle to maintain a natural sound before applying autotune.
Here’s a quick reference table for optimizing vocal input settings:
| Setting | Description | Tips |
|---|---|---|
| Volume | Adjust overall loudness | Avoid peaking and maintain consistent levels |
| EQ | Balance frequency spectrum | Enhance clarity by cutting muddiness |
| Effects | Apply compression and reverb | Use sparingly to maintain vocal integrity |
Access Editor Window
To access the editor window, press ‘e’ on your keyboard while your vocal track is selected.
In the editor window, locate the pitch correction tool to start applying Autotune.
Adjust the intensity of the Autotune effect using the slider to achieve your desired sound.
Open Track Editor
Press ‘e’ on your keyboard to swiftly open the track editor window in GarageBand, where you can access a range of editing tools including pitch correction for Auto-Tune adjustments. The editor window is your command center for fine-tuning your audio tracks. By exploring different editing options, you can greatly enhance vocal performance.
Once inside the editor window, you’ll find various settings to manipulate Auto-Tune. The pitch correction feature is particularly useful for achieving that polished, professional sound. Below is a handy table summarizing key features you’ll encounter in the editor window:
| Feature | Description |
|---|---|
| Pitch Correction | Adjusts the pitch to match selected key |
| Flex Time | Enables precise timing adjustments |
| Automation | Allows dynamic changes in volume and effects |
| EQ | Fine-tunes frequencies for clarity |
| Effects | Adds reverb, echo, and other audio effects |
To enhance vocal performance, start by adjusting the pitch correction slider. This tool helps you control the intensity of Auto-Tune, allowing for subtle tweaks or dramatic effects. Use the visual interface to pinpoint exact notes and tweak them accordingly. Don’t forget to experiment with other editing tools like Flex Time and EQ to further refine your track. These tools collectively offer a robust solution for creating high-quality vocal tracks.
Select Vocal Track
Locate the vocal track you want to enhance with Auto-Tune by clicking on it in your GarageBand project. This step is vital for guaranteeing that you enhance the correct vocal performance.
Once you’ve selected your desired track, access the editor window by pressing ‘e’ on your keyboard. This opens up a dedicated space where you can fine-tune various aspects of your vocal track, essential for professional music production.
In the editor window, you’ll see a visual representation of the waveform of your vocal track. This visual aid allows for precise editing and ensures that you can apply Auto-Tune accurately. Make sure to scrutinize the waveform to identify any areas that may need pitch correction.
Enable Pitch Correction
Start by accessing pitch correction in GarageBand by pressing the ‘B’ key on your keyboard, which brings up the editor window. Once the editor window is open, click on the scissors icon to enter the Audio Editor.
Here, you’ll find the Pitch Correction slider. This tool is essential for AutoTune troubleshooting and experimenting with creative autotune effects.
To enable pitch correction, follow these steps:
- Locate the Pitch Correction slider: It’s found in the bottom section of the Audio Editor. Adjust the slider to your desired level of correction, bearing in mind that higher settings produce more robotic effects, while lower settings maintain a natural tone.
- Activate ‘Limit to Key’: Check this option to confine pitch correction to the song’s key. This ensures that your vocals stay in harmony with the instrumental track, reducing the need for extensive autotune troubleshooting later.
- Ensure high-quality vocal recordings: Before applying any pitch correction, make sure your vocal tracks are recorded with good clarity and minimal background noise. High-quality recordings allow the autotune to work more effectively, enhancing the overall sound.
Adjust Auto-Tune Slider
Adjusting the Auto-Tune slider in GarageBand is essential for tailoring the pitch correction effect to match your vocal track’s unique characteristics.
According to Sound Buttons Lab, to achieve Auto Tune precision, start by locating the Auto-Tune slider, which ranges from 0 to 100. Lower values, such as 10-25, provide a subtle pitch correction that maintains a natural sound, ideal for genres requiring organic vocal performance.
Conversely, higher values, like 75-100, deliver a pronounced pitch correction effect, often used in modern pop or electronic music for an unmistakable Auto-Tune signature.
Experiment with different slider positions to find the sweet spot for your track. Adjust the Auto-Tune slider in real-time while listening to your vocals. This method allows you to fine-tune the pitch correction, ensuring it complements the vocal performance without sounding overly artificial.
A good starting point is around 50, from where you can incrementally adjust up or down based on the desired effect.
Set Key and Scale
To ensure your vocal track stays in harmony with the rest of your composition, you’ll need to set the key and scale in GarageBand’s track editor. This step is essential for melody matching and harmonic alignment, ensuring your autotune corrections are precise and musically coherent.
First, access the track editor by selecting your vocal track. Click on the track header to reveal the editor pane at the bottom of the screen.
Here’s how you can set the key and scale:
- Determine the Key and Scale: Identify the key and scale of your song. This could be C Major, A Minor, etc. If you’re unsure, consult your composition notes or use a key detection tool.
- Set Key in GarageBand: In the track editor, locate the key signature area. Click on the current key to open a dropdown menu, and select the appropriate key for your song.
- Select the Scale: After setting the key, choose the corresponding scale (major, minor, etc.). This selection will guide the autotune to correct pitch deviations accurately, maintaining the intended melodic structure.
Fine-Tune Your Settings
Frequently, you’ll need to adjust the pitch correction intensity slider in GarageBand to fine-tune the autotune effect and achieve the desired vocal sound.
Start by locating the pitch correction section and find the intensity slider. Gradually increase or decrease the slider to control the strength of the autotune effect. For a more natural sound blending, aim for a moderate setting rather than maxing it out. This prevents the vocals from sounding too robotic, maintaining a more organic feel.
Experiment with the ‘limit to key’ option. By enabling this, you restrict the pitch correction to the specific key of your song, ensuring an accurate and coherent autotune level. This step is important for vocal enhancement as it helps the autotune algorithm stay true to the musical context.
Listen to your vocals within the entire mix. Soloing the vocal track can be misleading; always check how the autotuned vocals interact with other instruments. This holistic approach ensures balanced sound blending and prevents the vocals from standing out awkwardly.
Lastly, fine-tune the settings to match your music’s style and vibe. Different genres require different autotune intensities, so adjust accordingly to achieve the best vocal enhancement. High-quality initial recordings will always lead to superior final results.
Frequently Asked Questions
How to Use Auto-Tune With Garageband?
You’ll access GarageBand’s pitch correction for vocal effects by pressing ‘B’. Click the scissors icon, enable pitch correction, and adjust the intensity slider. Use ‘Limit to Key’ for alignment. Record high-quality vocals before applying.
How Do You Use Auto-Tune Easy?
To use auto-tune easily, access pitch correction by pressing ‘B’. Enable pitch correction via the scissors icon, adjust the intensity slider, and use ‘Limit to Key’ to guarantee vocal effects stay precise and within the song’s key.
How to Fix Pitch in Garageband?
To fix pitch in GarageBand, access pitch correction by pressing ‘B’. Use the pitch correction slider for vocal tuning. Enable ‘Limit to Key’ to stay within the song’s key. Adjust settings for best vocal tuning.
How Do You Make a Tune on Garageband?
To make a tune on GarageBand, start with melody creation by recording or importing vocals. Use instrument selection to add layers, then fine-tune each element. Adjust pitch correction settings for a polished result. Experiment for best balance.
Conclusion
By following these 7 simple steps, you’ll master using Auto-Tune in GarageBand.
Open your project, select the vocal track, and access the editor window.
Enable pitch correction, adjust the Auto-Tune slider, and set the key and scale.
Finally, fine-tune your settings for best results.
With these detailed instructions, you can guarantee your vocals are pitch-perfect, leveraging GarageBand’s powerful tools to enhance your music production effortlessly.
Now, you’re ready to produce professional-quality tracks with precision and ease.


