Trimming audio in Audacity is efficient and user-friendly. First, install Audacity and import your audio file via File > Import or drag-and-drop. Use the selection tool to highlight the unwanted sections of the waveform. For precision, utilize the zoom feature to accurately set start and end points. Press the DEL key to remove the unwanted audio or select “Trim Audio” under “Remove Special” for a cleaner cut. Finally, export your trimmed file by maneuvering to File > Export, selecting your desired format, and adjusting settings as necessary. For further insights on enhancing your audio projects, explore additional features within Audacity.
Key Takeaways
- Launch Audacity and import your audio file via File > Import or drag and drop it into the workspace.
- Use the selection tool to highlight the unwanted sections of the audio waveform.
- Press DEL to remove the selected audio or use “Remove Special” > “Trim Audio” for more precision.
- Zoom in on the waveform for accurate selection of start and end points for trimming.
- After trimming, export the audio by navigating to File > Export and choose your desired format and settings.
Overview of Audacity
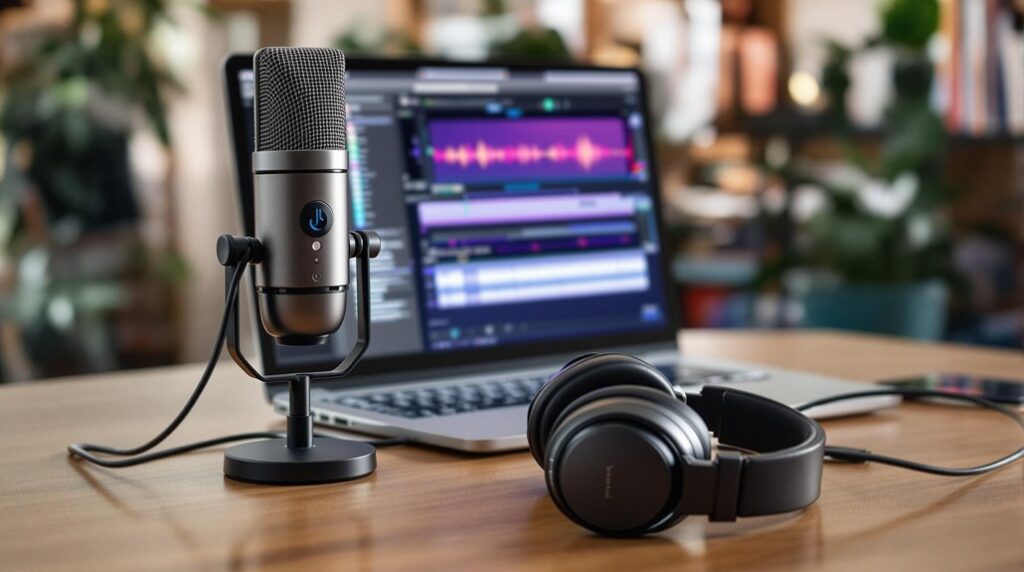
Audacity serves as a powerful tool in the field of audio editing, providing users with a robust platform for manipulating sound files. This open-source audio editing software is compatible with Windows, MacOS, Linux, and UNIX, ensuring versatility across different operating systems.
Audacity supports a wide range of audio formats, including MP3, WAV, FLAC, AIFF, and OGG, making it suitable for diverse editing tasks. The software features a customizable interface that enhances workflow efficiency, complemented by extensive editing tools and plugins for advanced audio manipulation.
With its user-friendly layout, Audacity is accessible to both beginners and professionals, allowing users to easily trim audio tracks and implement various editing techniques. Regular community-driven updates further enhance its capabilities and performance. Additionally, users can benefit from capturing audio through WASAPI for seamless recording experiences.
Installation and Setup
To get started with Audacity, first download the latest version from the official website, selecting the correct installer for your operating system.
Follow the installation prompts to complete the setup, ensuring you agree to the license and make any necessary selections.
Upon installation, launch Audacity and configure your input/output devices to begin your audio editing projects effectively.
Downloading Audacity Software
A seamless experience with audio editing begins with downloading the latest version of Audacity from its official website. Verify you select the installer appropriate for your operating system (Windows, MacOS, or Linux). Follow the prompts to download and install Audacity, which includes accepting the license agreement and selecting the installation location.
| Step | Action |
|---|---|
| 1. Download | Access the official Audacity website |
| 2. Select Installer | Choose the correct version |
| 3. Install | Follow installation prompts |
| 4. Launch Audacity | Double-click the icon |
| 5. Configure Devices | Select your input and output devices |
After completing installation, you can import an audio file using File > Import or by drag and drop, setting the stage for your editing session on audio projects.
Installation Process Overview
While installing Audacity is a straightforward process, it is essential to follow each step carefully to confirm proper setup.
Begin the installation process by downloading the latest version from the official website, ensuring you select the appropriate installer for your operating system—Windows, macOS, Linux, or UNIX.
Once downloaded, execute the installer and follow the prompts to complete the setup process.
After installation, you can open Audacity by double-clicking its desktop icon or accessing it via the applications menu.
To record audio, ensure your input devices are connected and select them from the dropdown menu on the main screen; if they do not appear, restart Audacity.
Audacity supports various audio formats, allowing you to import audio and start editing immediately.
Initial Setup Instructions
Begin your journey with Audacity by ensuring that you have successfully installed the software. Download the latest version from the official website, selecting the installer compatible with your operating system—Windows, MacOS, Linux, or UNIX.
After installation, launch Audacity by double-clicking its icon to access the main interface for audio editing. To set up your environment, choose the appropriate input and output devices from the dropdown menu; restart Audacity if they do not appear.
You can import audio files for trimming by guiding to File > Import > Audio, or by utilizing the drag-and-drop feature directly into the window. Audacity supports various audio formats, including MP3, WAV, and FLAC, enhancing your editing and cutting capabilities.
Importing Audio Files
To begin importing audio files into Audacity, users can utilize multiple methods, including accessing File > Import > Audio or employing the drag and drop feature directly into the workspace.
Audacity is compatible with various audio formats such as MP3, WAV, FLAC, AIFF, and OGG, offering flexibility for diverse editing projects.
For a quicker approach, the keyboard shortcut Ctrl + Shift + I provides immediate access to the import function.
Supported Audio Formats
Audacity offers robust support for a variety of audio formats, ensuring flexibility for users engaged in audio editing. Supported formats include MP3, WAV, FLAC, AIFF, and OGG, allowing you to import audio files tailored to your needs.
To import audio, navigate to the Edit menu and select File > Import > Audio, or simply drag and drop your desired audio files into the interface. For enhanced efficiency, utilize the keyboard shortcut Ctrl + Shift + I to access the import function quickly.
Audacity also enables batch importing of multiple files, making it easier to manage larger projects. Before finalizing the process, use the Play button or space bar to preview your tracks, ensuring you trim audio files as needed.
Import Methods Overview
Efficiently importing audio files is a crucial step in the editing process within Audacity. This software supports various formats such as MP3, WAV, FLAC, AIFF, and OGG, catering to diverse project needs.
The primary method for importing audio files is by maneuvering to File > Import > Audio. Alternatively, you can streamline the process using the keyboard shortcut Ctrl + Shift + I. For a more intuitive approach, simply drag and drop your audio files directly into the Audacity interface.
After importing, utilize the Play button or the space bar to preview tracks and confirm they are the correct files. If connected input/output devices are not recognized, restarting Audacity may resolve the issue for ideal recording or playback.
Drag and Drop
Importing audio files into Audacity can be seamlessly achieved through the drag and drop method. To begin, verify the Audacity application is open. Locate the desired audio file on your computer, then drag it into the Audacity workspace. This method supports various audio formats including MP3, WAV, FLAC, AIFF, and OGG, providing extensive editing options once the file is imported. After dropping the audio file, it will appear as a waveform track, ready for cutting and trimming audio.
| Step | Action | Result |
|---|---|---|
| Open Audacity | Launch the application | Workspace is ready |
| Locate audio file | Find the file on your PC | Prepare for import |
| Drag and drop | Move file into workspace | Waveform track appears |
| Edit audio | Use tools for trimming | Finalized audio files |
Identifying Audio Sections
To effectively identify audio sections for trimming in your project, begin by utilizing the playback controls to listen attentively to the audio. This allows you to determine the exact start and end points for trimming unwanted sections.
Next, zoom in on the waveform for a clearer view of the audio peaks and valleys, enabling you to identify specific audio segments more easily. Use the selection tool to highlight the part you wish to trim by clicking and dragging over the waveform.
Although Audacity lacks Edit Markers, you can create a label by proceeding to Tracks > Add Label at Selection, marking key points for easier orientation. If necessary, reposition labels by clicking and dragging them to your desired location on the timeline.
Basic Trimming Method
To execute the basic trimming method in Audacity, begin by selecting the audio portion you wish to keep.
Highlight the unwanted sections by clicking and dragging over them, then press the DEL key to remove these parts.
This process can be repeated at the end of the track to eliminate any remaining unnecessary content.
Selecting Desired Audio Portion
Begin trimming audio in Audacity by clicking on the waveform at the start of the section you wish to keep. Once selected, hold down the mouse button to highlight the unwanted audio.
With the unwanted section highlighted, press the DEL key to remove it, ensuring only the desired audio portion remains. Next, scroll to the end of the track and repeat this process to trim any additional unwanted audio from the end of the clip.
For greater precision, you can zoom in to view both the start and end points clearly, making it easier to select the audio intended for preservation.
Finally, navigate to the File menu and choose the export option to save your trimmed audio files in your preferred format.
Deleting Unwanted Sections
Deleting unwanted sections in Audacity can greatly enhance the clarity and focus of your audio project.
To begin, use the Selection Tool to click and drag over the audio waveform, highlighting the portion you wish to remove. Once selected, press the DEL key to delete this section instantly.
Alternatively, you can select the beginning of the audio you want to keep, drag to the end of the desired section, and navigate to the Edit menu. From there, choose “Remove Special” and then “Trim Audio” to cut the unwanted parts.
For precise selection, zoom in on the waveform to guarantee accuracy.
Finally, remember to export your edited audio by going to File > Export to save your changes in the desired format.
Alternative Trimming Technique
Trimming audio in Audacity can be efficiently accomplished using an alternative technique that streamlines the process.
Begin by zooming in on the waveform to identify the start and end points of the desired audio segment. Employ the Selection Tool to click and drag over the portion you wish to keep. This allows you to trim audio files without the risk of selecting unwanted parts.
Next, use the keyboard shortcut Ctrl + T (or Command + T on Mac) to execute the trimming action, effectively cutting and trimming the audio recordings to your specifications. This method enhances efficiency by minimizing unnecessary clicks. Additionally, consider applying noise reduction techniques to ensure your trimmed audio maintains high quality without background distractions.
After completing the trim, proceed to save your work as needed.
Exporting Audio
Once the audio has been effectively trimmed, attention shifts to the exporting process in Audacity.
Follow these steps to guarantee your trimmed audio file is saved correctly:
- Navigate to the File menu and select Export, choosing your desired audio format such as MP3 or WAV.
- Confirm that the correct audio segment is highlighted, as only this portion will be included in the exported file.
- Specify the destination folder and file name, and consider adding metadata tags to include details like episode title and artist name. Adjust settings for bitrate mode and overall quality as needed.
After confirming your choices, click Save and follow any additional prompts. Additionally, ensure that your exported audio meets industry loudness standards, as this will enhance its compatibility across various platforms.
This will finalize the exporting audio process, ensuring your file is stored as intended.
Audio Enhancement Tools
Enhancing audio quality is essential for achieving professional sound in recordings, whether for podcasts, music, or other media.
Audio enhancement tools, such as iZotope VEA and CrumplePop Voice Enhance, greatly improve sound clarity and optimize recordings. These tools incorporate features like noise reduction and vocal enhancement, allowing you to trim an audio file effectively while ensuring professional-grade audio output.
When using Audacity, these user-friendly tools seamlessly integrate into your editing process, enabling you to address specific audio issues, such as eliminating background noise or enhancing vocal presence. Additionally, proper mastering techniques ensure that your final audio product meets industry standards for quality and loudness.
Furthermore, regular updates and community support keep you informed about the latest features, ensuring your projects benefit from the best practices in audio enhancement.
Tips for Effective Trimming
Achieving effective audio trimming requires careful attention to detail and the application of specific techniques.
To guarantee a seamless editing process, consider the following tips:
- Utilize the zoom feature: This allows for precise viewing of the start and end points of the audio segments you wish to trim, enhancing accuracy.
- Familiarize yourself with keyboard shortcuts: Use shortcuts like Ctrl + T for trimming selected audio, which greatly boosts your editing efficiency.
- Backup your original file: Always keep a backup before trimming to prevent loss of valuable content due to mistakes.
Lastly, after trimming, be sure to preview the edited audio to confirm smooth shifts and that the desired segments are retained.
Exploring Alternative Software
While effective trimming techniques in Audacity are invaluable, users may find that exploring alternative audio editing software can further enhance their editing capabilities.
For instance, Adobe Audition delivers professional-grade features like multi-track editing and noise reduction.
GarageBand is an excellent choice for Mac users, offering user-friendly tools for beginners to create and edit background music.
WavePad supports various formats and includes batch processing, making it versatile for different needs.
If simplicity is a priority, Ocenaudio is a lightweight option that supports VST plugins.
Finally, Reaper provides a thorough, affordable solution for both novices and experienced users.
Each alternative software presents unique functionalities that can complement the skills learned in Audacity, especially when learning to cut audio in Audacity using keyboard shortcuts. Additionally, understanding how to use autotune plugins effectively can further improve your audio editing projects across different platforms.
Frequently Asked Questions
How Do I Trim Audio in Audacity?
To trim audio in Audacity, utilize its user interface and software features by selecting desired segments with trimming techniques, then employ export options to save in various audio formats. Guarantee project management practices are followed to preserve edits.
How Do I Cut Some Part of Audio?
To cut specific parts of audio, utilize audio editing techniques such as selecting the desired segment and executing a cut command. Apply audio mastering basics for ideal sound effects usage and guarantee precision in mixing audio tracks.
How to Remove Unwanted Sound in Audacity?
To remove unwanted noise in Audacity, utilize audio editing techniques such as noise reduction, trimming background silence, and enhancing sound quality. Employ the Selection Tool for precise cuts and improve overall sound effects through careful adjustments.
How to Slice Audio in Audacity?
To slice audio in Audacity for effective audio editing, use the Selection Tool to highlight the desired section, then apply editing shortcuts like Ctrl + I to split. This facilitates precise track manipulation and maintains sound quality.
Conclusion
In summary, trimming audio in Audacity involves a systematic approach that encompasses installation, importing files, identifying segments, executing basic trimming, and exporting the final product. Utilizing audio enhancement tools can further refine the output, while adherence to effective trimming techniques guarantees optimal outcomes. Exploring alternative software may provide additional functionalities suited to specific needs. Mastery of these steps facilitates efficient audio editing, enhancing overall productivity and quality in audio project results.