Achieving professional-sounding guitar recordings at home requires meticulous setup and the right gear. Start by optimizing your recording space with acoustic treatment to control reflections and echoes. Invest in essential gear like an audio interface (e.g., Focusrite Scarlett 2i2) and quality microphones (e.g., Shure SM57). Connect your equipment appropriately and use a DAW like Reaper for recording. For acoustic guitars, mic placement is vital, while electric guitars benefit from amp simulators and dynamic mics. Monitoring with studio headphones (e.g., Audio-Technica ATH-M50x) helps maintain track clarity during mixing. Enhance your recordings with these techniques in more detail.
Key Takeaways
- Choose a quiet, well-ventilated space with acoustic treatment for optimal recording conditions.
- Invest in essential gear like a Focusrite Scarlett 2i2 interface, Shure SM57 microphone, and high-quality monitoring solutions.
- Connect your guitar properly using appropriate cables and set up your DAW with correct input settings.
- Position microphones effectively for acoustic and electric guitars, and maintain recording levels around -12dBFS to avoid clipping.
Setting Up Your Recording Space
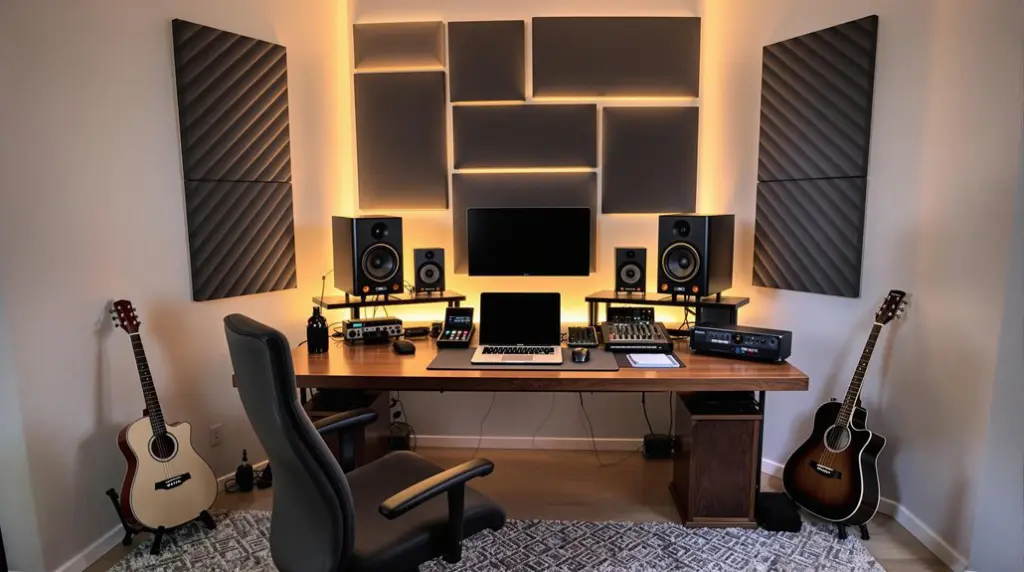
Creating an ideal recording space for guitar involves selecting a quiet, well-ventilated area and employing acoustic treatment methods such as bass traps and diffusers to manage room acoustics effectively.
Acoustic treatment is essential for mitigating unwanted frequencies and enhancing audio clarity. Bass traps, strategically positioned in corners, help absorb low-frequency energy, preventing muddiness in recordings. Diffusers, on the other hand, scatter sound waves, reducing flutter echoes and creating a balanced acoustic environment.
Positioning your setup away from reflective surfaces like windows and hard walls further reduces unwanted reflections and echoes. Utilizing thick curtains or acoustic panels can also dampen these reflections, ensuring a cleaner sound capture.
Equally important is power management. Isolating audio connections from power sources is vital to prevent ground hum and interference, which can compromise the integrity of your recordings. Employing high-quality power conditioners can mitigate electrical noise and provide stable power to your equipment.
Maintaining an organized, clutter-free recording space facilitates smooth setup and adjustments, optimizing workflow efficiency. Proper cable management and ergonomic placement of equipment contribute to a professional recording environment, allowing you to focus on capturing the best guitar tones without unnecessary distractions.
Choosing the Right Gear
Choosing the right gear is paramount for achieving professional-grade recordings at home, balancing cost-effectiveness with quality.
Key components such as an audio interface like the Focusrite Scarlett 2i2 and versatile microphones such as the Shure SM57 or Lewitt LCT 240 Pro form the backbone of your recording chain.
Additionally, maintaining your equipment and selecting accurate monitoring solutions, like the Mackie CR Series or Audio-Technica ATH-M50x, guarantees clarity throughout the production process.
Budget-Friendly Equipment Options
For those aspiring to record guitar at home without breaking the bank, investing in budget-friendly yet high-quality equipment is vital to achieving professional-level results.
One of the most significant components is selecting affordable interfaces. The Focusrite Scarlett Solo, priced at approximately $114.99, stands out as a reliable choice for beginners. Its superior preamps and low-latency performance make it a prime interface for capturing pristine guitar tones.
Equally important is the choice of versatile microphones. The Shure SM57, a dynamic microphone priced around $99, is renowned for its robustness and adaptability. This microphone excels in recording guitar amplifiers and can seamlessly shift to capture vocals and various instruments, making it a staple in any home recording setup.
For digital recording enthusiasts, software like Reaper offers extensive functionality at an accessible price point of around $60. Additionally, the IK Multimedia iRig 2, available for about $35, presents an affordable solution for guitarists who wish to record directly onto their iOS devices.
Quality monitoring is essential, and investing in headphones such as the Audio-Technica ATH-M50x, priced around $149, guarantees accurate sound reproduction, aiding in better mixing and monitoring.
Essential Recording Chain Components
Establishing an effective recording chain is crucial for achieving high-fidelity guitar recordings, necessitating careful selection of each component to warrant ideal signal flow and sound quality. The chain typically begins with the guitar itself, proceeding through high-quality cables to an amplifier and cabinet setup. A dynamic microphone like the Shure SM57 is often preferred for close-miking the amp due to its durability and ability to handle high SPLs, guaranteeing optimal gear compatibility.
The next essential component is the audio interface. Models such as the Focusrite Scarlett 2i2 are lauded for their user-friendly features and high-quality preamps, serving as the bridge between the analog signal and digital environment. This interface connects to your computer, where a DAW (Digital Audio Workstation) like Reaper or Studio One facilitates recording, mixing, and editing tracks through an intuitive interface.
For those seeking to record quietly, a load box and impulse responses can be invaluable. These devices allow the capture of the amp’s characteristics without the need for a loud speaker cabinet, preserving the integrity of the signal flow while offering extensive tonal control.
Careful gear selection and compatibility warrant your recording chain captures the guitar’s true essence.
Effective Gear Maintenance
Maintaining your recording gear in top condition is just as important as selecting the right components, guaranteeing each piece performs at its best and extends its lifespan. A significant aspect of this involves diligent string maintenance and timely string replacement.
Regularly changing your guitar strings is essential to maintaining ideal intonation and action, thereby preventing recording issues caused by poor setup. High-quality strings not only enhance tonal quality but also guarantee a consistent performance during recording sessions.
Investing in a robust audio interface, such as the Focusrite Scarlett 2i2, is critical for achieving clear sound and low latency. Coupled with proper string maintenance, this guarantees that the clarity and precision of your recordings are not compromised.
Moreover, the choice of microphones, like the versatile Shure SM57 for electric guitar amps and the Lewitt LCT 240 Pro for acoustic recordings, plays a significant role in capturing a wide range of sounds.
Utilizing shielded instrument cables can minimize interference and noise, preserving a clear signal path from your guitar to the audio interface.
Additionally, upgrading your DAW to options like Reaper or Studio One can enhance your workflow, providing advanced editing features that complement well-maintained gear.
Connecting Your Equipment
Connecting your equipment is the foundational step in guaranteeing a seamless and high-quality recording process for your guitar. The first consideration is the type of cable you use. For electric guitars, a quarter-inch instrument cable is the standard choice. This cable should connect your guitar directly to the input of your audio interface. It is essential to adjust the impedance settings on your audio interface to Hi-Z (high impedance) to capture the full tonal spectrum of your electric guitar accurately.
When recording an acoustic guitar, a different approach is needed. Using an XLR cable, connect a microphone positioned near the sound hole to your audio interface. This method captures the natural resonance and depth of an acoustic guitar more effectively.
Next, open your digital audio workstation (DAW) and create a new project. Confirm that you select the correct input corresponding to your audio interface. Adjust the gain levels on the interface, aiming for peak levels around -12dBFS to avoid clipping during recording. Below is a table summarizing the essential connections:
| Equipment | Cable Type | Impedance Setting |
|---|---|---|
| Electric Guitar | Quarter-Inch Instrument | Hi-Z |
| Acoustic Guitar | XLR Microphone | Not Applicable |
| Audio Interface | USB/Thunderbolt | Default |
Recording Acoustic Guitar
Recording acoustic guitar at home necessitates strategic microphone placement, precision in essential recording gear selection, and effective soundproofing techniques.
Positioning a condenser microphone about 6 to 12 inches from the 12th fret captures a balanced timbre, while experimenting with placements near the soundhole or body can alter tonal characteristics.
Additionally, investing in acoustic treatment for your recording space guarantees the purity of the captured sound, free from extraneous noise and reflections.
Microphone Placement Tips
Proper microphone placement is essential for capturing the nuanced tones of an acoustic guitar, with the ideal position typically being 6-12 inches away from the 12th fret to balance warmth and clarity. This strategic positioning allows for a rich amalgamation of the guitar’s natural resonance and articulate string detail without overemphasizing unwanted frequencies.
To enhance your recording, consider employing various microphone techniques and recording angles. Avoid pointing the microphone directly at the soundhole, as this can result in boominess and potential feedback issues. Instead, aim for a spot between the soundhole and the fingerboard. Experimenting with different angles, such as positioning the mic at a 45-degree angle to the guitar, can yield a more natural tone and reduce harshness.
Here are a few key tips to visualize:
- 45-degree angle placement: Reduces harshness and captures a more natural tone.
- Dual microphones: Combine a condenser mic for detail and a dynamic mic for warmth to enrich the sound.
Essential Recording Gear
Investing in high-quality recording gear, such as a condenser microphone like the Lewitt LCT 240 Pro and an audio interface like the Focusrite Scarlett Solo, is vital for capturing the intricate details and rich tones of an acoustic guitar at home.
Condenser microphones are renowned for their sensitivity and ability to capture the nuanced dynamics of acoustic instruments. The Lewitt LCT 240 Pro, in particular, excels in picking up the natural resonance and clarity of an acoustic guitar, making it a preferred choice among recording enthusiasts.
To optimize your recordings, microphone placement is essential. Position the microphone approximately 1-2 feet away from the fretboard, ensuring it is not directly aligned with the soundhole to avoid feedback and achieve a balanced tone.
Additionally, blending microphone recordings with a direct input (DI) signal can enhance the overall sound quality. This recording technique marries the organic richness of the guitar’s body with the crispness of the DI signal, producing a fuller and more defined sound.
An audio interface like the Focusrite Scarlett Solo is indispensable for connecting your microphone to your computer, ensuring high-fidelity recordings.
This setup, coupled with portable acoustic panels, can greatly improve your home recording capabilities, providing professional-grade results.
Soundproofing Techniques
While high-quality gear is indispensable for capturing the intricate details of an acoustic guitar, an equally vital factor in achieving pristine recordings is implementing effective soundproofing techniques in your recording space. Proper soundproofing can greatly enhance sound quality by minimizing external noise interference, which is essential for capturing the instrument’s natural tone.
To effectively soundproof your room, consider these acoustic treatment and noise reduction strategies:
- Heavy Curtains or Sound-Absorbing Panels: Adding these to windows and walls can reduce sound reflections and echoes, creating a more controlled recording environment.
- Rugs or Carpets: Placing these on the floor helps dampen sound and prevent unwanted reflections, contributing to a more balanced acoustic setting.
Additionally, employing portable acoustic panels offers flexible soundproofing solutions, allowing for adjustments based on specific recording needs or room configurations.
These techniques collectively contribute to a more refined and professional recording setup, enabling you to capture the full, rich tones of your acoustic guitar with minimal interference. By investing in these soundproofing measures, you can greatly improve the quality of your home recordings.
Recording Electric Guitar
Capturing the essence of an electric guitar requires a meticulous setup, beginning with a direct connection to a high-quality audio interface like the Focusrite Scarlett 2i2, guaranteeing the input is set to Hi-Z for ideal signal fidelity. The next vital step involves perfecting your guitar tone, which can be achieved through various recording techniques. Utilizing a dynamic microphone like the Shure SM57 to capture your amp’s sound is essential. Position the mic close to the speaker cone at a 90-degree angle to harness optimal treble response.
To maintain a clean signal, confirm your recording levels hover around -12dBFS, thereby avoiding digital distortion. Experimenting with mic placement and amp settings will help you discover the ideal tone. Additionally, using isolation cabinets or load boxes can greatly minimize noise and enhance recording quality.
| Equipment | Function | Best Practice |
|---|---|---|
| Focusrite Scarlett 2i2 | Audio Interface | Set input to Hi-Z |
| Shure SM57 | Dynamic Microphone | Position at 90-degree angle to cone |
| Isolation Cabinet | Noise Reduction | Use to minimize external noise |
These methodologies are foundational to capturing the true character of your electric guitar, guaranteeing a professional and polished recording.
Using Amp Simulators
Harnessing the power of amp simulators can revolutionize your home recording setup by offering an extensive array of virtual amplifiers and effects, eliminating the need for cumbersome physical gear.
Amp modeling technology allows guitarists to emulate the distinctive sounds of various amplifiers and effects within a digital environment. Popular Digital Audio Workstations (DAWs) like GarageBand and Logic Pro provide built-in amp and pedal models at no extra cost, making it easier for musicians to engage in tone shaping without significant investment.
For those seeking more sophisticated options, high-quality amp simulation software such as Neural DSP and Bias FX offers unparalleled customization. By adjusting parameters like gain, EQ, and room ambiance, users can achieve a realistic and sonically pleasing output. Experimenting with different amp models and configurations can lead to unique tones and enhance the quality of your recordings.
- Neural DSP and Bias FX: Top-tier software offering extensive amp and effect libraries.
- Built-in DAW Models: Accessible options within GarageBand and Logic Pro for beginners.
Amp simulators therefore provide a versatile, cost-effective solution for home recording that caters to both novice and professional guitarists.
Monitoring and Playback
Achieving high-quality monitoring and playback is paramount for guaranteeing accurate sound assessment and effective mix decisions during home recording sessions. Proper monitoring techniques begin with selecting appropriate equipment, such as studio monitors or high-quality headphones. Models like the Mackie CR Series or Audio-Technica ATH-M50x are favored for their precise sound reproduction, which is essential for identifying nuances in your guitar recordings.
Latency management is another critical aspect of monitoring. Aim for latency levels below 10 milliseconds to avoid timing discrepancies that can disrupt both performance and playback. Direct monitoring via an audio interface, such as the Focusrite Scarlett series, can greatly reduce latency, providing real-time feedback and a more seamless recording experience.
Playback optimization involves regularly calibrating your monitoring setup. This includes adjusting volume levels and evaluating room acoustics to guarantee that your environment is conducive to accurate sound representation. Techniques such as room treatment with acoustic panels can help mitigate issues like standing waves and reflections, further enhancing playback fidelity.
Editing and Mixing Tracks
After guaranteeing accurate monitoring and playback, the next step in the recording process involves meticulously editing and mixing your guitar tracks to achieve a professional sound.
Begin by organizing your tracks in the Digital Audio Workstation (DAW), naming them appropriately, and grouping similar instruments. This organization facilitates efficient navigation and clarity during the editing process.
Employ editing techniques such as comping to select the best sections from multiple takes. This guarantees a polished performance by capturing the standout elements of each recording.
Next, apply EQ adjustments to each track to enhance clarity. Focus on cutting unnecessary low frequencies and boosting essential midrange frequencies to achieve a balanced mix.
Utilize compression to control the dynamic range of your tracks. This helps maintain consistent levels and adds punch to your guitar recordings without sacrificing natural dynamics.
- EQ Adjustments: Enhance clarity by cutting low frequencies and boosting midrange.
- Compression: Maintain consistent levels and add punch without losing dynamics.
Experiment with reverb and delay effects to create depth and space in your mix. However, exercise caution in their application to avoid muddying the overall sound, guaranteeing each element retains its distinct presence within the mix.
Frequently Asked Questions
How to Get Started Recording Guitar at Home?
To get started recording guitar at home, establish a home studio with a quality audio interface, select an efficient DAW, and employ proper recording techniques, including ideal microphone placement and gain settings, to achieve professional sound quality.
How Do You Prepare a Guitar for Recording?
To prepare a guitar for recording, guarantee meticulous guitar maintenance, including tuning, intonation, and string cleaning. Set the action and neck relief accurately. Use fresh strings for ideal tone shaping, enhancing clarity, brightness, and sustain.
What Equipment Do I Need to Record My Guitar?
To record your guitar, essential equipment includes an audio interface like the Focusrite Scarlett 2i2, various microphone types (e.g., Shure SM57 for electric, condenser mics for acoustic), a DAW, studio monitors or quality headphones, and additional accessories.
How to Learn Guitar at Home for Beginners Step by Step?
To learn guitar at home as a beginner, engage in regular guitar practice, utilize online lessons for structured guidance, focus on mastering basic chords and scales, and participate in online communities for feedback and motivation.
Conclusion
Mastering the art of recording guitar at home necessitates meticulous attention to detail across various stages, from setting up an ideal recording space and selecting appropriate gear to effectively connecting equipment and employing amp simulators.
Whether capturing the nuances of acoustic strings or the electrifying tones of an electric guitar, the process culminates in precise monitoring, playback, and the nuanced editing and mixing of tracks.
Achieving professional-quality recordings demands both technical proficiency and creative insight.


