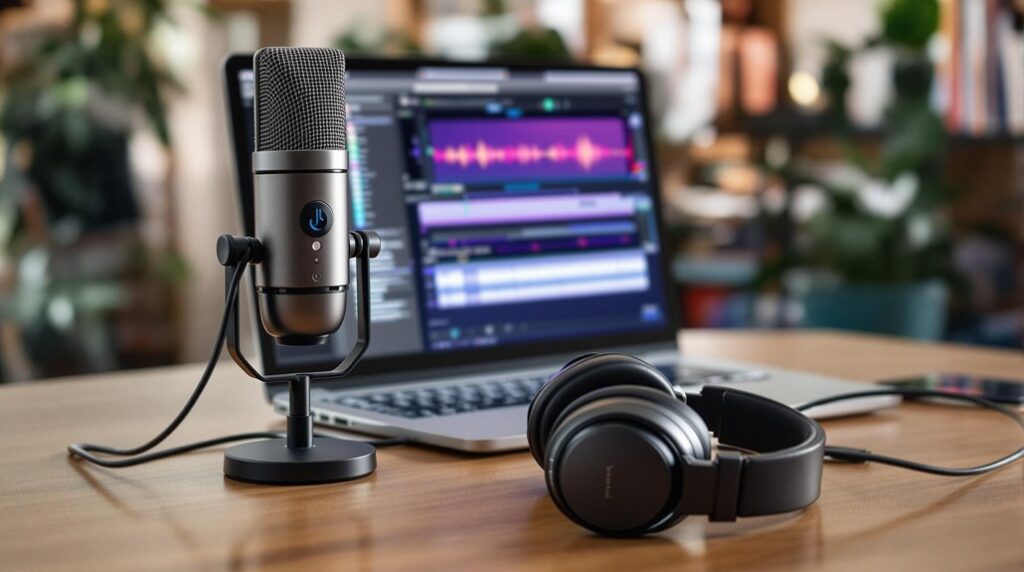
To record two USB microphones in Audacity, first select compatible mics and guarantee functionality. For Mac users, create an Aggregate Device using Audio MIDI Setup; Windows users may need VoiceMeeter. Connect both mics and update system drivers. In Audacity, set preferences for 2-channel (stereo) recording, matching project rates (44100 Hz recommended). Monitor input levels for peak sound, adjusting as necessary. Click the Record button to start capturing audio, while regularly checking waveforms. Once satisfied, save your project and export in desired formats. Following these steps will guarantee a smooth recording process and enhance your audio quality. More details will further clarify the process.
Key Takeaways
- Select compatible USB microphones with similar specifications and test each individually before combining them in Audacity.
- For Mac, create an Aggregate Device using Audio MIDI Setup; Windows users may need VoiceMeeter for simultaneous recording.
- Set Audacity to 2-channel (stereo) recording mode and ensure the project rate matches mic sample rates.
- Monitor input levels during recording, aiming for peaks between -12 dB and -6 dB for optimal sound quality.
- Save the project regularly and export using standard audio formats, ensuring to normalize volume levels for consistency.
Choose Your Microphones
Choosing the right microphones is vital for effective recording in Audacity, particularly when working with two USB microphones. It is important to select compatible USB models to prevent setup conflicts.
Aim for microphones with similar specifications, such as sensitivity and frequency response, to guarantee consistent audio quality during recordings. In addition, opt for USB microphones that are known to function well together; some models may interfere with each other, leading to potential setup issues.
Before combining the microphones in Audacity, individually test each one to confirm they operate correctly. Moreover, be aware that recording with two USB microphones may necessitate additional software, such as VoiceMeeter, to effectively manage audio inputs within the Audacity platform. Additionally, consider microphones with excellent sound quality to enhance your recordings.
Check Operating System Compatibility
When working with two USB microphones, verifying the compatibility of your operating system is a necessary step to guarantee seamless recording.
Windows operating systems often face limitations when recording from multiple USB microphones simultaneously, potentially requiring third-party software solutions. In contrast, Mac users can utilize the Audio MIDI Setup to create an Aggregate Device, effectively combining multiple USB audio sources into one.
For Linux systems, the Jack Audio System offers a robust method for facilitating multi-device recording. Additionally, it is essential to check operating system compatibility with your audio interface to confirm it can handle multiple USB microphones. Furthermore, ensuring that your system supports the necessary technical specifications is crucial for optimal performance during recording sessions.
Finally, verify that your operating system drivers are updated to avoid any recognition issues during your recording sessions.
Set Up Aggregate Device
To record two USB microphones simultaneously in Audacity, it is necessary to configure an Aggregate Device through the Audio MIDI Setup on a Mac.
Guarantee that both microphones are connected prior to this configuration to allow their inclusion in the virtual device.
After setup, testing the device’s functionality is essential to verify that both microphones capture audio correctly before proceeding with the recording session.
Configure Audio MIDI Setup
Creating an Aggregate Device in the Audio MIDI Setup application is crucial for recording two USB microphones simultaneously in Audacity on a Mac.
Begin by opening the Audio MIDI Setup and selecting both microphones from the device list. Check the boxes next to them to combine their inputs into a single Aggregate Device.
Verify this Aggregate Device is configured with the appropriate sample rate and bit depth, typically set at 44100 Hz and 16-bit, to maintain peak audio quality.
Once configured, select the Aggregate Device as the input in Audacity’s Device Toolbar to facilitate multi-mic recording.
Additionally, adjust the input levels within the Aggregate Device settings to achieve balanced audio capture, preventing distortion during recording.
Test Device Functionality
Testing the functionality of the Aggregate Device is an essential step to guarantee that both USB microphones are set up correctly and are capable of recording simultaneously in Audacity.
Begin by ensuring that each microphone is properly connected and recognized in the Audio MIDI Setup. Once confirmed, open Audacity and select the newly created Aggregate Device from the Device Toolbar.
To conduct a thorough test, speak into each microphone individually while monitoring the input levels in Audacity. This will allow you to verify that both devices are capturing sound effectively.
Be vigilant for potential synchronization issues, as differing internal clock timings of the USB mics may necessitate adjustments during post-production to achieve peak audio quality.
Install Necessary Software
Installing the necessary software is essential for effectively recording from two USB microphones in Audacity.
Begin by downloading and installing VoiceMeeter, a powerful virtual audio mixer that enables the simultaneous use of multiple audio devices. This software will allow you to aggregate the inputs from both USB microphones into a single recording source.
After installation, configure VoiceMeeter as your default recording device in the Windows sound settings. This step is vital to guarantee that both microphones can be utilized together.
In Audacity, select VoiceMeeter from the Device Toolbar to capture audio from both inputs. Verify that Audacity is set to record in 2-channel (stereo) mode to facilitate dual microphone input.
This preparation will streamline your recording process.
Configure Audacity Settings
To successfully configure Audacity for recording two USB microphones simultaneously, start by accessing the preferences under the “Devices” tab.
Set Audacity to 2-channel (stereo) recording mode to facilitate dual input. If using an audio interface, verify it supports multiple USB inputs, or for Mac users, create an aggregate device to combine the USB mics into a single input source recognized by Audacity.
In the Device Toolbar, select the appropriate audio interface or aggregate device as the recording device. During recording, monitor input levels to prevent clipping and maintain a balanced sound. Additionally, ensure the plugin compatibility with your system to avoid any issues during recording.
After completion, utilize the “Split Stereo to Mono” feature to separate audio channels for individual editing and adjustments, enhancing workflow efficiency.
Select Input Sources
To successfully record from two USB microphones in Audacity, it is essential to first identify and guarantee both microphones are properly connected and recognized by the operating system.
For Mac users, configuring an Aggregate Device in Audio MIDI Setup will enable the microphones to function as a single input source.
Windows users can utilize third-party software like VoiceMeeter to facilitate the routing of audio from both microphones into Audacity.
Identify USB Microphones
Identifying USB microphones as input sources is fundamental for achieving high-quality audio recordings in Audacity.
To record with two USB mics, verify both microphones are properly connected to your computer and recognized by the operating system. For Windows users, navigate to the Sound settings and confirm that both microphones are visible under the Recording tab.
Mac users should access the Audio MIDI Setup to create an Aggregate Device, which combines the two USB mics into a single input source.
In Audacity, select this Aggregate Device or your preferred audio interface from the Device Toolbar to facilitate simultaneous recording. This step is vital for guaranteeing each microphone is effectively utilized for peak audio quality during recording sessions.
Configure Audacity Settings
Configuring the settings in Audacity is essential for effectively managing multiple USB microphones as input sources. To record with 2 USB mics, follow these steps to guarantee proper setup:
- Open Audacity and navigate to the “Edit” menu, then select “Preferences” to access Audio Settings.
- In the “Devices” section, select either “MME” or “Windows WASAPI” as the Host, allowing multiple USB microphones to be recognized.
- Choose your primary USB microphone from the “Recording Device” dropdown; if on Mac, create an Aggregate Device, or utilize VoiceMeeter on Windows.
Additionally, set Audacity to “2-channel (stereo)” in the “Audio Channels” dropdown.
After recording, employ the “Split Stereo to Mono” feature to edit each microphone track independently for enhanced sound control.
Adjust Input Levels
Adjusting input levels is essential for achieving high-quality recordings with dual USB microphones in Audacity.
Begin by confirming both microphones are selected as input devices in the Device Toolbar. Set the project rate to match their sample rates, commonly 44100 Hz or 48000 Hz, to prevent audio quality issues.
To adjust input levels effectively, monitor the waveform levels during testing, targeting peaks between -12 dB and -6 dB for maximum quality. Utilize the “Monitor Input” feature to listen to real-time levels, allowing for precise adjustments before recording. Applying EQ effects can further enhance the clarity of your audio by adjusting frequency balance.
After capturing your audio, apply the “Normalize” effect to each track to guarantee consistent volume levels across both microphones, thereby enhancing overall audio clarity and professionalism.
Monitor Audio Quality
To guarantee ideal audio quality while recording with two USB microphones in Audacity, it is essential to monitor both the input levels and the live audio being captured. This proactive approach helps prevent clipping and distortion, ensuring a professional sound.
- Utilize the “Monitor Input” feature to listen to live audio, enabling real-time adjustments.
- Regularly check the waveforms in Audacity to visually assess audio levels and maintain them within the best range.
- Implement the “Meter Toolbar” to monitor dB levels, ensuring they remain balanced and do not exceed 0 dB.
Conducting a brief test recording before the main session can further enhance audio quality, providing valuable feedback for necessary adjustments based on playback analysis. Additionally, paying attention to vocal clarity can greatly improve the final recording quality by allowing for better mixing and processing of the audio.
Start Recording
To initiate the recording process in Audacity with two USB microphones, it is essential to first configure the audio settings to reflect the combined input from your interface or virtual mixer.
Next, select the appropriate recording devices in the Device Toolbar and guarantee that Audacity is set to a 2-channel recording mode.
Finally, monitor input levels carefully to achieve ideal sound quality before clicking the Record button to start capturing audio.
Configure Audio Settings
Before initiating the recording process in Audacity, it is essential to assure that the audio settings are properly configured to accommodate both USB microphones. This configuration guarantees seamless operation and ideal audio quality for your project.
Follow these steps:
- Install a virtual audio mixer, such as VoiceMeeter, to manage multiple inputs.
- Set up the USB microphones in the Windows sound settings for proper detection.
- In Audacity, select the VoiceMeeter virtual input from the Device Toolbar and configure the recording mode to 2-channel (stereo) to facilitate independent audio tracks for each mic.
After recording, remember to utilize the “Split Stereo to Mono” feature in Audacity for refined control over each microphone’s audio during post-production.
Select Recording Devices
With the audio settings properly configured, the next step involves selecting the appropriate recording devices to initiate the recording process.
On a Mac, set up an aggregate device to combine both USB microphones into a single input source. Alternatively, Windows users can utilize a virtual audio mixer like VoiceMeeter for this purpose.
In Audacity, verify the combined input is recognized by selecting it in the Device Toolbar. It is essential to match the project rate to the microphones’ sample rates to prevent synchronization issues.
Create a new stereo track to facilitate simultaneous recording on separate channels. Conduct a test recording to confirm effective sound capture from both recording devices, adjusting levels as needed for a balanced audio output.
Monitor Input Levels
Once both USB microphones are connected and recognized by Audacity, monitoring input levels becomes essential for achieving ideal sound quality.
To guarantee peak recording, take the following steps:
- Access the “Mixer Toolbar” to adjust input levels for each microphone, aiming to avoid clipping while capturing a clear signal.
- Utilize the “Meter Toolbar” for real-time audio level monitoring, targeting peaks around -6 dB to -12 dB for best results.
- Enable the “Software Playthrough” option to audibly evaluate the input audio during recording, guaranteeing clarity and appropriate volume.
Additionally, conduct a brief test recording followed by playback to confirm that both microphones effectively capture sound and maintain balanced output levels before proceeding with the final recording.
Save and Export Project
To secure your progress in Audacity after recording with two USB microphones, navigate to the “File” menu and select “Save Project.” This action allows you to preserve your work in the Audacity project format (.aup), enabling future edits and modifications without losing any audio data. Subsequently, to export your recording as a standard audio file, choose “Export” in the “File” menu and select your preferred format, such as WAV, MP3, or OGG. Remember to check the final volume levels using the “Normalize” effect for maximum clarity. Additionally, you can add metadata during export to enhance your audio file’s information. Proper loudness normalization ensures that your audio meets the standards required for streaming platforms.
| Action | Description |
|---|---|
| Save Project | Preserves your work in .aup format |
| Export | Converts project to standard audio formats |
| Normalize | Guarantees consistent volume levels |
| Add Metadata | Enriches file with title, artist, album, genre |
Frequently Asked Questions
Can You Use Two USB Microphones at Once?
Yes, you can use two USB microphones simultaneously, but microphone compatibility varies by operating system. macOS supports creating an Aggregate Device, while Windows typically requires third-party software for multi-microphone management, ensuring effective simultaneous recording.
Can Audacity Record 2 Sources at Once?
Audacity does not natively support recording from two sources simultaneously. However, through proper audio configuration using virtual devices or interfaces, users can achieve this functionality, ensuring effective recording of multiple audio inputs with careful setup and testing.
How to Record Multiple Audio Inputs in Audacity?
To record multiple audio inputs in Audacity, utilize an audio interface that supports multiple channels. Configure the interface with Audacity, ensuring correct device selection and project settings, enabling simultaneous capture and subsequent editing of individual audio tracks.
How to Connect 2 Microphones to 1 Input?
To connect two microphones to one input, guarantee microphone compatibility with your interface. Utilize a USB audio interface or create an Aggregate Device on macOS, guaranteeing sample rates match to avoid synchronization issues during recording.
Conclusion
In summary, recording two USB microphones simultaneously in Audacity requires careful preparation and configuration. By selecting compatible microphones, establishing an aggregate device, and configuring software settings appropriately, users can guarantee ideal audio capture. Monitoring input levels and audio quality throughout the process further enhances the recording outcomes. Following the outlined steps facilitates a streamlined recording experience, ultimately leading to a successfully saved and exported audio project suitable for various applications.