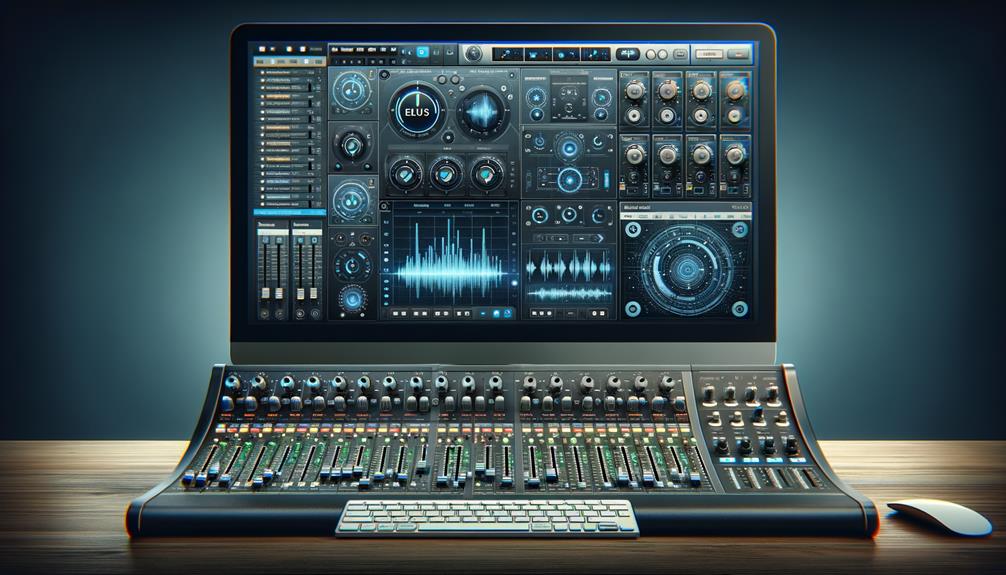
To produce beats in Logic Pro X, follow a structured approach. Begin by selecting your project settings, optimizing sample rates and tempos. Connect a MIDI controller for dynamic input and utilize the drum editor for precise note placement. Layer your beats, starting with a solid kick and snare foundation, enhanced by intricate hi-hat patterns. Explore automation and sound design techniques to further enrich your tracks. Incorporate various effects to add depth, and experiment with sampling for unique textures. Each step reveals new creative possibilities, unlocking the full potential of your music production journey. More insights await to enhance your artistry.
Key Takeaways
- Set up your project with the appropriate sample rate, bit depth, and tempo to establish a strong foundation for beat creation.
- Utilize a MIDI controller to create drum tracks, then access the drum editor for precise MIDI note placement and quantization.
- Start with a kick and snare foundation, layering hi-hat patterns and experimenting with different rhythmic variations for complexity.
- Enhance your beats by layering multiple drum sounds, applying effects, and using automation to create dynamic changes throughout the track.
- Organize your tracks and save templates to streamline your workflow, ensuring efficient access during the beat production process.
Overview of Beat Creation
Beat creation serves as the backbone of contemporary music production, providing the rhythmic foundation that drives a track’s energy and emotion. In Logic Pro X, the process might change based on the user’s approach, utilizing different elements such as MIDI controllers, drawn notes, or audio loops.
The software features advanced tools like the Drum Kit Designer and Drum Machine Designer, enabling extensive customization of acoustic and electronic sounds. Essential components of a beat include kick, snare, and hi-hats, which can be layered with additional percussion for depth. Furthermore, quantizing in the drum editor guarantees precision, while intuitive editing tools foster creative expression. With diverse learning resources available, users can enhance their skills in beat creation and music production techniques. Additionally, utilizing MIDI programming allows for total creative control over drum patterns, enhancing the overall beat-making experience.
Setting Up Your Project
Setting up your project in Logic Pro X is essential for a streamlined creative process.
Begin by selecting your project settings, ensuring the tempo and time signature align with your musical vision.
Then organize your track layout for ideal accessibility.
This foundational step sets the tone for your beat-making journey, allowing for efficient navigation and a clear focus on your sound design. Additionally, be sure to check compatibility with Audio Units plugins to ensure a smooth workflow.
Selecting Project Settings
Creating a solid foundation for your music project is essential, and selecting the right project settings in Logic Pro X is the first step to achieving that.
Begin by opening Logic Pro X and selecting “New Project,” where project settings importance becomes apparent. Focus on sample rate considerations; 44.1 kHz is standard for most music.
Next, make informed bit depth choices—opt for 16-bit for general use, or 24-bit for superior quality. Set your project tempo, starting at 100 BPM, and guarantee the time signature aligns with your genre, typically 4/4.
Remember to save your project early and frequently, employing a structured naming system to maintain organization throughout your creative journey, thereby laying the groundwork for a successful beat-making experience.
Organizing Track Layout
To guarantee a smooth and efficient workflow in Logic Pro X, organizing your track layout is essential as it directly impacts your creative process.
Begin by creating a new project and setting an appropriate tempo, around 100 BPM, to establish a solid foundation.
Implement effective naming conventions by clearly labeling your tracks (e.g., kick, snare, hi-hat, percussion) to enhance clarity.
Employ color coding techniques to differentiate between track types; for instance, use yellow for pre-made drum loops and distinct colors for various instruments.
Additionally, utilize track stacks for drums to group related elements, simplifying effects management.
Regularly save your project and adopt versioning practices, ensuring you can easily revert to previous stages throughout your beat-making journey.
Using a MIDI Controller
To harness the full potential of your MIDI controller in Logic Pro X, start by creating a dedicated software instrument track tailored to your project.
Choose between the rich acoustic textures of the Drum Kit Designer or the cutting-edge sounds of the Drum Machine Designer to set the foundation for your beats.
With the tempo aligned and your sounds selected, you’re ready to release your creativity and bring your rhythmic ideas to life. Additionally, understanding MIDI editing techniques will enhance your ability to manipulate and refine your beats effectively.
Setting Up Tracks
Setting up tracks in Logic Pro X using a MIDI controller opens up a world of creative possibilities for producers.
Begin by connecting your MIDI controller to your computer, ensuring it is recognized through MIDI preferences adjustment in the Logic Pro menu.
Next, create a new software instrument track, selecting your preferred drum sounds—whether from the Drum Kit Designer for acoustic textures or the Drum Machine Designer for electronic beats.
Set your song tempo, ideally starting at 100 BPM for a solid rhythmic foundation.
For streamlined workflow, consider track template creation to save your preferred settings.
As you record, play beats and utilize the quantization feature to align your patterns precisely, enhancing the overall sonic integrity of your production.
Selecting Drum Sounds
While crafting your beat in Logic Pro X, selecting the right drum sounds is essential for establishing the desired mood and energy of your track. Begin by creating a software instrument track, then utilize either the Drum Kit Designer for organic acoustic sounds or the Drum Machine Designer for electronic samples. Logic Pro X’s extensive library offers genre-specific kits that cater to various styles, enhancing your drum sound selection process. Adjust your song tempo to 100 BPM for ideal alignment with your selected beats. Using a MIDI controller, you can play and record these sounds in real-time, resulting in an expressive performance that breathes life into your track.
| Drum Type | Characteristics |
|---|---|
| Acoustic Drums | Organic, rich textures |
| Electronic Drums | Sharp, versatile, often synthesized |
| Genre-Specific Kits | Tailored sounds for specific genres |
| MIDI Controller | Enables expressive real-time playing |
Drawing Beats With MIDI
Creating intricate beats with MIDI in Logic Pro X opens up a world of sonic possibilities for producers.
Begin by accessing the drum editor, where you can utilize the pencil tool for precise MIDI note placement, ensuring each drum sound aligns perfectly with your vision. Employ quantization techniques to synchronize your drawn MIDI notes with the project’s tempo, enhancing rhythmic precision.
Experiment with adjusting the lengths and positions of these notes to facilitate dynamic rhythm creation, adding depth and variation to your patterns. To further enrich your track, incorporate additional percussion elements, such as shakers and claps, by adding corresponding MIDI notes.
The paintbrush tool also allows for efficient replication across measures, streamlining your beat production process. Additionally, understanding the distinction between mixing and mastering can significantly enhance the overall quality of your final mix.
Integrating Drummer Tracks
Enhance your beat-making process by integrating Drummer tracks in Logic Pro X, which offer a wealth of customizable pre-made drum loops tailored to your music’s unique style.
These tracks allow for seamless integration of various drummer styles, providing a foundation that is both innovative and flexible.
To optimize your Drummer tracks, consider the following:
- Track Customization: Choose from diverse drummers that represent different genres, ensuring the perfect fit for your project.
- Dynamics Control: Utilize the “Fills” and “Swing” controls to shape the complexity and groove of the performance, adding a natural feel.
- Element Selection: Disable specific drum components, like the kick or snare, to focus on the desired elements that improve your mix.
Additionally, remember to apply gain staging to maintain ideal levels and prevent distortion in your beats.
With these features, you can create compelling rhythms that uplift your beats.
Essential Beat Components
Building on the rhythmic foundation established by Drummer tracks, understanding the core components of a beat is essential for producing compelling music. A basic structure typically includes the kick, snare, and hi-hats, which collectively establish a solid rhythmic foundation.
Kicks anchor the beat on beats two and four, while snares punctuate the backbeat, enhancing the groove. Hi-hats, played in eighth or sixteenth notes, introduce rhythmic complexity and texture.
To further raise your beat, incorporate additional percussion elements like toms, shakers, and tambourines, which add depth and nuance. Engaging in sound experimentation with various drum kits allows for beat variations, ensuring each creation possesses a unique sonic identity that captivates listeners and inspires further creativity. Proper adjustment of input gain is also crucial for achieving optimal sound fidelity, which can significantly enhance the clarity of your beats.
Layering and Structuring Beats
Layering and structuring beats is essential for crafting a compelling sonic environment in Logic Pro X.
Start with a solid kick and snare foundation, then enhance your rhythm with diverse hi-hat patterns and dynamic percussion elements to create texture and depth. Implementing high-pass filters can also help in defining the frequency range of your layers, ensuring a cleaner mix.
Kick and Snare Layering
Kick and snare layering is a fundamental technique that can transform a simple rhythm into a dynamic and engaging beat. Mastering kick drum techniques can boost your production by emphasizing the groove.
Here are three essential steps to evaluate:
- Kick Placement: Start with kicks on beats one and three, layering additional kicks on offbeats for depth.
- Sound Selection: Combine kick samples, such as a punchy kick paired with a deeper sub-kick, to enhance fullness.
- Snare Variations: Position snares on beats two and four, and experiment with adding claps or rim shots to maintain listener engagement.
Adding Percussion Elements
Once you have established a solid foundation with your kick and snare, the next step involves enriching your beat with percussion elements that enhance its complexity and depth.
Employ percussion layering techniques by integrating organic sounds, such as toms and tambourines, using the Drum Kit Designer, alongside electronic elements from the Drum Machine Designer. This blend fosters a unique audio palette.
Make dynamic rhythm adjustments by varying the velocity and timing of these elements, ensuring a groove that captivates listeners. Experiment with layering claps over snares and juxtaposing multiple hi-hat patterns to create a more engaging beat structure.
Balancing organic versus electronic textures will ultimately uplift your composition, providing both richness and intricacy to your musical creation.
Hi-Hat Patterns and Variations
Crafting compelling hi-hat patterns is essential for adding rhythm and texture to your beats. To achieve engaging hi-hat grooves, consider the following techniques:
- Closed and Open Hi-Hats: Combine closed hi-hats on off-beats and open hi-hats on the upbeat to create dynamic rhythmic syncopation.
- Rhythmic Variations: Experiment with 16th notes, triplet patterns, or polyrhythms to develop complex hi-hat sequences that uplift your sound.
- Sound Layering: Layer multiple hi-hat samples with varying velocities and panning to enhance depth and create a rich stereo image.
Utilizing quantization in Logic Pro X guarantees precision, while selective unquantized notes can add a human touch.
Adding effects like reverb or delay can further enhance your hi-hat tracks, making them stand out cohesively within your mix.
Advanced Recording Techniques
Enhance your beat-making process by mastering advanced recording techniques in Logic Pro X. Employ advanced recording methods such as layering multiple drum sounds, which can boost your tracks’ depth and richness. Utilize automation for dynamic changes in volume and effects, fostering movement and interest throughout your beat. Implement swing settings in the MIDI editor to infuse a human touch, making your compositions groovier and less rigid. Additionally, consider boosting vocal presence by applying EQ techniques to ensure clarity in any vocal elements you incorporate into your beats.
| Technique | Description |
|---|---|
| Layering | Combine sub kicks with primary kicks for richness. |
| Automation | Create dynamic volume and effect changes. |
| Flex Time & Pitch | Adjust timing and pitch for precision and creativity. |
Leverage built-in effects for creative audio manipulation, ensuring your beats resonate with texture and complexity.
Sampling and Sound Design
As you explore the world of sampling and sound design in Logic Pro X, the ability to transform ordinary audio into extraordinary beats becomes paramount.
Mastering this process involves several key techniques:
- Sample Manipulation Techniques: Use the Sampler or Quick Sampler to adjust pitch, stretch time, and creatively modify your samples.
- Sound Layering Strategies: Layer multiple samples across separate tracks, carefully balancing their volumes and panning to create a rich, cohesive sound.
- Effects Processing Tips: Enhance your samples with built-in effects such as reverb, delay, and distortion, adding depth and character that boosts your beats. Additionally, utilizing Audio Units (.component) plugins can significantly enhance your sound design capabilities.
Learning Resources Available
While mastering beat creation in Logic Pro X can seem intimidating, a wealth of learning resources is readily available to empower both new and experienced producers.
An extensive free course on recording offers in-depth insights into beat creation techniques, covering methods such as MIDI controllers, note drawing, and audio loops. This resource is complemented by a plethora of video tutorials, which provide visual guidance and practical exercises to enhance understanding.
Additionally, platforms like YouTube and Spotify allow users to explore personal music while engaging with real-world examples. The continuous community engagement fostered through viewer feedback and upcoming content not only enriches the learning experience but also creates a supportive environment for sharing insights on music production in Logic Pro X. Furthermore, blogs like Produce Like A Pro provide comprehensive tutorials that cater to various skill levels, offering valuable insights and techniques for aspiring music producers.
Frequently Asked Questions
Can You Make Beats on Logic Pro X?
Yes, beat making in Logic Pro X is highly versatile, offering various software options that enhance music production. With tools for MIDI control, audio loops, and advanced editing techniques, it caters to diverse musical styles and creativity.
How to Make Beats for Beginners?
For beginners in beat making, mastering essential plugins and exploring diverse rhythm patterns are vital. Experiment with beat making techniques to create unique sounds, progressively layering elements to develop your skills and enhance musical creativity.
Is Logic Pro Good for Beginners?
Logic Pro is an excellent choice for beginners in music production, offering intuitive tools and extensive resources. With beginner tips readily available, users can effectively explore their creativity and develop their unique sound through innovative features.
How to Make a Beat Drop in Logic Pro?
To craft a compelling beat drop, employ beat drop techniques that emphasize sound layering and rhythm variations. Build tension with automation, integrate dynamic fills, and strategically reduce elements for an impactful, energetic resurgence that captivates listeners.
Conclusion
In summary, the process of beat creation in Logic Pro X encompasses a diverse array of techniques and tools, from project setup to advanced recording methods. Mastery of MIDI, integration of drummer tracks, and the art of sound design are essential for crafting unique compositions. By exploring the various layers and structures within beats, producers can enhance their musical productions. Continuous engagement with available learning resources fosters growth and innovation in the ever-evolving environment of music production.