To increase audio volume in Audacity like a pro, first make sure your track is prepared in a soundproof environment using a quality microphone. Set recording levels to peak around -6 dB to avoid distortion. Use the Amplify effect via the Effect menu to adjust volume precisely while preventing clipping. Afterward, apply Loudness Normalization to make certain consistent dynamic levels, targeting around -23 LUFS. Monitor levels with Audacity’s meters and maintain exported audio under -6 dB for clarity. Professional touches like the Compressor effect can balance disparities while preserving dynamics. Uncover deeper insights by exploring the full range of advanced techniques available.
Key Takeaways
- Use the Amplify effect via Effect → Volume and Compression → Amplify to boost audio volume without clipping.
- Ensure amplified audio peaks below -6 dB to prevent distortion during export.
- Preview changes to confirm the increase does not introduce distortion or unwanted noise.
- Apply the Compressor effect with a threshold around -18 dB to balance volume disparities.
- Maintain clarity by avoiding over-compression and preserving natural audio dynamics.
Understanding Audacity’s Interface
Audacity’s interface is an extensive suite of tools and controls designed to facilitate efficient audio editing and production. Key components include multiple toolbars, such as transport and track controls, which allow users to manage playback, recording, and navigation seamlessly.
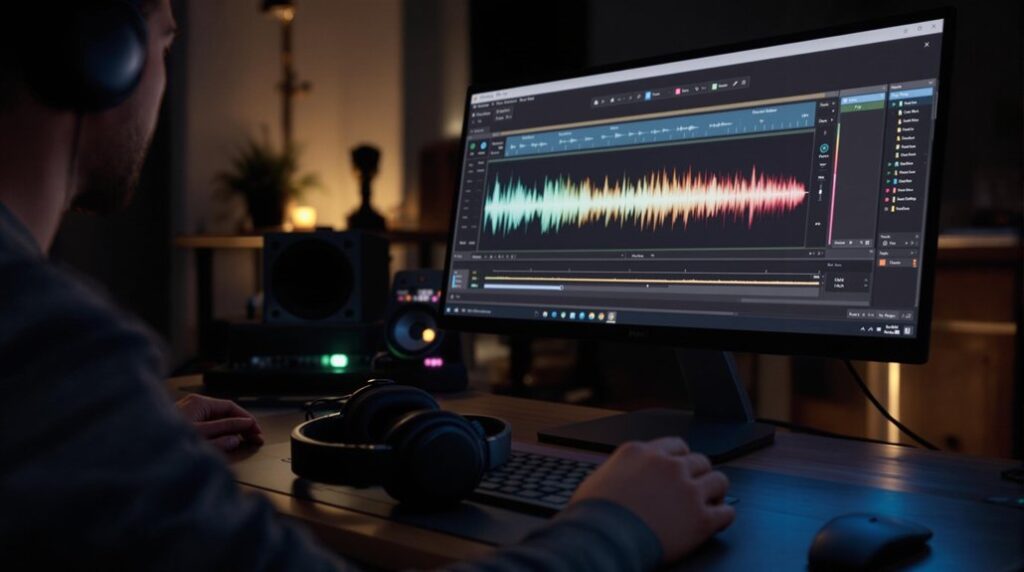
The main workspace, featuring audio waveforms, enables precise visual editing with tools like selection, trimming, and amplification, essential for adjusting volume levels accurately. The Mixer Toolbar provides a straightforward method for adjusting individual track volumes and panning, ensuring balanced audio levels across multiple tracks.
Additionally, the Effect menu offers powerful options like Amplify, Normalize, and Compressor to enhance recordings. Customization is possible via View > Toolbars, allowing users to tailor the interface to specific editing needs and optimize the management of volume levels. Understanding the Selection Tool is crucial for precise audio trimming, further enhancing your editing capabilities.
Preparing Your Audio Track
To optimize audio quality before increasing volume in Audacity, precise microphone positioning is essential; maintain a consistent distance and angle to minimize variations in sound capture.
Guarantee your recording environment is acoustically treated to reduce external noise interference, enhancing clarity.
Configure audio settings by setting the sample rate to 44.1 kHz and the bit depth to 16-bit, guaranteeing standardized quality for further processing. Additionally, using professional-grade microphones can significantly improve overall audio capture quality.
Microphone Positioning Tips
Achieving ideal audio quality in Audacity begins with proper microphone positioning. Implementing effective microphone positioning tips is essential for capturing clear audio and utilizing volume controls for optimal output.
Position your microphone 6 to 12 inches from the sound source. This distance helps balance sound clarity and minimizes background noise. Employing a pop filter reduces plosive sounds, preventing distortion.
Verify the microphone is level with your mouth to enhance sound capture and clarity. Before recording, test microphone levels by speaking at the intended volume, confirming they do not peak near 0 dB to avoid clipping.
These practices are foundational for preparing your audio track, allowing you to effectively manage volume controls in Audacity and achieve professional-grade recordings.
Recording Environment Setup
Building on effective microphone positioning, preparing your recording environment is essential for achieving high-quality audio in Audacity. A well-considered recording environment setup is vital to minimize unwanted noise and enhance the volume clarity of your recordings.
Begin by selecting a quiet location, utilizing soundproofing materials such as foam panels or blankets to absorb ambient noise. This foundational step markedly reduces interference from external noise sources like fans or air conditioning.
Additionally, employ a high-quality microphone in close proximity to the sound source to guarantee clear capture. Integrate a pop filter to diminish plosive sounds, thereby improving audio fidelity.
Performing a sound check prior to recording is important; adjust levels to prevent clipping and ascertain they remain comfortably below 0 dB.
Audio Settings Configuration
Configuring your audio settings in Audacity with precision is vital to achieving ideal sound quality in your recordings. Start by setting the sample rate to 44.1 kHz and the bit depth to 16-bit, guaranteeing standard audio quality for most applications.
Opt for mono recording on voice tracks to maintain clarity, preventing unnecessary complexity in your volume dynamics. Adjust input levels meticulously, keeping them below 0 dB to avoid distortion, which is critical for clean audio capture.
Enabling “Software Playthrough” allows you to monitor sound in real-time, facilitating immediate adjustments to microphone settings. Perform a thorough sound check in a quiet environment, eliminating background noise that could interfere with volume consistency and compression efficiency.
This preparation guarantees peak audio track configuration.
Adjusting Recording Levels
To effectively adjust recording levels in Audacity, it is essential to set your levels to peak around -6 dB, minimizing the risk of distortion and clipping during audio capture.
Begin by utilizing a high-quality microphone positioned close to the sound source for ideal audio clarity. Conduct a preliminary sound check to detect and mitigate any extraneous noise, ensuring precise level adjustments.
Configure Audacity’s microphone settings to a 44.1 kHz sample rate and 16-bit depth, aligning with industry standards for superior audio fidelity.
Implement “Software Playthrough” in Audacity to facilitate real-time monitoring of recording levels, providing immediate feedback and control.
While adjusting recording levels, consider the potential need for Make-up Gain to achieve the desired output without compromising audio integrity. Additionally, understanding budget-friendly hardware can greatly enhance your recording setup without breaking the bank.
Using the Amplify Effect
The Amplify effect in Audacity is an essential tool for adjusting audio volume while preventing clipping, which is achieved by automatically suggesting a suitable gain level that keeps audio peaks within the 0dB limit.
Users can access this feature by maneuvering to Effect → Volume and Compression → Amplify, where they can set the desired gain level according to the current loudness of the track.
To guarantee audio integrity, it is important to monitor the levels using Audacity’s level meters, maintaining the amplified audio below the -6dB threshold to avoid clipping during export. Additionally, managing headroom and dynamics is crucial to ensure that the final output retains its clarity and impact.
Amplify Without Clipping
When aiming to amplify audio in Audacity without introducing clipping, it is essential to carefully manage your waveform levels.
Begin by selecting the desired audio segment and guiding to Effect → Volume and Compression → Amplify. This feature intelligently sets the gain so that peak levels reach a peak 0dB without exceeding it, thereby preventing clipping.
Monitor audio levels vigilantly as clipping occurs when surpassing the 0dB threshold, potentially degrading quality. Audacity’s digital amplification can greatly boost volume while maintaining audio integrity.
Employ the preview function to verify that increases do not introduce distortion. Prior to exporting, confirm mix levels are kept below -6dB to guarantee a clean, clipping-free final output, preserving professional sound quality throughout the process.
Adjusting Gain Levels
Master the art of adjusting gain levels in Audacity by utilizing the Amplify effect, a powerful tool designed for precise audio enhancement.
Begin by selecting your desired audio section and maneuvering to Effect → Volume and Compression → Amplify. Here, Audacity provides a suggested gain level to guarantee peaks are maximized at 0 dB without causing distortion.
This effect allows for both positive and negative gain adjustments, offering flexibility to tailor audio levels precisely. Be vigilant of potential clipping, which occurs if levels surpass 0 dB; Audacity automatically applies attenuation to safeguard sound quality.
For ideal results, maintain final mix levels below -6 dB to prevent clipping during export, ensuring clarity and fidelity in your audio output.
Applying Loudness Normalization
Ever wondered how to achieve consistent volume levels across all your tracks in Audacity? Applying loudness normalization is a precise technique to guarantee uniformity. First, navigate to the Effect menu and select Loudness Normalization. For best results, use the default settings, targeting a loudness level of -23 LUFS. Avoid the first option to preserve the natural dynamic range. Confirm all desired tracks are selected beforehand to apply the effect uniformly. Post-application, inspect the waveforms to confirm they reside in the -12 dB to -18 dB range, enhancing sound quality. Additionally, understanding loudness normalization standards can further improve your audio’s playback consistency across platforms.
| Step | Action |
|---|---|
| 1 | Select all tracks |
| 2 | Go to Effect menu |
| 3 | Choose Loudness Normalization |
| 4 | Check waveforms (-12 dB to -18 dB) |
Managing Dynamic Range
Having achieved consistent volume levels through loudness normalization, attention now shifts to managing the dynamic range of your audio tracks. This essential step guarantees a balanced listening experience by using the compressor effect to control disparities between the loudest and quietest parts.
In Audacity, set a threshold often around -18 dB and apply a ratio, such as 3:1 or 2:1, to regulate the dynamic range effectively. Maintaining audio levels below 0 dB is imperative to prevent distortion, while gentle compression enhances the recording’s natural sound. Proper dynamic range management can eliminate background noise and improve vocal clarity, engaging listeners more effectively. Additionally, employing dynamic compression methods can help to capture loud peaks while maintaining vocal musicality. However, avoid over-compression to preserve audio dynamics and prevent a flat, lifeless sound.
Utilizing Compression
When working with audio recordings in Audacity, utilizing compression is an essential technique for achieving balanced sound dynamics.
Compression effectively manages the dynamic range by amplifying quieter segments and controlling peaks of louder passages. To apply this, navigate to the Effects menu and select the Compressor effect.
Configure parameters such as threshold, ratio, attack, and release to fine-tune the audio dynamics. A threshold around -20 dB and a 3:1 ratio is a recommended starting point for subtle enhancement.
Maintain minimal attack and release times to preserve the audio’s natural quality while smoothing fluctuations. Avoid enabling the “Compressed based on Peaks” option to prevent distortion, ensuring a seamless compression effect that enhances the overall sound without compromising its integrity. Additionally, employing gentle compression techniques can help maintain the emotional impact of your recordings while balancing loudness.
Preventing Clipping
Preventing clipping involves several key practices. When amplifying audio in Audacity, guarantee that attenuation is applied if necessary to maintain peaks below 0 dB. Before applying effects like Amplify or Normalize, use the Mix and Render feature to confirm balanced mix levels, ideally below -6 dB, to provide ample headroom. This practice helps avoid clipping during the final export. Additionally, the Limiter effect in Audacity is an effective tool for enhancing loudness while preventing clipping by automatically reducing the volume of sections exceeding a specified threshold, guaranteeing audio integrity and clarity. Maintaining proper headroom is essential for achieving a clean, distortion-free master, allowing for adjustments without compromising audio quality.
Equalization for Clarity
Equalization for Clarity
Why is equalization essential for achieving audio clarity? Equalization is vital as it allows precise frequency adjustments to enhance vocal intelligibility and presence.
Boosting mid-range frequencies, typically between 1-3 kHz, can greatly improve speech clarity. Tailoring EQ to specific voice types, such as enhancing female vocals in the 165-255 Hz range, or male vocals between 85-155 Hz, optimizes their presence.
Additionally, cutting low frequencies below 80 Hz reduces muddiness, while a slight boost in the 5-10 kHz range adds brightness and airiness to vocals. Understanding frequency characteristics is crucial for making effective adjustments.
Audacity users can utilize the preview feature to monitor these adjustments in real-time, ensuring precision before finalizing.
- Boost mid-range frequencies for clarity.
- Tailor EQ for specific voice types.
- Cut low frequencies to reduce muddiness.
- Enhance high frequencies for brightness.
- Use Audacity’s preview feature for real-time monitoring.
Exporting for Final Use
When exporting your audio project in Audacity, selecting the appropriate format is essential to maintaining quality.
Opt for “Export as WAV” to preserve the audio’s integrity and avoid the compression artifacts that can degrade sound in formats like MP3.
Consistency in quality is achieved by exporting as a floating-point WAV file, ensuring the dynamic range is intact and the mix levels are monitored to stay below -6 dB to prevent distortion. Additionally, maintaining proper gain staging during the export process enhances the impact and professionalism of the final track.
Choosing Export Formats
Selecting the appropriate export format in Audacity is essential for achieving the desired balance between audio quality and file size, tailored to the final use of your project.
When exporting, the choice between WAV and MP3 formats is vital. WAV retains high-quality, uncompressed audio, ideal for projects requiring professional finish and archival. Utilize the “Floating Point” option to prevent clipping, ensuring that any normalize effect applied maintains its integrity.
For web distribution, MP3 offers smaller file sizes with satisfactory quality.
- WAV: High-quality, uncompressed, professional use
- MP3: Compressed, smaller size, suitable for web
- Floating Point: Prevents clipping in WAV exports
- Export Multiple: Streamlines multiple track exports
- Metadata: Include artist and title for professionalism
These choices influence the final audio quality and usability.
Ensuring Quality Consistency
To guarantee quality consistency when exporting audio for final use in Audacity, it is essential to maintain precise control over the technical aspects of the process.
Begin by exporting in the floating-point WAV format to prevent clipping and preserve sound integrity across various playback environments. Set peak amplitude levels to approximately -6 dB during mixing to avert distortion in the exported file.
Normalize individual tracks post-mixing to establish consistent volume, ensuring seamless playback on diverse devices. Conduct a thorough quality check by listening on multiple audio systems to verify clarity and intelligibility.
Finally, safeguard your work by saving backup copies of your final audio project. This step preserves the original quality and allows for future adjustments if necessary.
Monitoring Audio Levels
Monitoring audio levels in Audacity is essential for ensuring high-quality sound production. Utilizing the level meters effectively allows users to visually evaluate track amplitude, avoiding distortion by maintaining levels below 0 dB. This is important for preventing clipping and ensuring clarity.
To further control dynamics, employ the Envelope Tool to selectively lower the level or increase volume in specific audio sections. Regularly evaluating mix levels is significant, aiming for levels below -6 dB to prevent clipping during export.
Additionally, the Limiter effect is a helpful tool to enhance loudness while maintaining clarity, ensuring professional-sounding audio.
Key tools and techniques include:
- Level meters for visual amplitude evaluation
- Envelope Tool for dynamic control
- Mix level checks below -6 dB
- Limiter effect to enhance loudness
- Monitoring to prevent distortion
Troubleshooting Common Issues
Although Audacity is a robust tool for audio editing, users may occasionally encounter common issues that require troubleshooting to guarantee peak performance.
If clipping occurs during playback or post-effect application, monitor your tracks using Audacity’s level meters. Adjust amplification or compression settings to preserve audio quality.
Missing features like the Envelope Tool can often be restored by resetting toolbars via the View menu.
For noise reduction challenges, select a silent track section to capture an accurate noise profile, then apply the Noise Reduction effect with precise settings.
If normalization leaves audio levels inconsistent, revisit the Compressor effect to fine-tune threshold and ratio settings for balanced sound across tracks.
Utilize community forums or Audacity documentation for additional software guidance.
Exploring Additional Effects
When delving into Audacity‘s array of additional effects, users can greatly improve their audio projects by applying a variety of sophisticated tools.
The software provides a rich selection of sound effects that can transform audio quality and uplift the listening experience. By incorporating effects like Reverb, users can add depth and richness, making the audio more immersive.
The AutoDuck effect guarantees narration clarity by automatically lowering background music volume. To maximize loudness without clipping, the Limiter effect is indispensable.
Modulation effects such as Chorus and Flanger introduce movement and space to the mix, enhancing audio complexity. Equalization allows precise tailoring of frequency ranges to improve vocal clarity and presence.
- Reverb: Adds depth and richness
- AutoDuck: Balances narration and music
- Limiter: Prevents clipping
- Chorus: Adds modulation
- Equalization: Tailors frequency ranges
Frequently Asked Questions
How Do I Make Audio Louder in Audacity?
To increase audio volume in Audacity, utilize the Amplify effect, guarantee peaks remain below 0 dB to prevent audio clipping. Apply normalization and compression for consistent loudness, and use a limiter to enhance sound dynamics without distortion.
How to Increase Master Volume in Audacity?
To increase master volume in Audacity, select all tracks, apply the Amplify effect, and adjust audio dynamics using the Compressor. Use the Normalize effect to prevent clipping, ensuring peak amplitude remains below 0 dB for ideal clarity.
How to Enhance Audio in Audacity?
To enhance audio in Audacity, apply Audio Effects such as Amplify for volume increase, Compressor for dynamic balance, Equalization for frequency adjustment, Noise Reduction for background minimization, and Normalize for consistent track levels, ensuring professional sound quality.
How Do I Enlarge Volume in Audacity?
To enlarge volume in Audacity, utilize Volume Normalization by selecting your audio, then guiding to Effect → Volume and Compression → Normalize. Adjust the peak amplitude to maintain consistency and avoid distortion, ensuring a professional and balanced output.
Conclusion
Mastering audio volume adjustments in Audacity involves a thorough understanding of its interface and functionalities. By preparing the audio track, adjusting recording levels, and utilizing the Amplify and Loudness Normalization effects, ideal audio quality can be achieved. Proper monitoring of audio levels and addressing common issues guarantee the final output meets professional standards. Exporting the refined audio guarantees readiness for final use. Exploring additional effects further enhances the audio’s dynamic range and overall quality.


