Beginners often make critical errors in their home studio setups including neglecting acoustic treatment, which results in excessive reverberation and poor recording clarity. Skimping on high-quality equipment, such as microphones and audio interfaces, deteriorates sound quality. Ignoring background noise, like traffic and household appliances, introduces unwanted disruptions. Poor monitoring practices, including low-quality headphones and improper speaker positioning, result in inaccurate audio mixing. Finally, overlooking post-production techniques like EQ and mastering reduces the overall impact of recordings. Addressing these issues guarantees a more professional and efficient setup, leading to greatly improved outcomes. Continue to uncover more essential tips and best practices.
Key Takeaways
- Neglecting acoustic treatment results in excessive reverberation and unwanted reflections.
- Skimping on quality equipment compromises recording integrity and sound quality.
- Ignoring background noise leads to disrupted and unclear recordings.
- Poor monitoring practices distort audio accuracy and mix translation.
- Overlooking essential post-production techniques diminishes the impact of recordings.
Neglecting Acoustic Treatment
One of the most critical yet frequently overlooked aspects of home studio setup is acoustic treatment. Neglecting this component can lead to excessive reverberation and unwanted reflections, severely impacting recording quality and clarity.
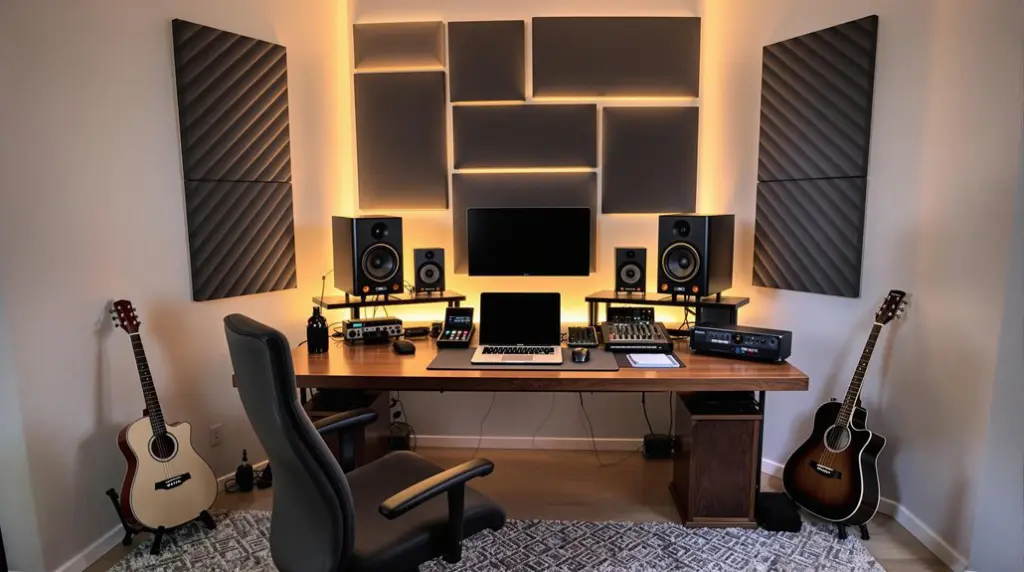
When room design includes untreated surfaces such as bare walls and ceilings, stray sounds are introduced, complicating the process of capturing accurate audio. To address these issues, implementing sound absorption materials is essential. Acoustic panels, bass traps, and diffusers play pivotal roles in absorbing sound waves and reducing internal echoes.
Additionally, strategic microphone placement can further enhance audio clarity by minimizing interference. These elements are integral to enhancing the overall acoustics of the recording space. For beginners operating on a tight budget, DIY solutions like using blankets and pillows can serve as cost-effective alternatives to professional-grade equipment, providing a noticeable improvement in sound quality.
However, it’s imperative to strike the right balance between sound absorption and maintaining a creative ambience. Over-treating a room can result in a sterile environment that dampens creativity.
Consequently, careful consideration and planning in room design are essential to achieving an ideal acoustic setup that supports both technical precision and creative expression in recording sessions.
Skimping on Quality Equipment
Many individuals commencing on the journey of setting up a home studio make the mistake of skimping on quality equipment, which can severely compromise the integrity of their recordings. Microphone selection is vital; opting for high-quality microphones like the Audio-Technica AT2020 or Shure SM57 guarantees clear and professional-sounding recordings. Lower-quality mics often result in distortion and poor vocal capture, detracting from the overall sound.
Equally important is the audio interface. A reliable interface with superior preamps and AD/DA conversion, such as the Focusrite Scarlett series, maintains sound fidelity. Inferior interfaces can introduce noise and degrade recording quality, leading to suboptimal results. Considering user-friendly options like the Audient Evo 4 can also streamline workflow for beginners, enhancing their recording experience.
Furthermore, investing in accurate studio monitors is essential. Monitors like the KRK Rokit 6 G3 offer a flat frequency response, vital for precise mixing. Inaccurate sound reproduction from budget monitors hampers the mix’s effectiveness.
A powerful computer is also indispensable, particularly when utilizing resource-intensive Digital Audio Workstations (DAWs). Underpowered computers can cause lag and an inefficient workflow.
Ignoring Background Noise
Background noise is a pervasive issue that can undermine the quality of home studio recordings, making it essential to address this challenge with meticulous attention.
Ambient noise from sources such as traffic, appliances, and HVAC systems can considerably disrupt recordings, necessitating effective sound isolation strategies. Untreated rooms also contribute to unwanted reflections that can further distort audio quality. Prolonged exposure to these issues can lead to listener fatigue, affecting the ability to make accurate judgments in mastering.
To mitigate background noise, consider the following:
- Identify and Minimize Noise Sources: Pinpoint external noises and minimize them. Turning off appliances and recording during quieter times of the day can lead to cleaner audio captures.
- Implement Soundproofing Materials: Using heavy curtains, carpets, and acoustic panels can absorb or block unwanted noise. This enhances the clarity of your recordings by reducing ambient noise.
- Enhance Equipment Placement: Position recording equipment away from walls and corners to avoid reflections and resonances that muddy sound quality. Proper placement is vital for effective sound isolation.
- Regularly Test Noise Levels: Conduct frequent tests of your recording environment to identify and address new sources of background noise. This guarantees that the studio maintains peak conditions for high-quality recordings.
Poor Monitoring Practices
Effective monitoring practices are vital for achieving accurate and reliable audio mixes. Poor monitoring practices, such as using low-quality speakers or headphones, can result in mixes that do not translate well across different playback systems. This discrepancy often stems from inaccurate sound representation, leading to flawed mixing decisions.
Additionally, issues like improper signal routing, which directs audio from inputs to outputs, can further distort the accuracy of your monitoring setup.
Proper speaker positioning is fundamental to guaranteeing balanced frequency response and correct stereo imaging. Ideally, studio monitors should form an equilateral triangle with the listening position, where the distance between each speaker and the listener is equal. Incorrect positioning can cause frequency imbalances and misinterpretation of stereo fields, which can notably affect the mix quality.
Monitor calibration is another vital aspect often overlooked by beginners. Calibrating monitor levels guarantees consistent volume, preventing overcompensation during mixing. Without calibration, adjustments made at one volume level might not hold true at another, leading to inconsistent mixes.
Furthermore, neglecting the acoustic treatment of the monitoring environment can introduce issues such as excessive reflections or dead spots, distorting perceived sound quality and clarity.
Overlooking Post-Production
Achieving ideal monitoring practices is just the initial step towards producing high-quality audio; the subsequent phase, often underestimated by many, is post-production. Neglecting post-production can greatly diminish the impact of recorded material, as mixing and mastering enhance the overall quality of tracks before they are released.
To guarantee clarity and balance in recordings, beginners must master basic mixing techniques such as EQ, compression, and panning. These skills are essential for transforming raw recordings into polished, professional tracks. Mastering techniques such as harmonic saturation and stereo imaging can also add warmth and depth to your audio, providing a more immersive listening experience.
The mastering process serves as the final step in production, elevating tracks to a professional standard and making them suitable for various playback systems. Investing time in post-production can greatly increase the appeal of a track to both listeners and industry professionals.
Continuous learning in post-production techniques is imperative for beginners, fostering improved results and a deeper understanding of sound manipulation.
Key steps to avoid overlooking post-production include:
- Learning essential mixing techniques: Focus on EQ, compression, and panning.
- Understanding the mastering process: Confirm tracks meet professional standards.
- Investing in post-production tools: Utilize software and hardware that enhance audio quality.
- Engaging in continuous education: Stay updated on the latest post-production methods.
Frequently Asked Questions
What Are the Things You Must Not Do in the Studio?
In the studio, avoid poor acoustics, inadequate equipment, and a cluttered workspace. Neglecting maintenance and ignoring lighting conditions can markedly impair recording quality, operational efficiency, and overall productivity, leading to suboptimal creative outcomes.
How Do I Set up a Home Recording Studio for Beginners?
To set up a home recording studio for beginners, select a quiet room, apply acoustic treatment to minimize echoes, and invest in essential equipment such as quality microphones and recording software. Guarantee ergonomic furniture for comfort and back up recordings regularly.
How Do I Prepare for My First Studio Session?
To prepare for your first studio session, create a session checklist that includes equipment essentials. Test all microphones, audio interfaces, and cables, familiarize yourself with your DAW, outline your session plan, and establish a backup routine.
How Do I Keep My Home Studio Organized?
To maintain an organized home studio, implement efficient studio layout strategies and cable management systems. Label all cables and equipment, designate specific areas for different gear, regularly clean, use storage solutions, and routinely back up and organize files.
Conclusion
To sum up, establishing a proficient home studio necessitates attention to critical factors such as adequate acoustic treatment, investment in quality equipment, management of background noise, adherence to effective monitoring practices, and thorough post-production processes. Neglecting these elements can greatly impair the quality of recordings and overall production outcomes. Consequently, a meticulous approach to each of these components is essential for achieving professional-grade results in a home studio environment.


