Building a high-quality home studio for DJs requires attention to space selection, acoustic treatment, and essential equipment. Choose a room with high ceilings and multiple outlets, guaranteeing proper acoustic treatments with bass traps and absorptive panels. Invest in high-quality DJ controllers like the Pioneer DDJ-SB3 or turntables such as the Technics SL-1200 for authentic vinyl experience. Utilize closed-back headphones like the Audio-Technica M50x for superior sound isolation and accurate studio monitors, such as KRK Rokit 5 or Yamaha HS5, to guarantee precise sound fidelity. Master effective cable management and select intuitive DJ software to streamline your workflow. For further detailed insights, continue exploring the nuances of studio optimization.
Key Takeaways
- Choose a room with ample size and high ceilings for optimal sound diffusion and minimal echoes.
- Invest in quality DJ controllers like the Pioneer DDJ-SB3 for affordability and ease of use.
- Use acoustic treatments such as bass traps and absorptive panels to reduce reverberation.
- Opt for precise studio monitors like KRK Rokit 5 or Yamaha HS5 for accurate sound reproduction.
- Implement effective cable management with trays and labels to maintain a clutter-free workspace.
Space Selection and Layout
Selecting the perfect space for your home DJ studio is pivotal for achieving ideal sound quality and efficient workflow. Begin by evaluating the room dimensions; ample size and high ceilings are critical to accommodating your equipment and optimizing acoustics. A larger space allows for better sound diffusion, while high ceilings prevent sound waves from bouncing directly back, reducing unwanted echoes.
Equally important is the room’s electrical capacity. Verify the space has multiple electrical outlets strategically positioned to power your DJ controller, laptop, speakers, and other essential gear. Consider using high-quality power cables for stable delivery and to prevent interruptions. Overloading circuits can lead to equipment failure or interruptions, so it’s crucial to check that the electrical infrastructure can handle the load.
Acoustic considerations are also paramount. Rooms with asymmetrical walls tend to produce better sound quality by minimizing standing waves. Implementing acoustic treatments such as bass traps, diffusers, and absorptive panels can further enhance audio fidelity by reducing reverberation and feedback.
Essential DJ Equipment
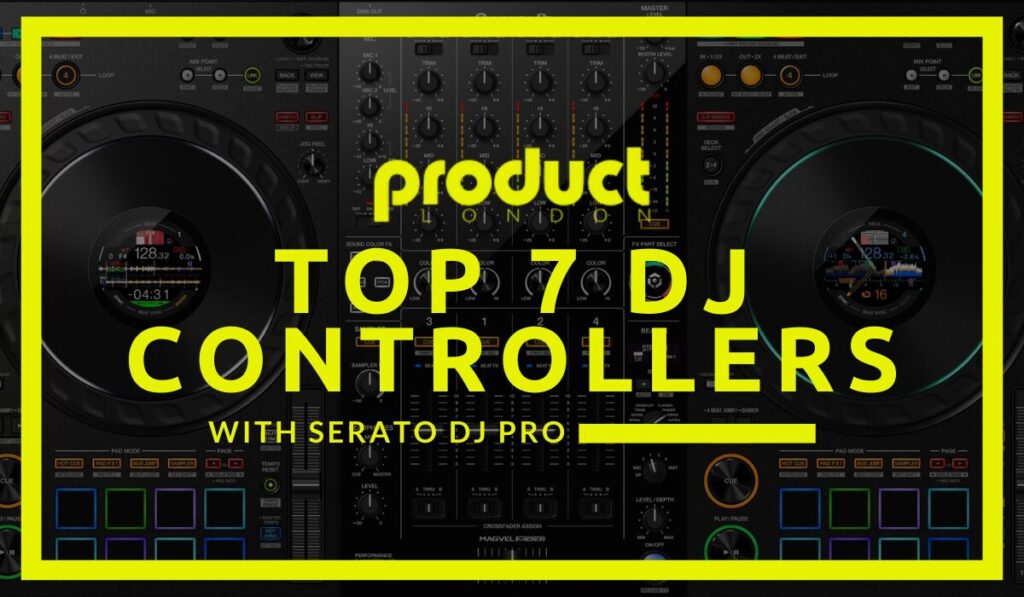
Equipping your home studio with the right tools is essential for any DJ, starting with high-quality DJ controllers like the Pioneer DDJ-SB3, which offers an accessible entry point for beginners.
For those seeking a more traditional vinyl experience, turntables such as the Technics SL-1200 demand skill but provide unparalleled sound authenticity.
Additionally, controllers such as the Pioneer DJ DDJ-200 are perfect for those looking for mobile connectivity and affordability.
Investing in reliable headphones like the Audio-Technica M50x and accurate studio monitors such as the KRK Rokit 5 is vital for precise track monitoring and clear sound reproduction.
Turntables and Controllers
When constructing a home studio for DJing, understanding the core differences between turntables and controllers is crucial.
Traditional turntables, revered for their authentic vinyl experience, necessitate mastery of turntable techniques such as beatmatching and scratching. This tactile control is cherished by purists and those who prefer a hands-on approach to their craft.
Conversely, DJ controllers present significant controller advantages, particularly for beginners. They are often more affordable and integrate seamlessly with digital DJ software, offering features like jog wheels and performance pads that simplify the mixing process.
Professional DJs frequently opt for CDJs due to their robustness and flexibility. CDJs replicate the feel of traditional turntables while accommodating digital files via USB drives. This versatility makes them a staple in many high-end setups.
When selecting equipment, key factors to reflect on include the number of channels, built-in effects, and connectivity options. For instance, USB ports are essential for controllers, while RCA inputs are crucial for turntables.
Ultimately, the choice between turntables and controllers hinges on personal preference, budget, and the desired level of engagement with the music. Each option provides unique benefits, catering to different skill levels and stylistic approaches in the art of DJing.
Headphones and Monitors
Diving into the domain of DJing, one quickly realizes the indispensable role that high-quality headphones and monitors play in crafting impeccable mixes.
Headphone types are a critical consideration; closed-back headphones, such as the Audio-Technica M50x, are highly recommended. These models provide excellent sound isolation and clarity, preventing sound leakage and guaranteeing that only the DJ hears the track being cued. This isolation is paramount for accurate mixing and cueing, essential for live performances and studio sessions alike.
Equally important are studio monitors, designed to deliver accurate sound reproduction. Monitors like the KRK Rokit 5 and Yamaha HS5 are renowned for their precise audio fidelity.
Key monitor features include a broad frequency response, typically ranging from 50 Hz to 40 kHz. This range enables DJs to discern both low-end bass and high-frequency details, allowing for meticulous adjustments without audio coloration.
Investing in premium monitors guarantees that the final mix is as close to the original source as possible.
Cable Management
A well-organized home studio is the foundation of a DJ’s workflow, and effective cable management is vital to achieving this. Employing strategic cable management techniques guarantees a clutter-free workspace, which in turn enhances both productivity and performance.
Key practices to focus on include cable labeling, portable organizers, cable trays, and regular cable maintenance. Implementing efficient cable management also plays a significant role in minimizing noise and interference, which can greatly improve sound quality.
To paint a clear picture, consider implementing the following steps:
- Cable Labeling: Use color-coded labels for each cable and port. This simplifies troubleshooting and setup, allowing you to quickly identify and connect the right cables.
- Portable Organizers: For DJs who frequently transport their gear, investing in cable organizers or pouches is essential. These keep essential cables easily accessible and prevent loss during transit.
- Cable Trays: Installing cable trays or raceways along walls or desks helps conceal and organize cables. This not only enhances the aesthetics but also improves safety by reducing trip hazards.
- Cable Maintenance: Regularly check and replace damaged cables to guarantee optimal performance. This preventive measure helps avoid potential disruptions during live performances or recording sessions.
Acoustic Treatment
Optimizing the acoustic environment of a home studio is fundamental for DJs aiming to achieve professional sound quality.
Acoustic treatment involves strategic use of panels, bass traps, and diffusers to manage sound reflections, thereby enhancing room acoustics. Proper soundproofing techniques, such as installing acoustic panels on walls, are essential for reducing unwanted echoes. These panels absorb sound waves, resulting in a clearer and more balanced audio mix.
Bass traps are irreplaceable when it comes to managing low-frequency sounds. Typically positioned in the corners of the room, they prevent muddiness and enhance the clarity of bass-heavy music. This is particularly important for DJs who need to guarantee that the low-end frequencies are well-defined and articulate.
Diffusers play an important role in scattering sound waves in various directions. This helps maintain a lively acoustic environment while minimizing harsh reflections that could distort the audio.
A well-balanced combination of these acoustic treatments, coupled with proper speaker placement and thoughtful room layout, greatly improves the listening experience.
Choosing DJ Software
Having established a well-treated acoustic environment, the next critical step for DJs is selecting the right DJ software to complement their setup. The market offers various options, with Serato DJ, Traktor Pro, and Rekordbox standing out as popular choices. Each software caters to different DJing styles and preferences, making a thorough software comparison essential.
When evaluating DJ software, consider the following:
- Hardware Compatibility: Confirm the software supports a wide range of hardware, including controllers, turntables, and mixers, for seamless integration and a versatile setup. Verify that the software supports essential MIDI functionality for seamless interaction.
- Key Features: Assess critical features such as beatmatching capabilities, effects processing, and library management tools. These elements are pivotal in enhancing mixing efficiency and fostering creativity.
- Free Trials: Take advantage of free trials offered by many platforms. They allow users to test the software’s functionality and interface, confirming it meets their specific needs before making a purchase.
- Operating System Compatibility: Verify that the software is compatible with your operating system. Some applications are optimized for macOS, while others may perform better on Windows systems.
Informed by user reviews and industry trends, making a strategic choice will appreciably impact your DJing experience and studio productivity.
Sound Testing
Sound testing is critical in a home studio setup, focusing on optimizing speaker placement to guarantee clear, balanced audio without unwanted echoes or feedback.
Proper setup and optimization can greatly enhance overall sound distribution and clarity. Utilizing a sound level meter helps manage volume levels, safeguarding hearing while maintaining audio clarity.
Walking the room during playback can identify acoustical issues, allowing for targeted adjustments and fine-tuning through mixer equalizer settings.
Speaker Placement Optimization
Achieving ideal speaker placement in a home studio is essential for balanced sound distribution and clarity. Proper placement involves meticulous attention to speaker distance and minimizing sound reflection. To guarantee peak sound quality, follow these guidelines:
- Equilateral Triangle Rule: Position the speakers and listening position at equal distances, forming an equilateral triangle. This guarantees balanced sound distribution and precise stereo imaging.
- Speaker Height: Place the speakers at ear level when seated, typically between 36 to 48 inches off the ground. This height helps achieve clear sound and accurate imaging.
- Wall Distance: Avoid placing speakers directly against walls. Maintain a distance of 1-2 feet to reduce bass buildup and unwanted sound reflection, which can muddy the audio.
- Sound Level Meter: Use a sound level meter to measure variations in sound levels throughout the room. This tool helps guarantee even coverage and minimal dead spots, leading to a consistent listening experience.
Regularly test the setup by walking around the room while playing music. This practice helps identify acoustical issues or reflections that may require further adjustments in positioning or additional acoustic treatment.
Volume Level Management
Once ideal speaker placement is achieved, the next vital step in creating a home studio for DJs is to manage volume levels effectively through sound testing.
Begin by using a sound level meter to measure decibel levels during playback, maintaining a range between 85-90 dB to achieve optimal sound dynamics while guaranteeing volume safety to prevent hearing damage. This balance is essential for long-term listening and professional performance.
In the pursuit of pristine audio, conduct frequency sweeps to evaluate how different frequencies interact within the studio space. This process helps to identify any problematic resonances or frequency buildups, assuring a more accurate representation of your mix.
Regularly walk around the room while music is playing to detect areas with poor acoustics, such as dead spots or excessive echo, which can considerably affect sound clarity.
Testing speaker placement further, verify they are positioned at ear level and equidistant from walls, promoting balanced sound distribution.
Acoustic Issue Identification**
Identifying acoustic issues in a home studio requires a meticulous approach to sound testing. Conducting thorough sound tests by playing music at various volumes and positions in the room is essential. This helps in identifying areas with excessive echoes, dead spots, or uneven sound distribution.
Utilizing a sound level meter to measure decibel levels across different locations guarantees balanced audio output and prevents potential hearing damage.
To effectively identify and address acoustic issues, consider the following steps:
- Echo Identification: Walk around the room while playing a track to detect any sound reflections or resonances that may interfere with sound quality.
- Frequency Response Analysis: Pay attention to frequency response during sound testing. If certain frequencies sound overly pronounced or muted, adjustments in speaker placement or acoustic treatment may be necessary.
- Document Findings: Keep a detailed record of your observations during sound tests. This documentation will inform future adjustments and improvements in room acoustics.
- Volume Variations: Play music at different volumes to guarantee that sound remains consistent and clear, regardless of the listening level.
Branding and Promotion
Establishing a distinct DJ identity is pivotal in building a brand that stands out in the crowded music industry. A unique visual identity, comprising logos, color schemes, and other visual elements, should complement your musical style. This cohesive branding makes your image memorable and helps to foster a strong connection with your audience.
Audience engagement is equally critical; leveraging social media platforms like Instagram, TikTok, and Facebook allows you to share mixes, behind-the-scenes content, and interact with fans directly, considerably enhancing your visibility and reach. Guarantee that your visual storytelling effectively communicates your artistic identity, helping to create an emotional connection with your audience.
Regular content creation is essential for maintaining audience interest and showcasing your skills. By consistently publishing mixes, videos, and other engaging content, you not only keep your current followers engaged but also attract new ones, potentially leading to more gig opportunities.
Collaborating with music influencers and bloggers can further boost your brand’s visibility. These partnerships can result in features, guest mixes, or joint events, expanding your reach within the industry.
Networking remains an invaluable tool. Attending local music events and forging relationships with fellow DJs and industry professionals can open doors to performance opportunities and mutually beneficial promotions, solidifying your presence in the music scene.
Livestreaming Tips
Livestreaming has become an important tool for DJs to reach a global audience and showcase their talents in real-time. To create a successful livestream, consider the following technical and strategic tips:
1. Choose a Reliable Streaming Platform: Opt for platforms like Twitch or YouTube Live that support robust audience interaction features. These platforms offer chat functionalities and other engagement tools to connect with your viewers seamlessly.
2. Invest in Quality Video Equipment: Utilize a DSLR camera or a high-definition webcam to guarantee clear visuals. High-quality video enhances viewer experience and keeps your audience engaged throughout your sets.
Additionally, setting up multiple scenes in OBS Studio can help switch between different camera angles and graphic overlays, making your stream more dynamic.
3. Guarantee a Stable Internet Connection: A minimum upload speed of 5 Mbps is vital to prevent interruptions. A stable connection guarantees a smooth streaming experience, maintaining the professional quality of your broadcast.
4. Promote Your Livestream in Advance: Use social media and music forums to announce your streaming schedule. Advanced promotion maximizes audience reach, ensuring more people tune in to your live performances.
Additionally, integrating music production software like OBS Studio or Streamlabs can enhance audio quality, providing a seamless listening experience.
Frequently Asked Questions
What Equipment Do I Need to Start DJING at Home?
To start DJing at home, beginner equipment includes a powerful laptop with DJ software options, a DJ controller for ease of use, quality headphones for accurate monitoring, studio monitors for precise sound reproduction, and a reliable audio interface.
How Do You Structure a House DJ Set?
To structure a house DJ set, start with cohesive track selection aligned with audience preferences. Organize tracks by energy levels, practice mixing techniques like beatmatching and EQ adjustment, and incorporate strategic pauses and build-ups for dynamic engagement.
How to Make DJ Setup at Home?
To create a home DJ setup, prioritize home acoustics by installing acoustic panels and guarantee effective cable management. Invest in high-quality equipment like a robust laptop, DJ controller, and sound-isolating headphones. Choose suitable DJ software and practice regularly.
What Do I Need to Set up as a DJ?
To set up as a DJ, procure essential DJ gear including a powerful laptop, extensive music library, robust mixing software, quality audio interface, and optimized speaker placement. Consider controller options, lighting effects, and soundproofing tips for an enhanced studio environment.
Conclusion
In summary, the construction of a home studio for DJs necessitates meticulous attention to space selection, equipment acquisition, cable management, and acoustic treatment. Integrating appropriate DJ software and conducting rigorous sound testing further enhance the studio’s functionality. Effective branding, promotion strategies, and leveraging livestreaming capabilities are also essential for establishing a professional presence. By adhering to these guidelines, DJs can create a conducive environment that supports artistic growth and professional development within the industry.


