

Audio mixing is the craft of blending multiple audio tracks into a cohesive sonic experience. You use digital audio workstations (DAWs) to adjust levels, panning, frequencies, and spatial effects. This process guarantees clarity, balance, and depth in your mix. Incorporate various techniques such as volume automation, panning strategies, equalization, and compression. By doing so, you create space for each element and enhance the overall texture. Employing effects like reverb and delay adds dimension and emotion. Stay tuned to master the intricate balance between technical precision and creative artistry in audio mixing.
Key Takeaways
- Audio mixing combines multiple audio tracks to adjust levels, panning, and effects for balanced and cohesive sound.
- It ensures clarity by balancing and blending individual elements in a mix.
- Utilizing DAWs, plugins, and hardware gear, audio mixing shapes the sonic character of a track.
- Techniques like EQ, compression, and reverb are applied to enhance depth and clarity.
- Panning and stereo imaging create spatial depth and dimension within the audio landscape.
Understanding Audio Mixing
Understanding audio mixing involves the intricate process of combining multiple audio tracks to form a cohesive and polished sound by adjusting levels, panning, frequencies, and spatial effects. In audio production, this phase is vital as it determines the overall sonic character and balance of your project. As a sound engineer, you’ll need to meticulously balance individual elements like vocals, instruments, and effects to create a harmonious blend.
You’ll use digital audio workstations (DAWs) as your primary tool. These platforms allow you to manipulate and enhance recordings in the digital domain. Essential techniques include equalization (EQ), which helps you adjust the frequency content of each track, and compression, which controls the dynamic range to maintain consistency and impact. Panning is critical for spatial placement, giving each element its own space within the stereo field.
Effects such as reverb and delay add depth and dimension, making the mix more engaging. The end goal is to achieve a well-balanced, dynamic, and captivating listening experience. Mastering these techniques is essential in sound engineering and will have a significant impact on the final production quality.
Importance of Audio Mixing
Mastering the techniques of audio mixing isn’t just about skill; it’s about acknowledging the importance of blending and balancing different elements to create a cohesive and emotionally impactful sound. You need to understand how vital audio clarity is in this process.
When you mix tracks, you’re not just adjusting levels; you’re meticulously crafting the sonic texture of each element to guarantee they coalesce seamlessly. This blending enhances the professional quality of the recording, making sure that it stands out in a competitive market.
Proper audio mixing involves precise adjustments to levels, panning, and the application of effects. These actions ensure that each instrument and vocal track can be heard distinctly, contributing effectively to the overall musical arrangement. By achieving this balance, you enhance the emotional impact of a song, making it resonate more deeply with your audience.
A well-executed mix can create depth and dimension, transforming a flat recording into a dynamic listening experience. It’s not just about making the music sound good; it’s about creating an immersive experience that captivates listeners.
When done right, audio mixing can turn a simple recording into a polished, professional-quality product.
Key Elements in Mixing
To achieve a balanced mix, you’ll need to meticulously adjust sound levels to guarantee no single element overpowers the others.
Utilize panning and stereo imaging to place instruments within the stereo field, creating depth and spatial separation.
Additionally, applying audio effects like reverb, delay, and compression will enhance the texture and dynamics of your mix.
Balancing Sound Levels
Balancing sound levels involves meticulously adjusting the volume of each track to guarantee a cohesive and distortion-free mix. You’ll need to manage the dynamic range carefully, ensuring that the quietest and loudest parts of your track are well-balanced. This process is critical to maintaining clarity across all elements of your mix.
Use signal processing tools like compressors and limiters to control dynamic range, preventing any track from overpowering others. Faders in your Digital Audio Workstation (DAW) are indispensable for this task. By finely tuning these controls, you can optimize each track’s volume, ensuring a polished final product.
| Tool | Function |
|---|---|
| Faders | Adjust individual track levels |
| Compressors | Control dynamic range |
| Limiters | Prevent clipping and distortion |
Balancing levels isn’t just about making sure no single track is too loud; it’s about creating a harmonious blend where each element has its own space. This meticulous approach helps to prevent clipping and distortion, essential for achieving a professional mix. By optimizing each track’s volume, you guarantee that your mix maintains its integrity and sounds well-rounded. So, grab those faders, and start sculpting your mix with precision!
Applying Audio Effects
In audio mixing, utilizing effects like EQ, compression, reverb, delay, and modulation is essential for crafting a professional and dynamic soundscape.
The first step in applying these effects is to establish your effect chains and signal routing. Start with EQ to shape the tonal balance of each track by boosting or cutting specific frequencies, ensuring clarity and separation.
Compression follows, reducing the dynamic range and delivering punch and consistency.
Reverb is next, simulating acoustic spaces to provide depth and realism. Properly applied, reverb can place your instruments in a cohesive environment, enhancing the mix’s spatial quality.
Delay adds echoes and repeats, creating a sense of depth and movement within your mix, perfect for making elements stand out or blend seamlessly.
Modulation effects, such as chorus, flanger, and phaser, alter sound characteristics in unique ways, adding richness and texture. Utilize these creatively for experimental techniques, bringing a distinctive flavor to your tracks.
Panning and Stereo Imaging
Mastering panning and stereo imaging is crucial for creating a mix with spatial depth and clarity. Panning involves placing audio elements within the stereo field by adjusting their position between the left and right channels. This spatial manipulation guarantees each instrument or vocal sits in its own space, preventing overcrowding and enhancing the mix’s overall balance.
Utilize pan pots on your mixing console to control the placement of sounds. Implement panning automation to introduce dynamic movement, bringing life and excitement to your tracks. For instance, automate the panning of a guitar solo to sweep across the stereo field, creating an engaging auditory experience.
Stereo imaging takes this concept further by enhancing the perceived width and depth of your mix. Stereo widening techniques, such as mid/side processing and spatial effects, help achieve a broader soundstage, making your mix sound full and immersive. Proper stereo field expansion ensures a balanced distribution of audio elements, preventing the mix from sounding too narrow or cluttered.
Incorporate these techniques to create a realistic and separated mix, allowing listeners to experience a more natural and engaging soundscape. Balancing these elements effectively transforms your mix from flat and lifeless to vibrant and three-dimensional.
Volume Adjustment
Volume adjustment, a critical aspect of audio mixing, involves manipulating fader levels to achieve a balanced and harmonious blend of tracks.
As you work within your Digital Audio Workstation (DAW) or on a mixing console, you’ll use volume automation to dynamically control track loudness throughout your mix. This technique is essential for emphasizing key elements, ensuring that no single track dominates the mix.
For effective volume adjustment, follow these steps:
- Set Initial Levels: Begin by setting rough levels for each track. This helps create an initial balance before diving into more detailed adjustments.
- Implement EQ Adjustments: Use EQ to carve out frequency ranges, allowing each element to occupy its own space in the mix. This preps you for more precise volume controls.
- Apply Compression Tips: Employ compression to manage dynamic range, ensuring that your tracks maintain consistent levels. This also supports the overall balance and cohesion.
Panning Techniques
When employing panning techniques, you strategically place elements within the stereo field to create spatial depth and enhance the mix’s dimensionality.
By balancing instrument placement, you achieve clarity and separation, ensuring each component occupies its distinct sonic space.
Utilize both hard and subtle panning to craft movement and engage listeners dynamically.
Creating Spatial Depth
Leveraging panning techniques involves strategically positioning sounds within the stereo field to craft spatial depth and enhance dimensionality in your mix. By mastering spatial positioning, you gain the creative freedom to place audio elements precisely where they need to be for an immersive experience.
Panning isn’t just about left and right; it’s about sculpting a three-dimensional soundscape.
To achieve effective audio placement, consider these essential techniques:
- Hard Panning: Extreme left or right placement can isolate specific elements, offering a striking separation that makes each sound distinctly perceptible.
- Center Panning: Placing critical elements like vocals or bass at the center ensures they maintain prominence and cohesion within the mix.
- Gradual Panning: Smooth changes between left and right can enhance spatial balance, making the mix feel more natural and less static.
Utilize automation in your DAW to create dynamic panning movements, bringing your mix to life. This can simulate the natural movement of sound in a real environment, adding to the overall immersive quality.
Panning effectively separates elements, creating a sense of space and dimensionality that enriches the listener’s experience.
Balancing Instrument Placement
Balancing instrument placement through adept panning techniques guarantees each element occupies its own sonic space, enhancing clarity and preventing frequency conflicts. As an audio engineer, you’re tasked with leveraging pan control to achieve ideal stereo positioning. By distributing sounds across the stereo field, you create a sense of width enhancement that’s essential for an immersive mix.
Start by positioning the lead vocals at the center; this secures they remain the focal point. Instruments like guitars or keyboards can be panned slightly off-center, thereby achieving better instrument separation. Background elements, such as backing vocals or ambient pads, often benefit from wider placements, contributing to a fuller stereo image.
Effective panning involves more than just assigning arbitrary positions. Consider the frequency spectrum of each element to avoid clashes. For instance, panning two similar-sounding instruments to opposite sides can help them stand out individually. Use pan control dynamically; subtle automation can add movement and keep the mix engaging.
Applying Effects
In audio mixing, applying effects like reverb, delay, chorus, flanger, and distortion plays an essential role in enhancing and shaping the sonic landscape of your tracks. Effect placement is key for achieving ideal sound enhancement. Placing a reverb effect on a vocal track can add depth and space, making it feel more immersive.
Applying delay can create compelling echoes, adding dimension to lead instruments. Experimenting with creative combinations of these effects can introduce an artistic flair to your mix. For example, blending chorus with flanger can produce a lush, sweeping sound that enriches your audio texture. Distortion, when used judiciously, can add a gritty quality that makes certain elements stand out.
Here are some key considerations when applying effects:
- Effect Placement: Decide whether to apply effects to individual tracks or the master bus for cohesive sound.
- Creative Combinations: Experiment with blending different effects to discover unique textures.
- Sound Enhancement: Focus on how each effect contributes to the overall mix, ensuring it complements rather than overwhelms.
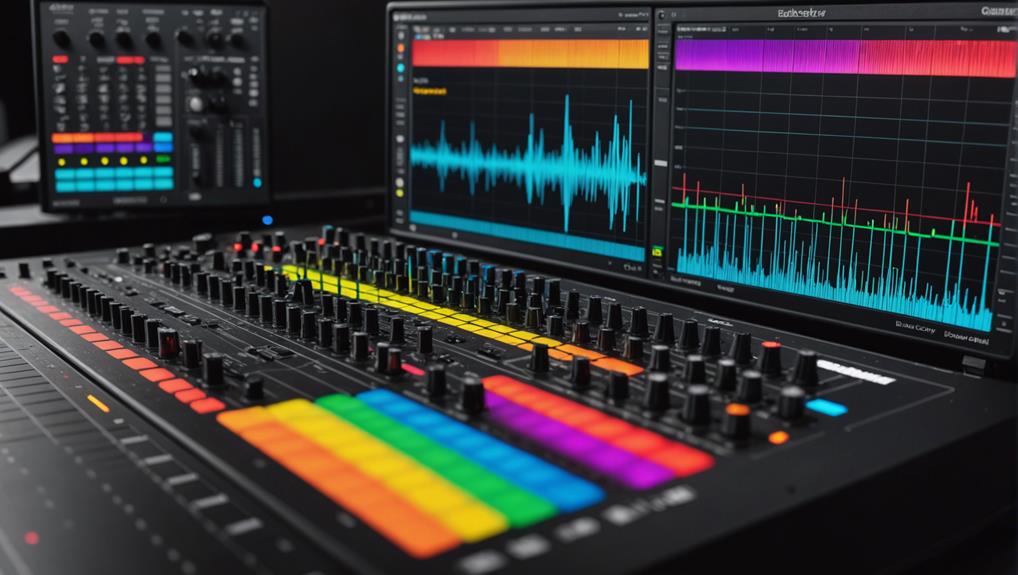
Mixing Tools
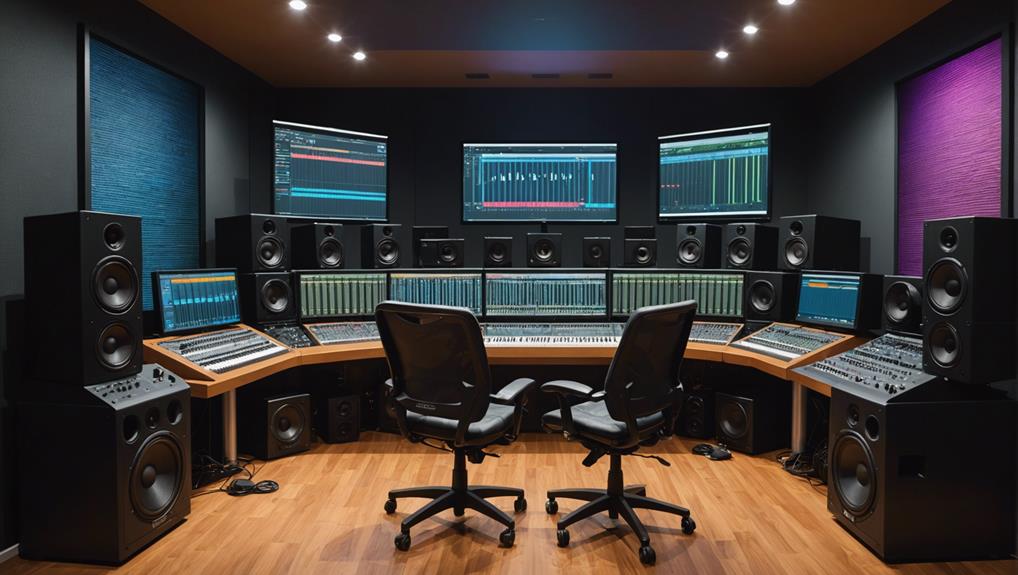
To achieve a professional mix, you’ll need a combination of digital audio workstations (DAWs), hardware outboard gear, and high-quality plugins. Mixing equipment forms the backbone of your studio setup. Start with DAWs like Pro Tools, Logic Pro, or Ableton Live, which provide robust platforms for arranging, editing, and mixing audio tracks.
Hardware outboard gear—including EQs, compressors, and reverbs—offers precise sound shaping capabilities that can be hard to replicate with software alone. High-end mixing consoles from brands like SSL, Neve, and API give you hands-on control over multiple audio sources, allowing for intricate adjustments and a tactile mixing experience.
When it comes to mixing software, plugin options are vast and essential. Companies like Waves, FabFilter, and iZotope provide a plethora of effects and processing tools, from dynamic range compression to intricate reverb settings. These plugins integrate seamlessly with your DAW, enabling you to manipulate your audio with precision.
Your studio setup wouldn’t be complete without reference monitors and an acoustically treated room. Accurate sound monitoring is pivotal, ensuring that your mix translates well across various listening environments.
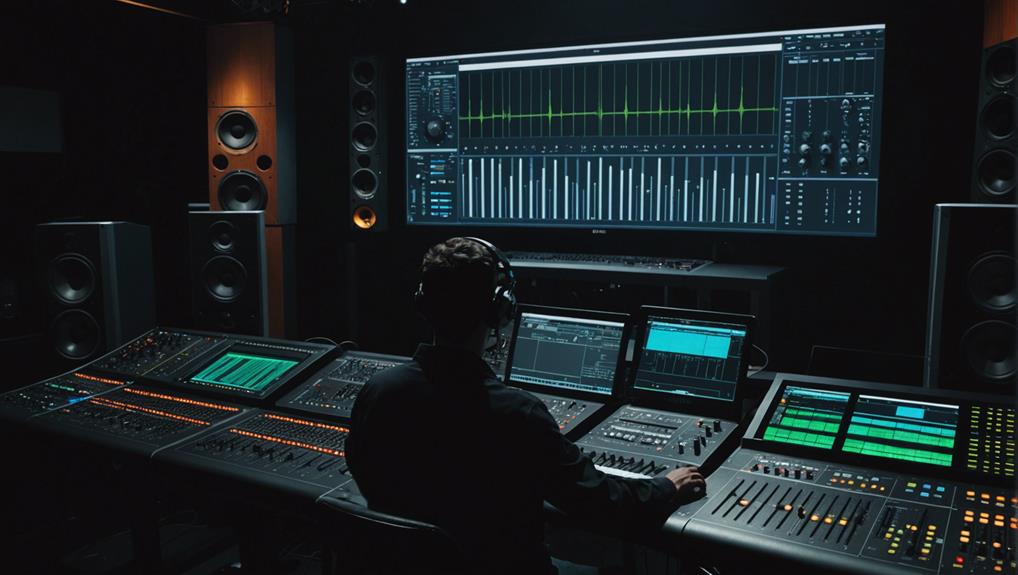
Digital Audio Workstations
Digital Audio Workstations (DAWs) revolutionize audio production by providing extensive tools for recording, editing, and mixing tracks with unparalleled precision and flexibility. These powerful mixing software applications, like Pro Tools, Logic Pro, Ableton Live, FL Studio, and Reaper, each offer unique features and workflows tailored to various audio production needs.
When you use a DAW, you’re equipped to handle multiple tracks simultaneously, allowing for complex arrangements and intricate layering. The integration of virtual instruments and plugins enables you to enhance your sound further, adding depth and character to your mixes. DAWs streamline the production process by offering automation capabilities, so you can dynamically modify parameters like volume, panning, and effects over time.
Here are three essential features typically found in DAWs:
- Multitrack Recording: Record and manage numerous audio tracks to build rich, detailed compositions.
- Effect Processing: Apply real-time effects such as EQ, compression, reverb, and delay to polish your sound.
- MIDI Sequencing: Utilize MIDI tracks to control virtual instruments and external hardware, providing versatility in composition.
Building a Mix
When building a mix, you’ll need to balance track levels to guarantee each element sits well within the overall soundscape.
Proper panning of instruments creates a dynamic stereo field, while applying effects like reverb and delay adds depth and dimension.
Balancing Track Levels
Effective balancing of track levels is essential for achieving a cohesive mix where each element occupies its intended space within the stereo field. You’ll need to manage track dynamics and use volume automation to make sure that no single element overpowers the others. By adjusting the faders in your digital audio workstation, you can create a mix that’s both clear and dynamic.
To achieve professional-level balance, focus on these three key aspects:
- Track Dynamics and Volume Automation: Employ volume automation to control track levels dynamically. This allows you to maintain a consistent mix even as different parts of the track change in intensity.
- Track EQ and Frequency Balance: Use EQ to carve out space for each instrument. Balancing frequencies ensures that elements don’t clash and that each track has its own distinct place in the mix.
- Overall Level Consistency: Regularly check your levels to avoid distortion and clipping. Proper level consistency guarantees that your mix translates well across different playback systems.
Balancing track levels is a foundational step in the mixing process. It allows you to build a harmonious blend where each audio element is both distinct and complementary, leading to a polished and professional final product.
Panning Instruments Correctly
After balancing track levels, you should focus on panning instruments correctly to create a spacious and immersive stereo field. Effective panning enhances stereo width and spatial imaging, giving your mix a sense of depth and dimension. Start by placing key elements like the kick, snare, and bass in the center, as these form the core of your track’s foundation.
Utilize creative panning to distribute other instruments across the stereo spectrum. For instance, pan guitars slightly left and right to create instrument separation, allowing each part to be distinctly heard without clashing. Apply the same principle to backing vocals, percussion, and synths to maintain a balanced mix.
Automation in panning can add movement and interest, dynamically shifting elements to engage the listener. For example, you might automate a hi-hat to slightly move left and right, enhancing the mix’s dynamism.
Applying Effects Tastefully
Applying effects tastefully in a mix is crucial for enhancing sonic clarity, depth, and emotional impact. You need to approach this with both precision and creativity. Here’s how you can do it effectively:
- EQ for Tonal Balance: Use equalization to carve out frequency space for each instrument. This guarantees that every element has its own place in the mix, reducing muddiness and enhancing clarity.
- Compression for Dynamic Control: Apply compression to manage the dynamic range of your tracks. This maintains consistent levels and helps instruments sit well together without overpowering one another.
- Reverb and Delay for Spatial Depth: These effects add a sense of space and dimension. Use reverb to create a natural ambiance, and delay for rhythmic echoes that can add interest without cluttering the mix.
Balancing these effects requires a blend of technical proficiency and artistic expression. Engage in creative experimentation to discover unique textures and atmospheres.
Remember, each effect should serve the song’s arrangement and intended sonic aesthetic. Overusing effects can overwhelm the mix, so always aim for subtlety and cohesion.
Common Mixing Techniques
Mastering common mixing techniques like adjusting levels, panning, EQ, and compression is vital to crafting a professional and polished audio mix. Start by setting appropriate levels for each track using faders to guarantee a balanced mix.
Panning helps to create a wide stereo image, placing elements strategically across the left-right spectrum. For EQ, focus on carving out space for each instrument by boosting or cutting specific frequencies. This enhances clarity and minimizes masking.
Compression is essential for controlling dynamics. Use parallel compression to add punch without losing the original track’s nuances and side-chain compression to duck certain elements, like making the bass drum cut through the bassline.
Advanced automation is a game changer. Automate volume, panning, and effects parameters to add movement and interest to your mix. Creative processing, like using reverb and delay, can add depth and space, but use these effects judiciously to avoid a cluttered mix.
Differences in Mixing Styles
Different mixing styles, such as analog, digital, and hybrid, offer unique workflows and sonic characteristics that cater to various audio production needs. When comparing analog vs digital mixing, you’ll notice that analog mixing provides a tactile, hands-on experience with physical hardware like consoles and outboard gear. This approach is known for its warmth and character, often sought after in genres demanding a vintage vibe.
In contrast, digital mixing relies on virtual plugins and automation within a Digital Audio Workstation (DAW), offering unparalleled flexibility and convenience for intricate edits and recallability.
Hybrid mixing benefits are substantial, combining the strengths of both analog and digital domains. You can leverage the analog warmth and character while enjoying the precision and versatility of digital tools. Here’s a closer look at the differences:
- Analog Mixing: Utilizes physical gear, offering a tactile interface and unique sonic characteristics.
- Digital Mixing: Employs virtual plugins within a DAW, providing flexible, non-destructive edits and easy recall.
- Hybrid Mixing: Combines analog hardware with digital processing, delivering the best of both worlds.
Understanding these differences helps you choose the most suitable approach for your project, ensuring excellent audio quality and workflow efficiency.
Tips for Better Mixing
To achieve a professional-sounding mix, make sure you effectively utilize EQ to carve out space for each instrument, preventing frequency clashes. This mixing philosophy is essential for maintaining clarity and avoiding muddiness.
Apply compression to control dynamic range, making softer sounds audible without overpowering louder elements. This advanced mixing strategy guarantees a balanced dynamic range, critical for a polished mix.
Experiment with panning to create a sense of width and depth, placing instruments in different positions within the stereo field. This creative technique adds spatial dimension and prevents the mix from sounding flat.
Incorporate reverb and delay to enhance depth and ambience, giving your mix a more immersive feel. Adjust these effects meticulously to avoid over-saturation, which can clutter your mix.
Regularly reference your mix on different playback systems to ensure it translates well across various devices and environments. This step is essential to mastering tips, as it ensures your mix sounds good whether it’s played on high-end studio monitors or basic earbuds.
Finalizing Your Mix
Finalizing your mix demands meticulous attention to detail, guaranteeing every element sits perfectly within the sonic landscape. You’ll need to employ critical listening to make subtle adjustments to levels, EQ, compression, and effects. This stage is vital for achieving a polished sound that holds up across various playback systems and environments.
To streamline your mixing workflow, consider these steps:
- Reference Tracks: Use professionally mixed tracks as benchmarks. This helps you maintain consistency and high-quality standards throughout your mix.
- Critical Listening: Focus on the fine details in your mix. Pay attention to balance, clarity, and how each element interacts within the stereo field.
- Mastering Techniques: Apply final touches, such as subtle EQ adjustments and compression, to glue the mix together and ensure it translates well on different playback systems.
After these adjustments, export your mixdown in various formats to ensure compatibility for distribution and playback. This process guarantees your mix sounds cohesive, whether it’s played on high-end studio monitors or consumer-grade earbuds.
Frequently Asked Questions
What Does Audio Mixing Do?
Audio mixing lets you perform volume balancing and equalization adjustments to create a cohesive sound. You blend tracks, tweak frequencies, and add effects, ensuring all elements harmonize. This process greatly impacts the recording’s overall quality and emotional resonance.
What Is the Difference Between Audio Editing and Audio Mixing?
You’ll find that audio editing focuses on manipulating individual audio files, while audio mixing blends multiple tracks. Editing refines elements, and mixing adjusts volume levels and balance control to craft a cohesive, harmonious sound.
What Is the Difference Between Mixing and Mastering Audio?
Mixing techniques focus on balancing levels, EQ, compression, and panning for individual tracks. Mastering tools enhance overall consistency, perform final quality control, and prepare the mix for distribution, ensuring it sounds great on all playback systems.
What Does Audio Mixer Do?
An audio mixer lets you combine tracks, apply equalization techniques, and make precise panning choices. You’ll control volume levels and add effects, ensuring each element fits perfectly. It’s essential for achieving a professional, balanced final mix.
Conclusion
To master audio mixing, you’ve got to understand its core principles and techniques. Balancing volume, employing precise panning, and utilizing various mixing methods are essential. Recognize the differences in mixing styles and continually refine your skills.
Use industry-standard tools and trust your ears. Adhering to these guidelines guarantees your mixes will stand out, delivering clarity, depth, and professional polish.
Keep honing your craft and your final mixes will consistently impress.