Choosing the right studio monitors is essential for accurate audio monitoring and high-quality mixes. Start by opting for studio monitors over Hi-Fi speakers due to their flat frequency response and balanced output. Decide between two-way or three-way designs, noting that active monitors with built-in amplifiers simplify setup. Confirm proper positioning at ear level, forming an equilateral triangle, and use isolation pads to reduce distortion. For beginners, monitors in the $200-$400 range with 50-75 watts per channel and 5-inch drivers are ideal. Room size and acoustics heavily influence monitor selection, so consider these factors thoroughly. Explore additional nuances to refine your choice.
Key Takeaways
- Choose studio monitors with a flat frequency response for accurate sound reproduction.
- Opt for active monitors with built-in amplifiers for simplified setup and consistent sound quality.
- Match driver size to room dimensions; 5-inch drivers are ideal for small studios.
- Position monitors at ear level and form an equilateral triangle for optimal listening.
- Ensure monitors have compatible inputs like XLR and TRS for seamless integration with audio equipment.
Studio Monitors Vs Hi-Fi Speakers
When it comes to audio production, the distinction between studio monitors and Hi-Fi speakers is vital for achieving professional results. Studio monitors are engineered to provide a flat frequency response, which is essential for audio accuracy in professional settings. This characteristic guarantees that sound is reproduced without coloration, enabling audio engineers to identify and address inconsistencies within their mixes.
In contrast, Hi-Fi speakers are optimized to enhance the listening experience by emphasizing certain frequencies, often boosting bass and treble, which can result in misleading mixes due to frequency coloration. For instance, models like the Adam Audio A7X excel in extended low-end response, guaranteeing clarity across all frequencies.
The frequency response of studio monitors is meticulously calibrated to maintain equal volume across all frequencies. This balanced output is vital for creating audio mixes that translate well across various playback systems. Hi-Fi speakers, however, typically focus on delivering a vibrant sound, often at the expense of true-to-source audio accuracy. This emphasis on certain frequencies can mask subtleties and details in the audio tracks, leading to less reliable mixing outcomes.
For home studio environments, investing in studio monitors is imperative. Their capacity to reveal musical details and guarantee balanced audio representation makes them indispensable for producing high-quality mixes that meet professional standards.
Speaker Design and Configuration
Understanding speaker design and configuration is essential for selecting the right studio monitors tailored to your specific audio production needs.
Two-way speakers, featuring a woofer for low frequencies and a tweeter for high frequencies, employ a crossover frequency typically between 1.5 to 2.5kHz. This design can sometimes result in less precise sound reproduction due to overlap in the midrange. Conversely, three-way speakers add a dedicated midrange driver handling frequencies between 500Hz and 3kHz, enhancing clarity and minimizing mix-up, a feature highly favored by audiophiles.
For those with compact studio spaces, monitors like the PreSonus Eris E3.5 offer customizable EQ tuning options to tailor sound output more precisely.
Active studio monitors integrate built-in amplifiers, which not only simplify setup but often improve sound quality. In contrast, passive monitors necessitate external amplifiers, offering flexibility in amplifier selection.
Monitor designs also vary considerably:
- Ported cabinets: Incorporate a reflex port that enhances bass performance.
- Sealed cabinets: Prevent rear sound interference, resulting in tighter bass response.
- Bi-amp and tri-amp configurations: Utilize multiple amplifiers per speaker to improve frequency response, with tri-amp setups offering the highest precision by dedicating an amplifier to each driver in a three-way speaker.
Choosing between these configurations and woofer types can critically influence sound dispersion and overall audio fidelity, ensuring your studio monitors meet specific production requirements.
Placement and Setup Tips
After selecting the ideal speaker design and configuration for your studio monitors, attention must turn to proper placement and setup to maximize their performance.
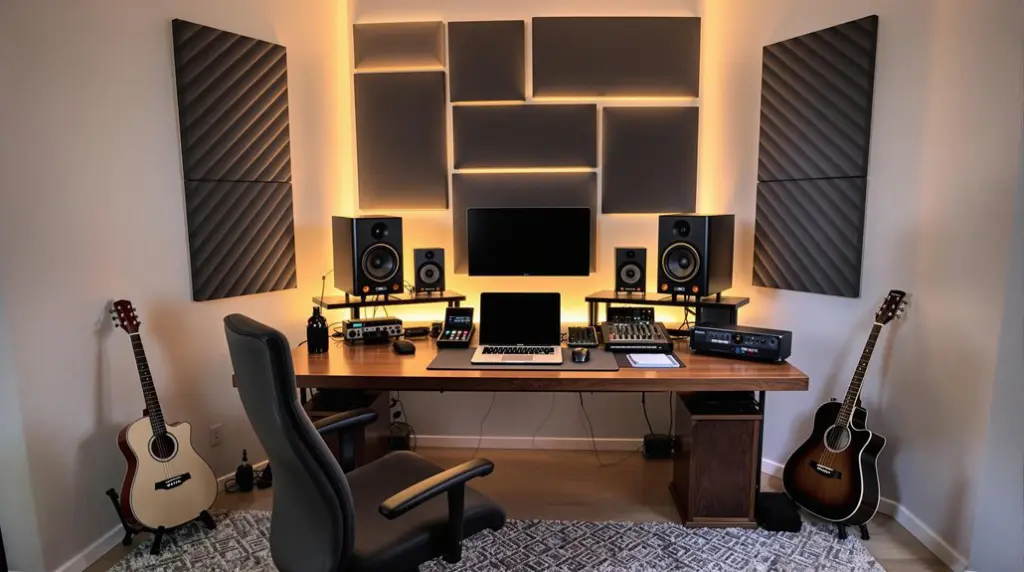
Studio monitors should be positioned at ear level and form an equilateral triangle with the listening position, typically spaced 5-6 feet apart. This configuration enhances stereo imaging and sound clarity, vital for precise audio mixing and mastering.
Monitor isolation is paramount; using quality stands or foam pads prevents frequency absorption and reduces distortion by decoupling the monitors from surfaces. This isolation guarantees that vibrations are not transferred to desks or other structures, which can color the sound.
Consider using adjustable height stands to fine-tune the monitor positioning based on your specific studio setup.
Placement also plays a vital role in achieving accurate bass response. Monitors should be situated at least one foot away from walls to minimize bass reflections, which can muddy low frequencies and degrade overall sound quality.
Adjusting the monitors to create a 30-degree listening angle, aligning tweeters with your ears, optimizes the high-frequency response and provides a more immersive sound experience.
Lastly, consider implementing acoustic treatment in your studio, such as foam panels or bass traps. These treatments improve sound quality by mitigating unwanted reflections and resonances, guaranteeing a more controlled and accurate listening environment.
Budget and Specifications
Selecting studio monitors requires careful consideration of your budget and the technical specifications that align with your specific needs.
Budget considerations are essential, as they will directly influence the quality and capabilities of the monitors you can afford. Entry-level models, priced between $200 and $400 per pair, offer a balance between accessibility and sound quality, making them ideal for beginners. Mid-range monitors, ranging from $400 to $1,000, provide enhanced sound accuracy and additional features, catering to more advanced home studio setups. Professional-grade monitors, exceeding $1,000, incorporate cutting-edge technology and components, delivering exceptional clarity and performance for high-end studio environments.
Just like high-quality DJ speakers that guarantee clear sound in clubs, professional-grade studio monitors are vital for accurate music production.
Specification details such as wattage and driver size are significant when selecting the right monitors. For beginners, a wattage of 50-75 watts per channel provides ample headroom, reducing the risk of distortion during mixing. Matching the monitor size to your room dimensions is equally important.
- 5-inch drivers – Ideal for small home studios, providing accurate sound reproduction without overwhelming the space.
- Larger drivers – Suitable for bigger rooms, providing effective bass response.
- Wattage – 50-75 watts per channel is recommended for beginners.
These factors will help you make an informed decision, aligning your budget and specifications to achieve the best achievable audio quality.
Final Considerations
When finalizing your choice of studio monitors, it is vital to reflect on a few additional factors to guarantee peak performance and integration into your studio environment.
First and foremost, prioritize models that deliver a flat frequency response. This guarantees accurate sound reproduction, a non-negotiable aspect for precise mixing and mastering.
It’s also wise to take into account room acoustics and whether the monitors you choose have integrated DSP-driven EQ to adapt to various room conditions, as this can greatly impact sound quality.
Budget constraints often dictate the selection process. Entry-level monitors typically range from $200 to $400, while mid-range options span $400 to $1,000.
Professional models often exceed $1,000. However, remember that higher price does not always assure superior quality. Monitor brands should be thoroughly researched and compared across these price brackets.
The physical dimensions of your studio space also play a significant role. For smaller rooms, 5-inch monitors are recommended to achieve an ideal low-frequency response without overwhelming the space.
Conversely, larger rooms may benefit from monitors with bigger drivers.
Connectivity options are another vital consideration. Confirm your chosen monitors feature compatible inputs such as XLR or TRS.
This compatibility with your audio interface or mixer is essential to minimize noise interference and enhance performance.
Frequently Asked Questions
What Is the 38 Rule for Studio Monitors?
The 38 Rule for studio monitor placement advises positioning monitors at 38% of the room’s length from the front wall, optimizing room acoustics by minimizing early reflections and enhancing stereo imaging for accurate sound reproduction and effective mixing decisions.
What Is the Difference Between Active and Passive Monitors?
Active monitors offer built-in amplification, simplifying setup and providing ideal component matching. In contrast, passive monitors require external amplifiers, complicating setup and risking mismatched components. Active benefits include integrated EQ controls; passive drawbacks include potential compatibility issues.
Do Studio Monitors Need to Be Matched?
Studio monitors do not need to be matched, but using similar models guarantees consistent sound characteristics. Factors such as room acoustics and monitor placement greatly impact performance, and maintaining uniform specifications like frequency response and sensitivity is advisable.
What Are the Different Types of Studio Monitors?
Different types of studio monitors include nearfield monitors for close-range listening, midfield monitors for larger spaces, active monitors with built-in amplifiers, passive monitors requiring external amplification, and subwoofers to enhance low-frequency response. Consider monitor placement and speaker sizes.
Conclusion
In summary, selecting appropriate studio monitors necessitates a thorough understanding of the distinctions between studio monitors and hi-fi speakers, speaker design and configuration, and ideal placement and setup techniques. Budget constraints and specific requirements must also be considered to guarantee the monitors meet professional standards. By addressing these critical factors, one can achieve an accurate and reliable sound reproduction, essential for high-quality audio production and critical listening environments.


