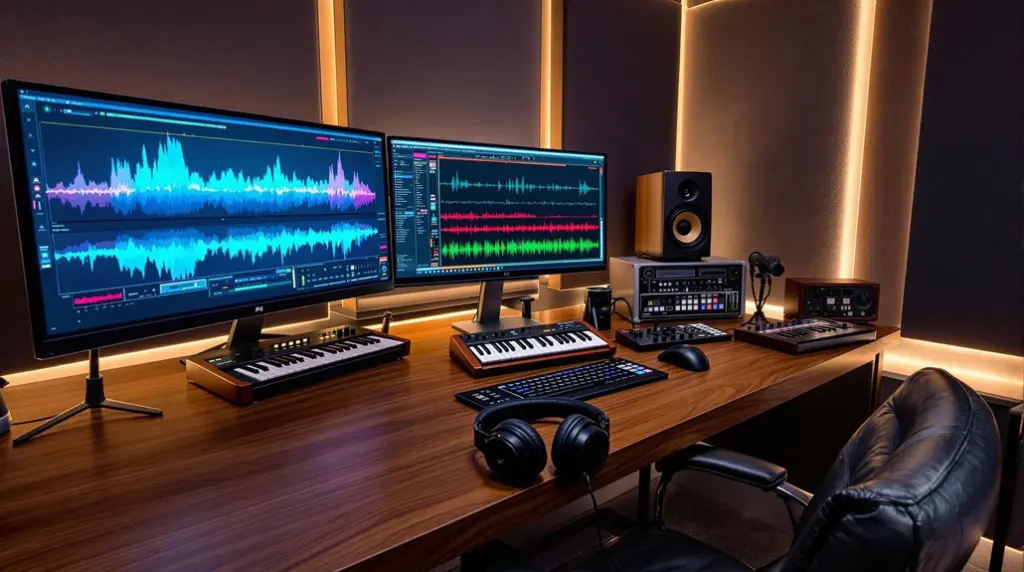
To master reverb with EQ, start by understanding the fundamental frequencies involved. Use low-cut filters on reverb to eliminate low-end rumble, ensuring clarity in your mix. Target mid frequencies for depth, while cutting problematic resonances prevents muddiness. Use precision in your EQ adjustments; subtle changes can drastically improve clarity. Manage low-end frequencies by applying high-pass filters on non-bass instruments. Always evaluate settings within the entire mix context to maintain balance. Remember, each element needs its own frequency space. Following this structured approach brings you closer to achieving a professional sound. There’s much more to explore in effective mixing techniques.
Key Takeaways
- Apply low-cut filters on reverb to remove low-end rumble and maintain clarity in the mix.
- Monitor reverb decay to ensure elements retain their spatial placement without muddiness.
- Use EQ on the reverb return to tailor its character, enhancing the overall mix depth.
- Cut frequencies where reverb builds up to prevent a cluttered soundstage and improve clarity.
- Adjust reverb depth carefully, using longer times for background sounds and shorter for lead elements.
Understanding EQ Fundamentals
Equalization (EQ) serves as an important tool in audio mixing, allowing you to sculpt the frequency spectrum of your sounds. When making EQ adjustments, it’s vital to listen to the entire mix rather than isolating individual tracks. This approach guarantees your changes enhance the overall sound.
Generally, it’s more effective to remove unwanted frequencies instead of boosting desired ones, as this preserves the mix’s integrity and minimizes artifacts. Small changes of just a few dB can lead to significant improvements in clarity and balance. Understanding frequency ranges is essential for effective EQ use, as it allows for creative sound shaping.
Managing Low-End Frequencies
When you manage low-end frequencies effectively, you create a solid foundation for your mix. Make sure to use a low-cut filter on non-bass instruments to eliminate unnecessary low-end clutter, allowing your kick and bass to shine. Regularly monitor these frequencies, as they can muddy your mix. I’m going to show you how to maintain clarity by ensuring each element occupies its own frequency range, especially in the low-end. Implementing high-pass filters is essential for achieving this balance.
Here’s a quick reference table:
| Instrument Type | Action | Goal |
|---|---|---|
| Non-Bass Instruments | Apply Low-Cut Filter | Remove unwanted rumble |
| Hi-Hats | Monitor Frequencies | Clear low-end clutter |
| Kick and Bass | Prioritize Clarity | Enhance overall quality |
Don’t forget to subscribe for more tips on mastering your mix!
Interplay Between Reverb and EQ
How do you strike the perfect balance between reverb and EQ in your mix? It’s essential to understand the interplay between these two elements.
Start by applying a low-cut filter on your reverb to eliminate low-end rumble, preserving clarity and maintaining dynamic range. Focus reverb on mid frequencies to enhance depth without muddying the sound, which contributes to better stereo imaging.
Be mindful of how reverb decay affects the perceived placement of elements; too much can push them back in the mix, altering prominence. Cutting frequencies where reverb builds up prevents a cluttered soundstage, ensuring each element retains its character.
Using EQ on the reverb return tailors the reverb’s character, making it more suitable for your specific mix. Additionally, remember that excessive reverb application can lead to a loss of articulation and clarity, so moderation is key.
Cutting vs. Boosting Techniques
When you apply EQ in mastering, understanding precision cutting techniques and effective boosting strategies is essential. Cutting narrow frequencies can eliminate unwanted resonances, while boosting wider ranges enhances overall sound presence. Additionally, utilizing EQ within reverb plugins can shape tonal characteristics and prevent muddiness in the mix.
Precision Cutting Techniques
Although both cutting and boosting techniques are essential in EQ, precision cutting stands out as a critical method for addressing problematic frequencies in a mix.
By employing narrow cutting techniques, you can effectively target and eliminate frequencies that cause issues, particularly those with frequency overlap. This approach guarantees clarity among elements, preventing any single sound from dominating the mix.
Focus on cuts in low frequencies of non-bass elements to create space for the kick and bass, enhancing overall tonal balance.
Effective Boosting Strategies
While precision cutting is essential for managing problematic frequencies, effective boosting strategies also play an important role in shaping your mix.
When employing boosting techniques, opt for wider Q settings to achieve a natural sound, enhancing frequencies like vocal presence around 3-5 kHz. However, be cautious—excessive boosts can create harshness and disrupt the mix balance.
It’s often better to prioritize cutting unwanted frequencies, as this creates space for frequency enhancement, resulting in a cleaner mix. Small adjustments of 1-3 dB are usually sufficient; larger boosts can introduce unwanted artifacts.
Always evaluate your EQ adjustments within the full mix context to guarantee cuts and boosts work harmoniously together, enhancing overall clarity and coherence.
Applying Low-Cut Filters
Applying a low-cut filter to your reverb is essential for eliminating unwanted low-end rumble, keeping your mix clear and focused.
Start around 80 Hz, but be prepared to adjust based on the specific elements in your mix. Using the low-cut filter while the entire mix plays will help you gauge its impact on clarity and spatial balance effectively. Additionally, implementing acoustic treatments can further enhance the overall quality of your recordings by minimizing unwanted reflections and reverb.
Importance of Low-Cut
One key technique in audio mixing is the use of low-cut filters on reverb, which can greatly enhance the clarity of your mix. By applying low-cut filters, you reap significant low cut benefits, such as eliminating unwanted low-end rumble and preventing muddiness. Typically, setting the filter between 80 Hz to 120 Hz allows essential frequencies to shine while creating space for vocals and guitars. This contributes to tighter low-end and improved overall sound placement.
| Low-Cut Benefits | Impact on Mix |
|---|---|
| Eliminates low-end rumble | Enhances clarity |
| Reduces frequency overlap | Creates space |
| Maintains essential tones | Highlights elements |
| Improves overall quality | Tightens low-end |
Frequency Range Considerations
When you consider frequency range in relation to low-cut filters, it’s crucial to target the right settings to enhance the overall mix. Engaging in frequency range exploration lets you manage the reverb impact on clarity and definition.
Here are three key considerations for low-end analysis:
- Set the low-cut filter around 80-120 Hz for non-bass instruments, eliminating muddiness.
- For vocals, a low-cut filter at 100 Hz guarantees the reverb supports vocal clarity without interference.
- Apply low-cut filters on percussion to maintain a tight low end, allowing kick and bass elements to shine through.
Practical Application Tips
To effectively manage reverb in your mix, it’s essential to incorporate low-cut filters strategically. Start by applying a low-cut filter around 100 Hz, adjusting based on specific instruments and their reverb types. This helps eliminate unwanted low-end rumble, preventing frequency masking that can muddy your mix.
Use a gentle slope of 12 dB/octave, maintaining a natural sound while reducing muddiness. Pay attention to different mixing styles; some instruments may require a more aggressive low-cut to retain clarity.
Always listen in the context of the full mix to guarantee the reverb enhances your sound rather than detracting from it. This approach guarantees a polished, professional mix that effectively utilizes reverb without compromising clarity.
Targeting Mid Frequencies
Targeting mid frequencies in your reverb application is crucial for maintaining clarity in a mix, particularly since these frequencies house the essential elements like vocals and guitars.
Focus on the mid frequency range, typically from 300 Hz to 3 kHz, to enhance spatial perception without overpowering key elements. Here are three strategies to reflect upon:
- EQ Low-Cut: Use EQ to low-cut reverb signals, removing unwanted low-end rumble that can muddy the mix.
- Monitor Interaction: Pay attention to how different reverb types interact with mid frequency effects to avoid excessive blurring.
- Adjust Depth: Careful adjustments can create depth, enriching your mix while ensuring clarity remains intact. Additionally, understanding frequency management is vital for achieving a balanced mix in bass-heavy music.
Maintaining Mix Clarity
While balancing various elements in a mix, maintaining clarity can often feel like a tightrope walk. To achieve this, utilize clarity techniques such as applying low-cut EQ on reverb to remove low-end rumble. Focus on mid frequencies with your reverb types to enhance depth without overshadowing other elements. Regularly monitor mix dynamics, ensuring reverb doesn’t mask critical frequencies. Here’s a quick reference table to guide you:
| Technique | Purpose | Result |
|---|---|---|
| Low-Cut EQ | Eliminate low-end rumble | Clearer overall sound |
| Mid-Frequency Focus | Enhance depth | Balanced soundscape |
| Precise EQ Cuts | Address problematic reverb areas | Defined reverb tail |
Incorporating subtractive EQ can further enhance the clarity of your mix by ensuring that unwanted frequencies are effectively cut.
Precision in EQ Adjustments
Achieving precision in EQ adjustments requires a keen ear and an analytical approach, as small, targeted changes can markedly enhance your mix.
Focus on these EQ precision techniques to refine your sound:
- Narrow Cuts for Problematic Frequencies: Make targeted frequency adjustments to eliminate specific issues without disrupting the overall balance.
- Broader Boosts for Tonal Qualities: Use broader boosts in desired areas to enhance clarity and presence, ensuring they complement the mix.
- Continuous Monitoring: Regularly assess how your adjustments interact with the entire mix to maintain clarity enhancement methods and avoid muddiness. Additionally, consider employing subtractive EQ methods to further refine unwanted frequencies and improve overall sound balance.
Creating Space for Elements
To create space for elements in your mix, start by applying low-cut filters on reverb, which eliminates unwanted low-end rumble. Position reverb primarily in the mid frequencies to maintain clarity while enhancing depth, ensuring each instrument occupies its own frequency range. Additionally, understanding reverb components is vital for effective mixing, as it helps in tailoring the auditory effects for each instrument.
Low-Cut Techniques
Creating space in your mix is essential for clarity and balance, especially when dealing with multiple elements.
Implementing low-cut techniques can greatly enhance your frequency management. Here are three effective low-cut applications to reflect upon:
- Instruments: Use a low-cut filter around 80-120 Hz on non-bass instruments like guitars and vocals to reduce muddiness, allowing kick and bass to shine.
- Reverb Sends: Apply a low-cut filter on reverb sends to eliminate low-end rumble, maintaining clarity and preventing density in your mix.
- Cymbals: Filter high-hats and cymbals at approximately 200 Hz to enhance their clarity without losing high-end brightness.
Reverb Placement Strategies
Low-cut techniques effectively manage frequencies, but proper reverb placement further enhances the spatial quality of your mix.
By strategically applying reverb to mid frequencies, you maintain depth without muddiness. Experiment with various reverb types—like plate, hall, or room—to discover which best suits individual elements. Each reverb type offers distinct spatial characteristics that can improve your mix.
For element placement, use longer reverb times for background sounds, creating a sense of distance, while shorter times work best for lead vocals or instruments, ensuring clarity.
Always monitor the interaction between reverb and EQ to prevent masking important frequencies, allowing every element to shine in its designated space. This intentional placement creates a cohesive and immersive listening experience.
Frequency Clarity Importance
While mixing, maintaining frequency clarity is essential for ensuring that each element stands out distinctly in the overall soundscape. By addressing frequency masking effects, you can create a cleaner mix and enhance clarity.
Here are three key strategies to achieve this:
- Cut low frequencies from reverb to eliminate unwanted rumble, allowing vocals and instruments to shine.
- Apply reverb primarily to mid frequencies, retaining presence without compromising low-end clarity.
- Use narrow EQ cuts to target problematic frequencies during reverb density control, ensuring each sound remains distinct.
Regularly assess the impact of your reverb settings with spatial perception techniques, guaranteeing that sound placement remains clear and the overall quality of your track improves.
Continuous Learning in Mixing
As you explore mixing, recognizing the importance of continuous learning can greatly enhance your skills. Engaging in creative experimentation with EQ settings and reverb can lead to breakthroughs in your mixing workflow optimization. Regular practice and reflection on adjustments develop a nuanced ear, while analyzing professionally mixed tracks reveals effective techniques. Moreover, understanding dynamic control techniques can significantly improve the quality of your mixes.
| Technique | Benefit |
|---|---|
| Online Tutorials | Exposure to diverse approaches |
| Audio Plugin Exploration | Discover new tools and methods |
| Track Analysis | Insight into professional styles |
| Community Engagement | Learning from peers’ experiences |
| Industry Trends | Staying updated with best practices |
Frequently Asked Questions
Should EQ Go Before or After Reverb?
In mixing strategies, you’ll often find that reverb placement impacts clarity. Using EQ techniques before reverb can eliminate unwanted frequencies, while post-reverb EQ tailors the effect, enhancing your overall sound design and achieving desired results.
What Is the Best Frequency for Mastering EQ?
To achieve the best EQ settings, focus on frequency ranges: cut lows below 80 Hz to reduce muddiness, adjust mids for vocal clarity, and slightly boost highs above 10 kHz for brightness using effective mastering techniques.
How Should I EQ My Reverb?
To EQ your reverb, focus on low-cut filtering and mid-frequency adjustments. Different reverb types require attention to specific frequency ranges, creating lush soundscapes while avoiding muddiness and maintaining clarity in your mix.
Should You Use Reverb in Mastering?
You can use reverb in mastering, but choose reverb types carefully. Employ mastering techniques that enhance sound clarity without overwhelming the mix. Subtle application maintains depth while preserving the integrity of individual elements.
Conclusion
Mastering reverb with EQ isn’t just about adjusting frequencies; it’s about creating a cohesive soundscape. By understanding EQ fundamentals and effectively managing low-end frequencies, you enhance clarity and space within your mix. Employ cutting and boosting techniques mindfully, especially with low-cut filters, to avoid muddiness. Precision in your adjustments will lead to a polished result. Remember, continuous learning is essential in mixing—stay curious and refine your skills for peak sound perfection.